How to Calculate Generator Size for Your House: 3 Methods That Guarantee Results

Why Getting Generator Size Right Is the Most Important Decision You'll Make Before the Next Outage

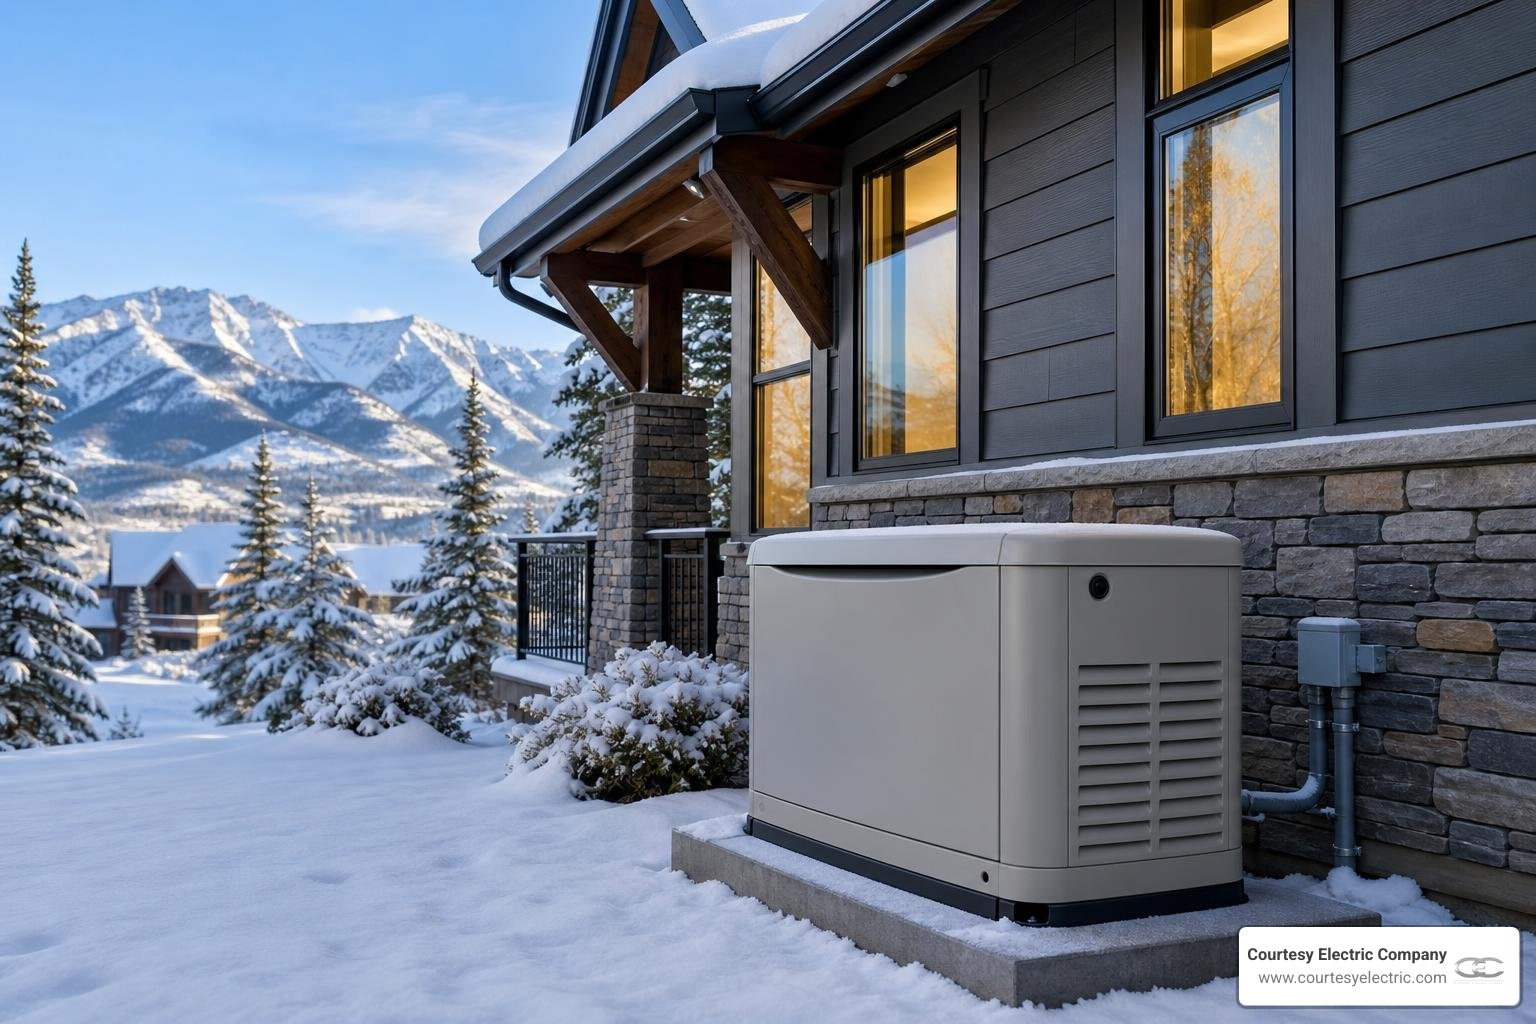
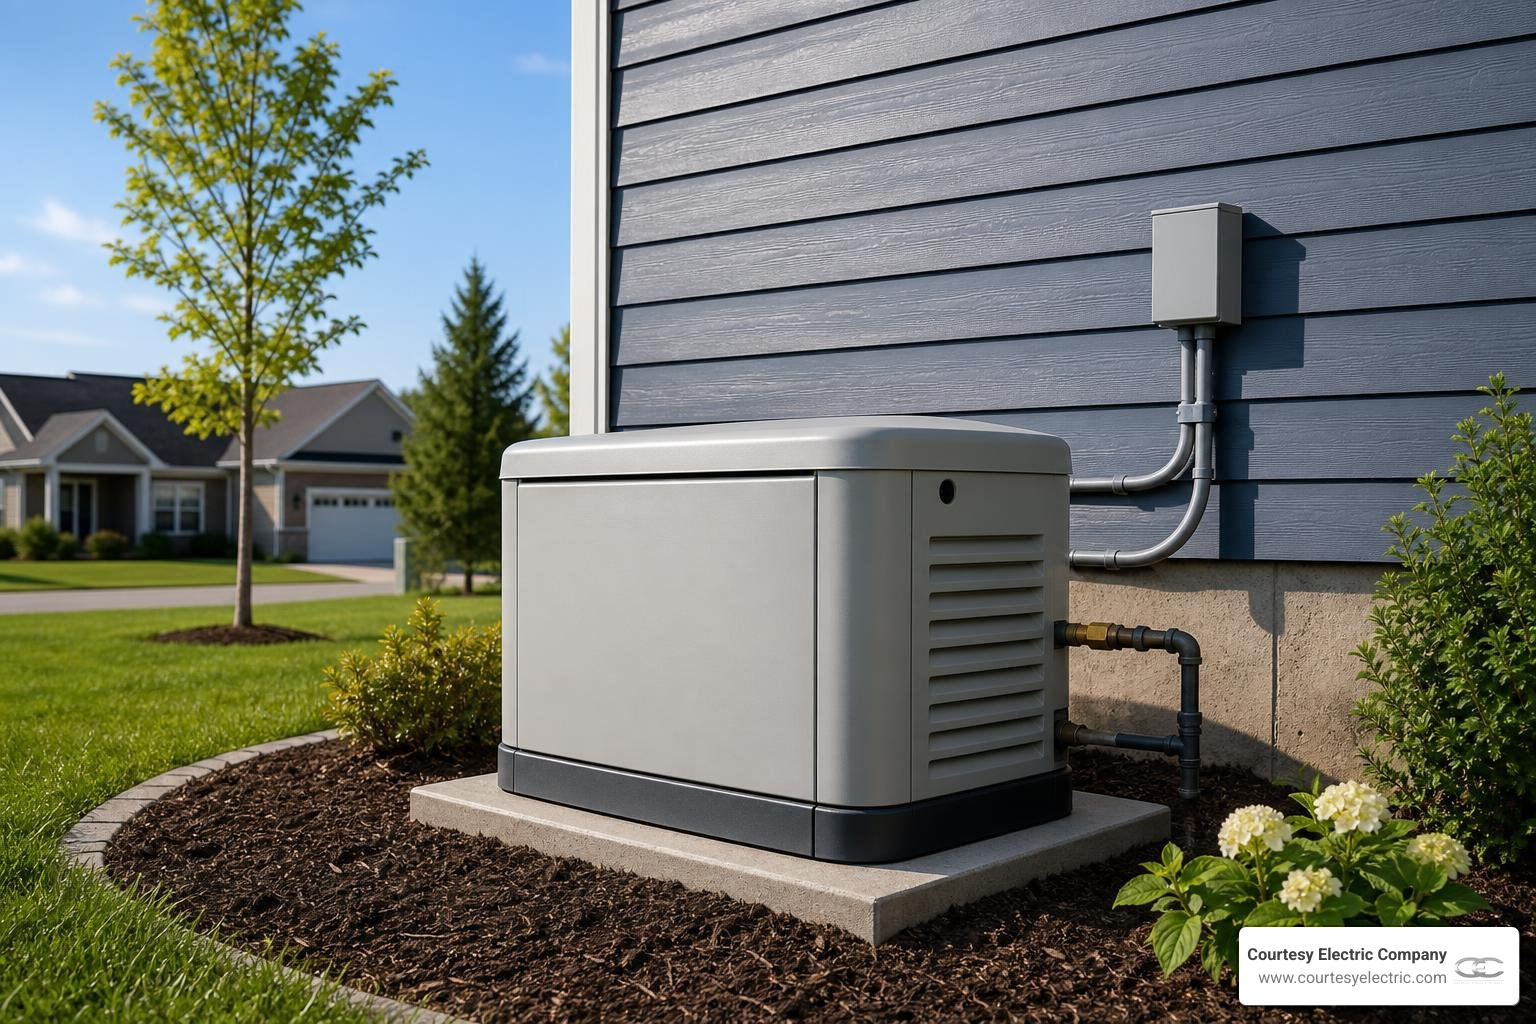
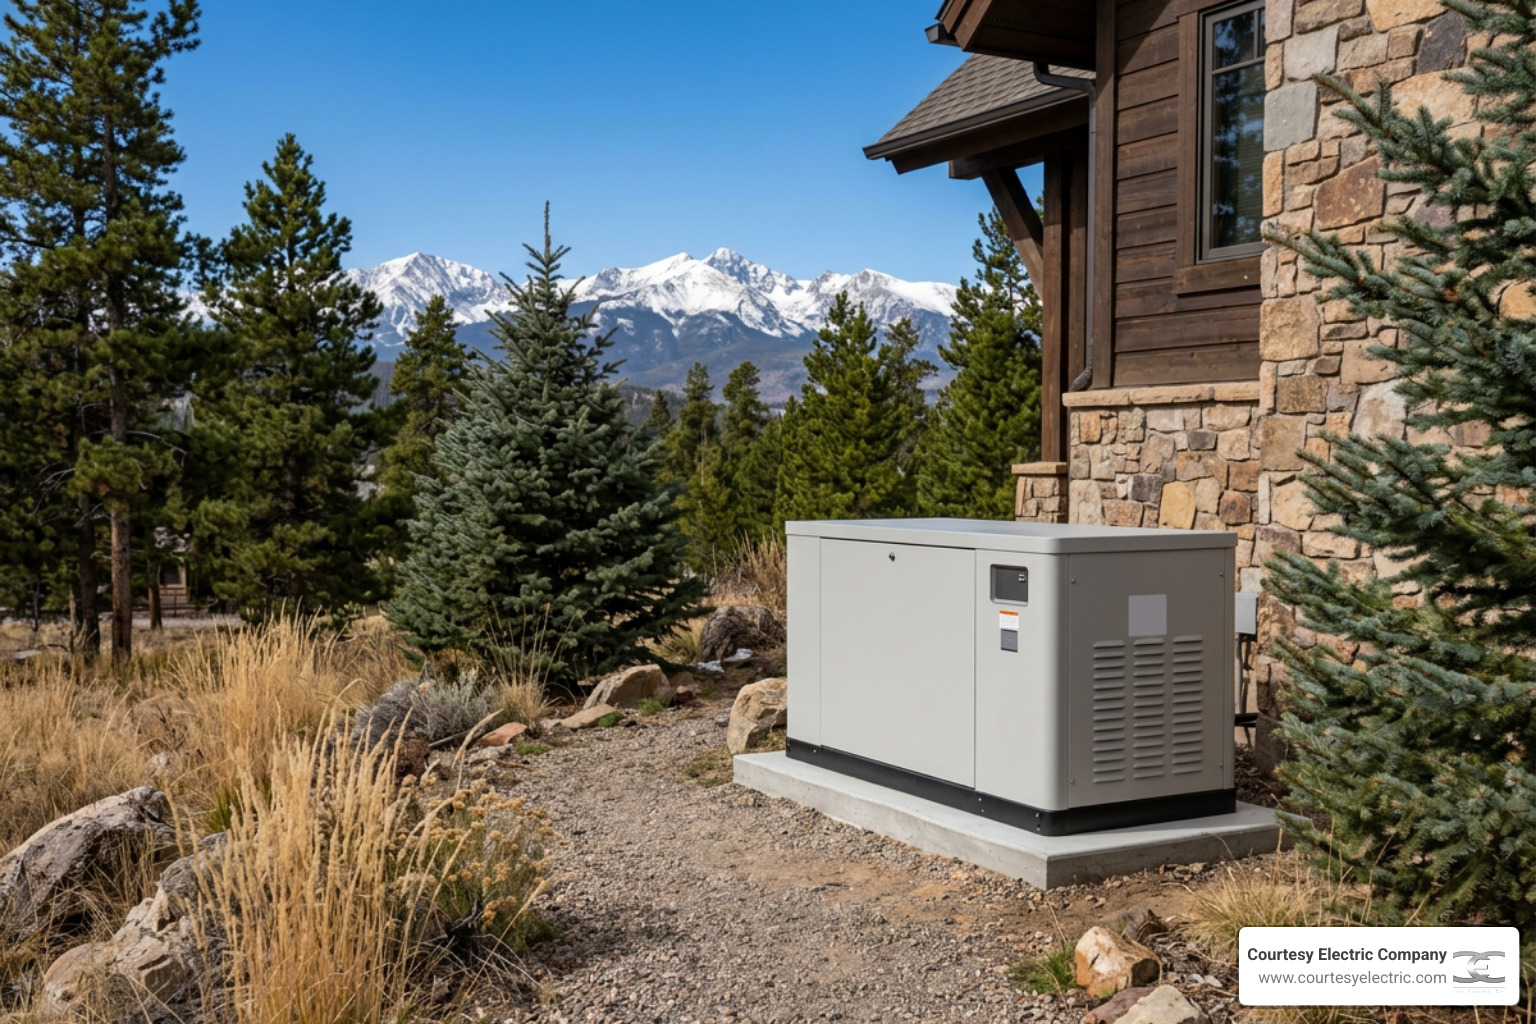
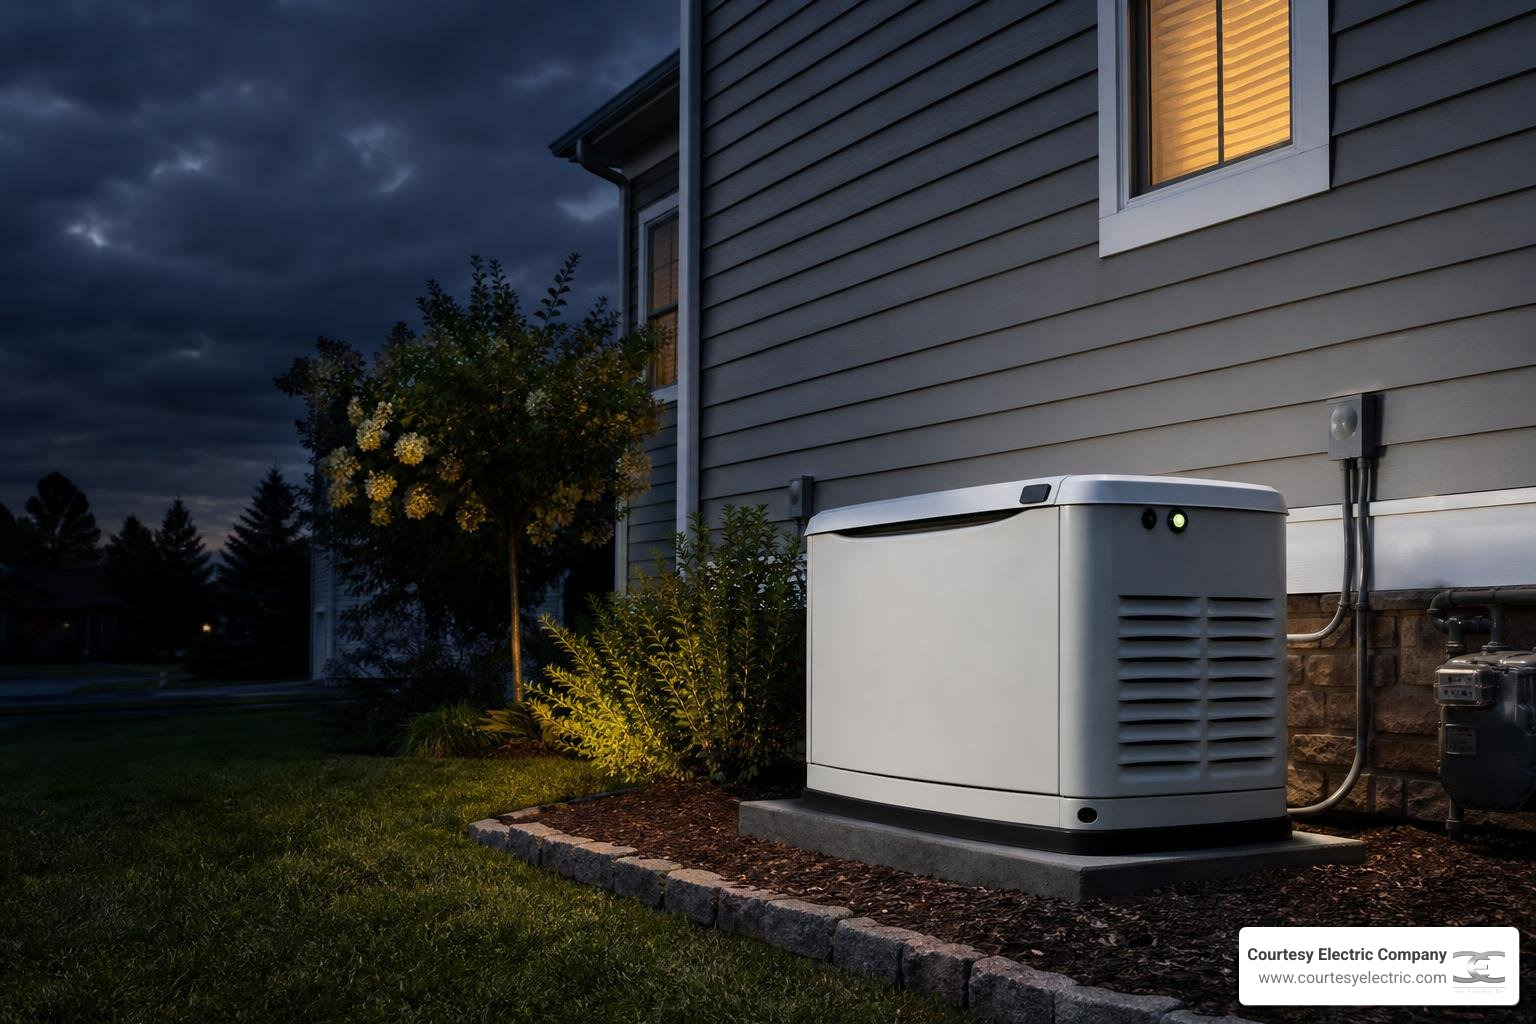
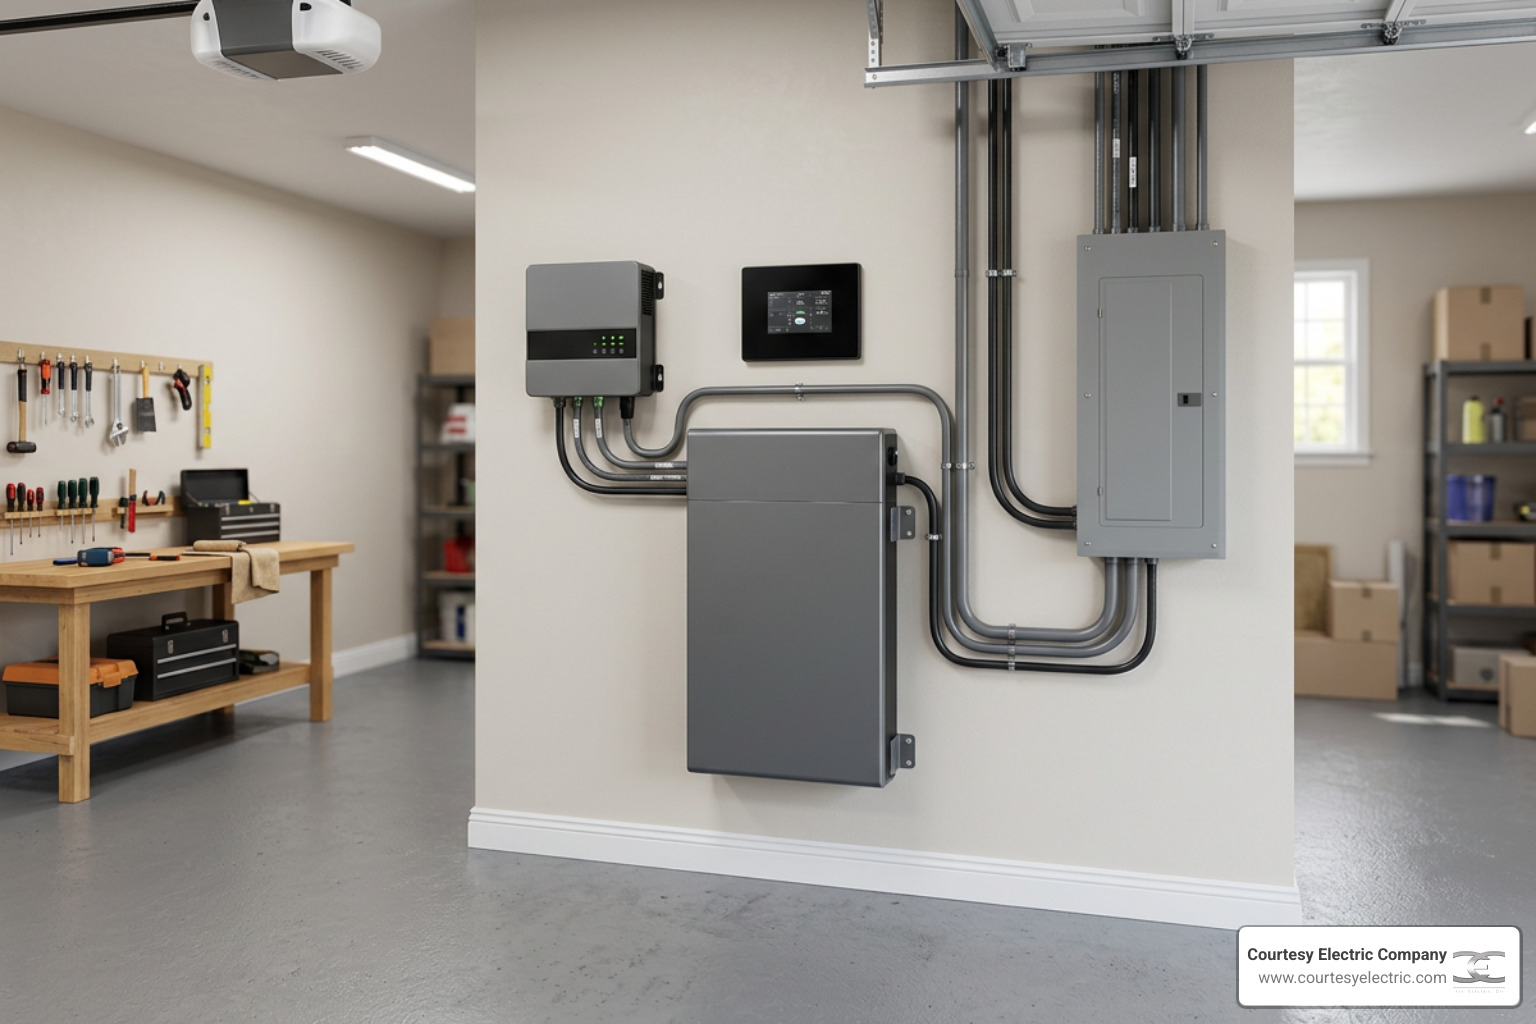
home standby generator installed outside a house in Colorado

Knowing how to calculate generator size for your house is the difference between a generator that works when you need it most and one that shuts down the moment your AC kicks on.

Here's the quick answer:

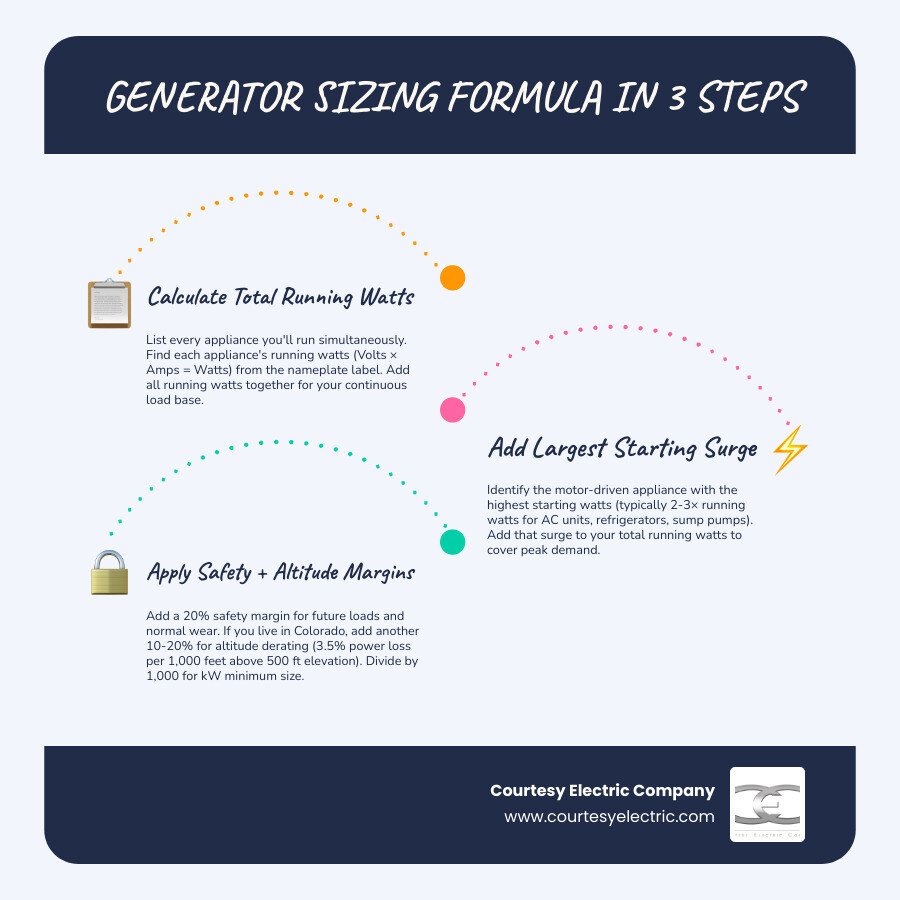
  1. List every appliance you need to run at the same time during an outage.
  2. Find the running watts for each appliance (check the nameplate label, or multiply Volts × Amps = Watts).
  3. Add all running watts together to get your total continuous load.
  4. Find the highest starting watts among your appliances (typically 2-3× the running watts for motor-driven appliances like AC units, refrigerators, and sump pumps) and add that surge to your total running watts.
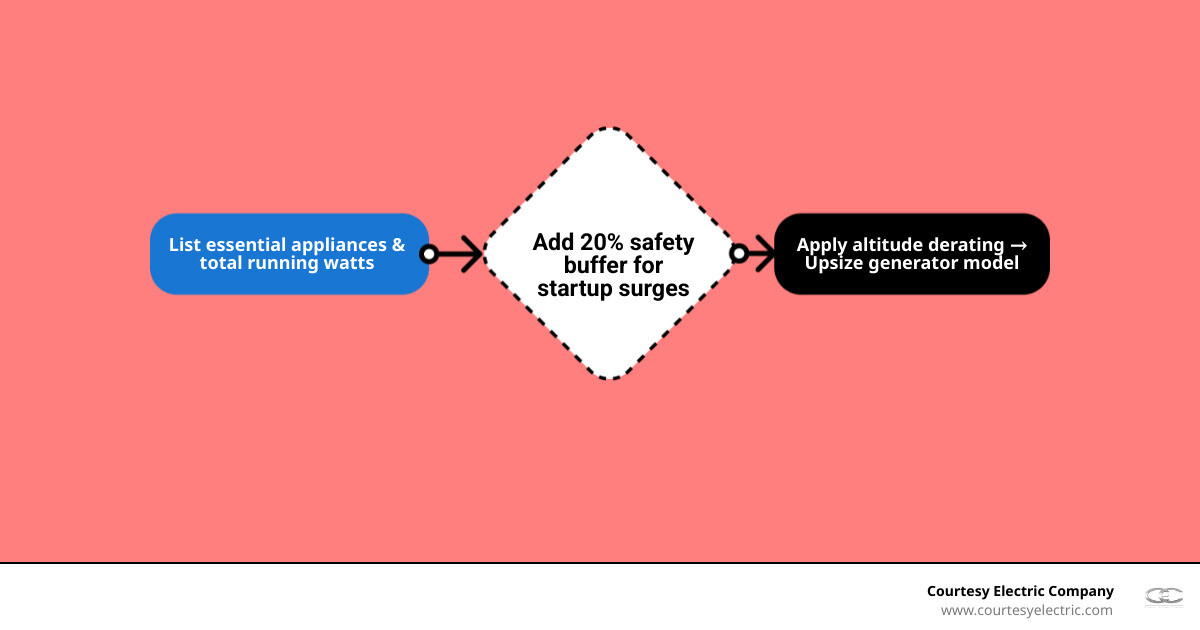
  5. Add a 20% safety margin to the result to account for future loads and normal wear.
  6. Divide the final number by 1,000 to convert watts to kilowatts (kW) — that's your minimum generator size.
  7. If you're in Colorado, add an extra 10-20% on top for altitude derating, since generators lose roughly 3.5% of their rated power for every 1,000 feet above 500 feet elevation.

That formula works for most homes. But the size you need also depends on whether you want to power just the essentials or run your whole house — including central air conditioning — without thinking twice about it.

Here's why this matters so much: a generator that's too small will overload and shut down at exactly the wrong moment. One that's too large wastes fuel and money, and can actually cause engine problems over time from running at too low a load. Getting it right is about more than math — it's about understanding what you need to keep running and making sure the equipment can handle it.

Power outages on the Colorado Front Range aren't rare. Between summer thunderstorms, winter blizzards, and an aging grid, the question isn't really if the power goes out — it's whether you're ready when it does.

I'm David Meyer, Vice President of Courtesy Electric, a Colorado electrical contractor with roots going back to 1976. I've spent my career working on generator installations, panel upgrades, and backup power systems across Denver and the Front Range, and helping homeowners understand how to calculate generator size for your house is one of the most common — and most important — conversations we have. In the sections below, I'll walk you through three methods to get this right, from a hands-on manual calculation to professional load analysis using NEC standards.

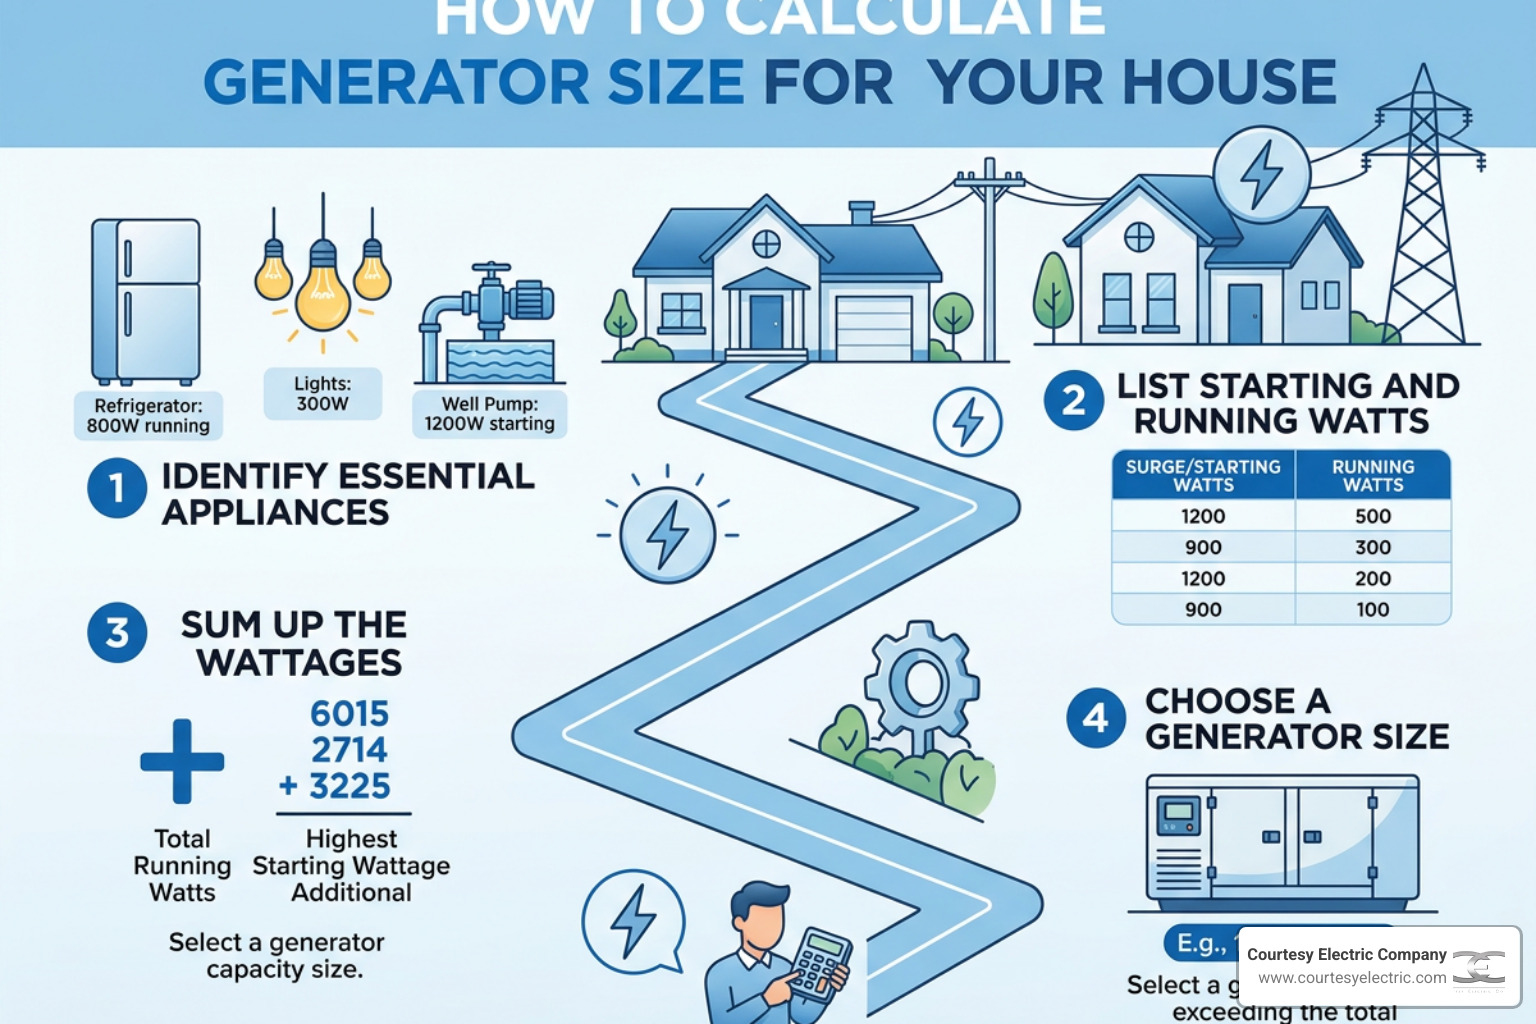
Infographic showing 7-step process to calculate home generator size including running watts, starting watts, and safety

How to Calculate Generator Size for Your House: The Step-by-Step Manual Method

The most reliable way to understand your home’s electrical appetite is to build a manual inventory. This hands-on approach helps you see exactly where your power goes, making it easier to prioritize your electrical loads during a grid failure.

When you calculate your load manually, you cannot simply add up every single lightbulb and outlet in your home. If you did, you would end up with an enormous, industrial-sized generator that would run highly inefficiently. Instead, manual calculation is about identifying your simultaneous usage — what actually needs to run at the exact same moment.

For instance, your microwave, refrigerator, and sump pump might all be on the same backup system, but they will rarely pull peak power at the exact same second. To size the generator properly, we calculate the total running watts of all your target appliances and add only the largest single starting surge to that total.

In places like Parker, Highlands Ranch, and Black Forest, our unique climate and geography play a massive role in how we apply this math. High-altitude environments feature thinner air, which directly impacts internal combustion engines. This means your generator will experience altitude derating, losing a portion of its rated capacity simply by sitting in your yard. Understanding how these factors interact ensures your system handles the load when the weather turns. For more on this, you can read about How Colorado Weather Affects Generator Lifespan.

appliance electrical specification label showing volts and amps

Why You Need to Know How to Calculate Generator Size for Your House

Choosing a backup power system based on a guess is a recipe for system failure. If you undersize your generator, the system will experience overloading risks. The moment a heavy motor like your refrigerator compressor or well pump tries to cycle on while you are running lights and a microwave, the generator’s circuit breaker will trip, plunging your home back into darkness. Over time, these sudden shutdowns damage the generator's alternator and strain your appliances' motors.

Conversely, buying an oversized generator is a major mistake. Aside from the unnecessary upfront equipment costs, an oversized generator runs highly inefficiently and consumes far too much fuel. Even worse, if a diesel or gas generator runs continuously at less than 30% to 50% of its rated capacity, it can suffer from a condition known as wet stacking. This occurs when unburned fuel accumulates in the exhaust system, degrading engine performance, creating heavy carbon deposits, and drastically shortening system longevity.

Sizing your system correctly ensures your generator runs within its optimal efficiency sweet spot (usually between 50% and 75% load). To protect your investment over the long haul, take a look at our guide on How to Extend the Life of Your Standby Generator.

Running Watts vs. Starting Watts

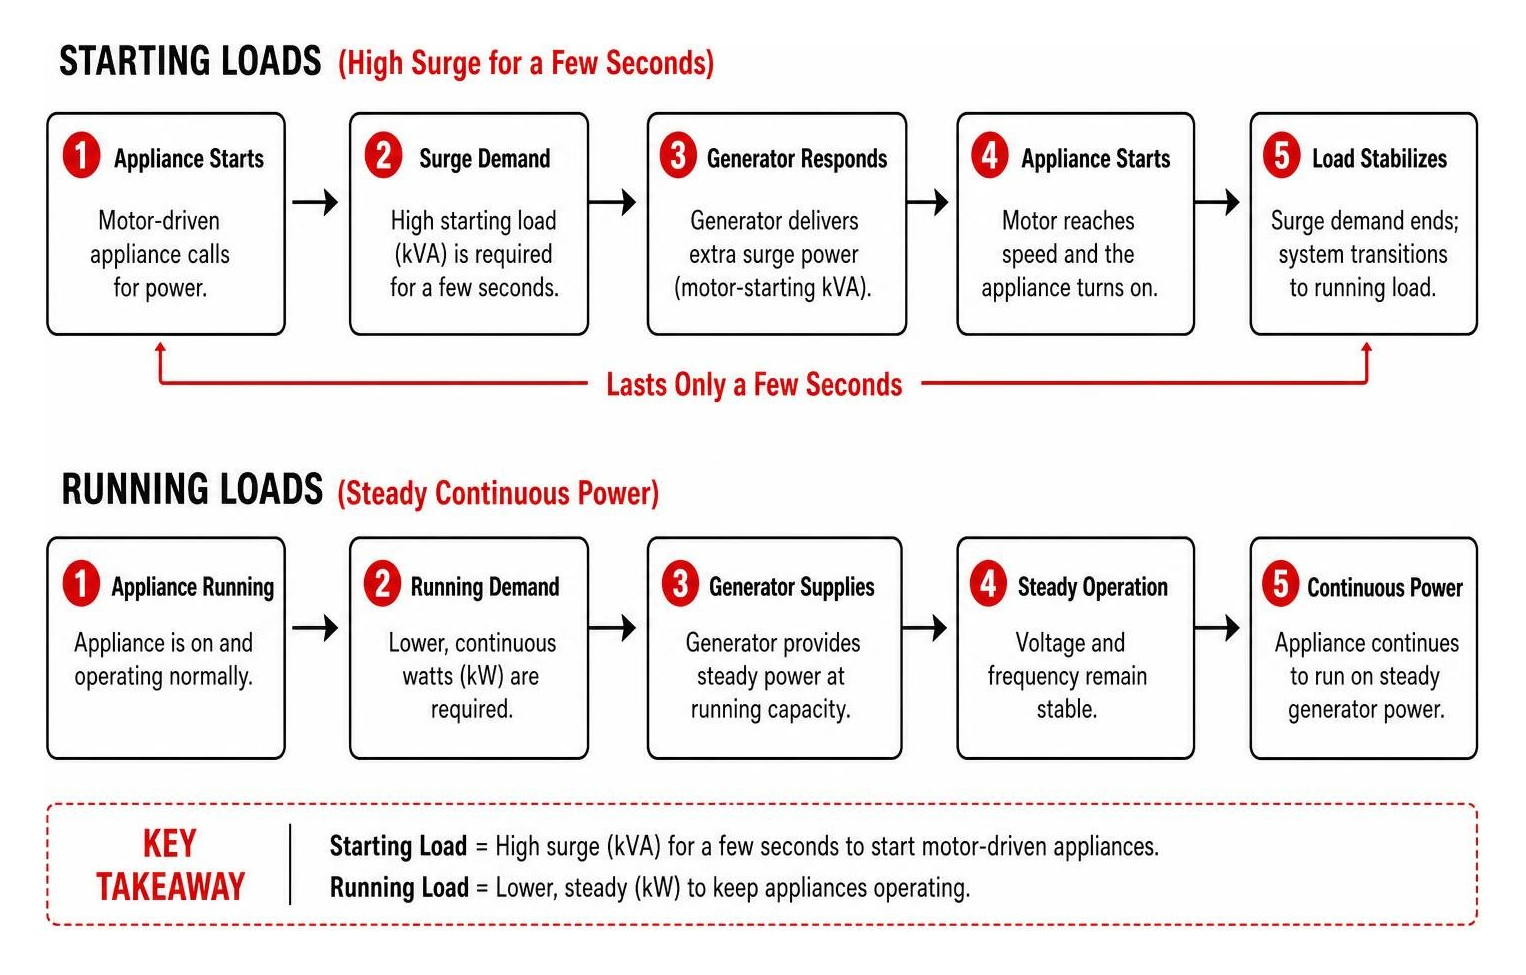
To master the math of generator sizing, you must understand the difference between two critical numbers: running watts and starting watts.

  • Running Watts (Continuous Load): This is the steady, ongoing electrical power an appliance requires to remain operational after its initial startup. For example, a standard refrigerator might only need 150 to 200 watts to keep its interior cold once the motor is running.
  • Starting Watts (Peak Demand / Surge Watts): This is the brief, high-energy burst of electricity required for a fraction of a second to start an electric motor or compressor from a dead stop. Because motors must overcome physical inertia, their starting watts can be 2 to 3 times higher than their running watts.

If your generator cannot supply this instantaneous peak demand, the motor will stall, and the generator’s safety controls will shut the unit down. This dynamic is central to understanding How Does a Standby Generator Work to keep your home safe.

Step-by-Step Wattage Calculation and the 20% Safety Margin

If an appliance label does not explicitly list its wattage, you can easily find it using a simple conversion formula. Look at the silver nameplate data tag on the back or bottom of the device to find the listed volts and amps.

Multiply those two numbers together to find the wattage:

$$\text{Volts} \times \text{Amps} = \text{Watts}$$

For example, if your microwave lists a demand of 10 amps at 120 volts, it requires 1,200 watts of power ($10 \times 120 = 1,200$).

For larger motorized equipment, such as a central AC compressor, look for the LRA (Locked Rotor Amps) or Starting Amps on the data plate. This indicates the absolute maximum current the motor will draw when starting up.

Once you have gathered these numbers, use this step-by-step process:

  1. List the running watts of every device you want to power simultaneously.
  2. Sum those running watts to establish your continuous load baseline.
  3. Identify the single appliance with the highest starting surge (e.g., your air conditioner or well pump). Subtract its running watts from its starting watts to find its "surge overhead," then add that surge overhead to your continuous baseline.
  4. Add a 20% safety margin (multiply the sum by 1.20). This safety factor provides essential headroom so your generator does not run at maximum capacity, leaving room for future household electrical additions.
  5. Apply altitude derating. Because air is less dense in Denver, Parker, and Highlands Ranch, generators lose approximately 3.5% of their rated power for every 1,000 feet above an elevation of 500 feet. If you live at 5,500 feet, your generator will experience roughly a 17.5% reduction in performance. We recommend adding an extra 10% to 20% to your final calculation to compensate for this high-altitude performance loss.

Here is a quick reference list of common household appliance power requirements:

  • Refrigerator / Freezer: 150W running / 1,200W starting
  • Sump Pump (1/2 HP): 1,000W running / 2,150W starting
  • Well Pump (3/4 HP): 1,500W running / 3,000W starting
  • Furnace Blower (Gas/Propane): 600W running / 1,200W starting
  • Electric Water Heater (Standard Tank): 4,500W running / 4,500W starting
  • Microwave Oven: 1,200W running / 1,200W starting
  • Sump Pump (1/2 HP): 900W running / 1,800W starting
  • Garage Door Opener: 500W running / 1,000W starting

Calculating these loads accurately is especially vital when preparing for winter weather. Explore how a properly sized system keeps you safe in our article on Generator Benefits During Colorado Winter Power Outages.

Method 2: Sizing by Square Footage and Coverage Goals

If you want a quick, reliable estimate before diving into individual appliance labels, you can use your home's square footage as a helpful starting proxy. This method groups your backup power goals into clear tiers: powering only the essentials versus running a true whole-house backup system.

diagram showing the difference between essentials-only backup and whole-house backup coverage

When sizing by square footage, we must carefully evaluate your HVAC loads. Heating and cooling systems are typically the largest electrical consumers in any home. If your home relies on a central AC unit, a heat pump, or electric resistance heating, your generator size requirements will increase significantly compared to a home with gas-fired heating and no central cooling.

To help you visualize these general sizing brackets, we have put together a quick-reference comparison:

Home Square Footage Essentials Only (No Central AC) Whole-House Backup (With Central AC) High-Demand Backup (Dual AC / Electric Heat)
Under 1,000 sq. ft. 3 – 5 kW 5 – 8 kW 10 – 12 kW
1,000 – 2,000 sq. ft. 5 – 7 kW 8 – 12 kW 14 – 20 kW
2,000 – 3,000 sq. ft. 7 – 10 kW 12 – 20 kW 22 – 26 kW
Over 3,000 sq. ft. 10 – 12 kW 22 – 26 kW 26 – 30+ kW

This table provides a starting point, but your specific appliance mix will dictate the ideal system. For a deeper look at how to select the right approach for your property, read our guide on Choosing the Right Backup Power for Colorado.

Sizing for Essentials Only vs. Whole-House Backup

Deciding between an essentials-only system and a whole-house backup determines both the size of your generator and how you will use it during an outage.

  • Essentials-Only Backup: This setup focuses strictly on critical circuits. It keeps your refrigerator cold, runs your gas furnace blower, powers your sump pump, and keeps your home's lights and internet active. For most homes, a generator in the 3 to 7 kW range is plenty for these essentials. This setup is highly efficient but requires you to manage your power usage, meaning you cannot run heavy convenience appliances like your electric dryer or oven while the generator is active.
  • Whole-House Backup: This approach powers your entire electrical panel, allowing you to live comfortably without worrying about what appliances are running. It easily handles comfort conveniences like central air conditioning, double ovens, and electric clothes dryers. If your home features high-draw systems like dual AC units, a hot tub, or tankless electric water heaters, you will typically need a standby generator in the 22 to 30 kW range to support these loads simultaneously.

Sizing for High-Load HVAC Systems and EV Chargers

In modern homes, central air conditioning, heat pumps, and electric vehicle (EV) chargers demand special attention during the sizing process. A standard 5-ton central AC unit can require 5,500 running watts but may demand up to 11,000 starting watts to kick the compressor into motion.

Fortunately, we can install a soft starter on your AC unit. A soft starter is an electronic device that smooths out the electrical current during startup, cutting the compressor's peak starting amps (LRA) by approximately 50%. This simple addition can allow you to install a smaller, more fuel-efficient generator while still enjoying full air conditioning during an outage.

For homes with heat pumps, our calculations must also account for supplemental heat. When outdoor temperatures plunge along the Front Range, heat pumps rely on electric resistance heat strips for backup. Sizing calculations must add 65% of this supplemental heat wattage to the overall load.

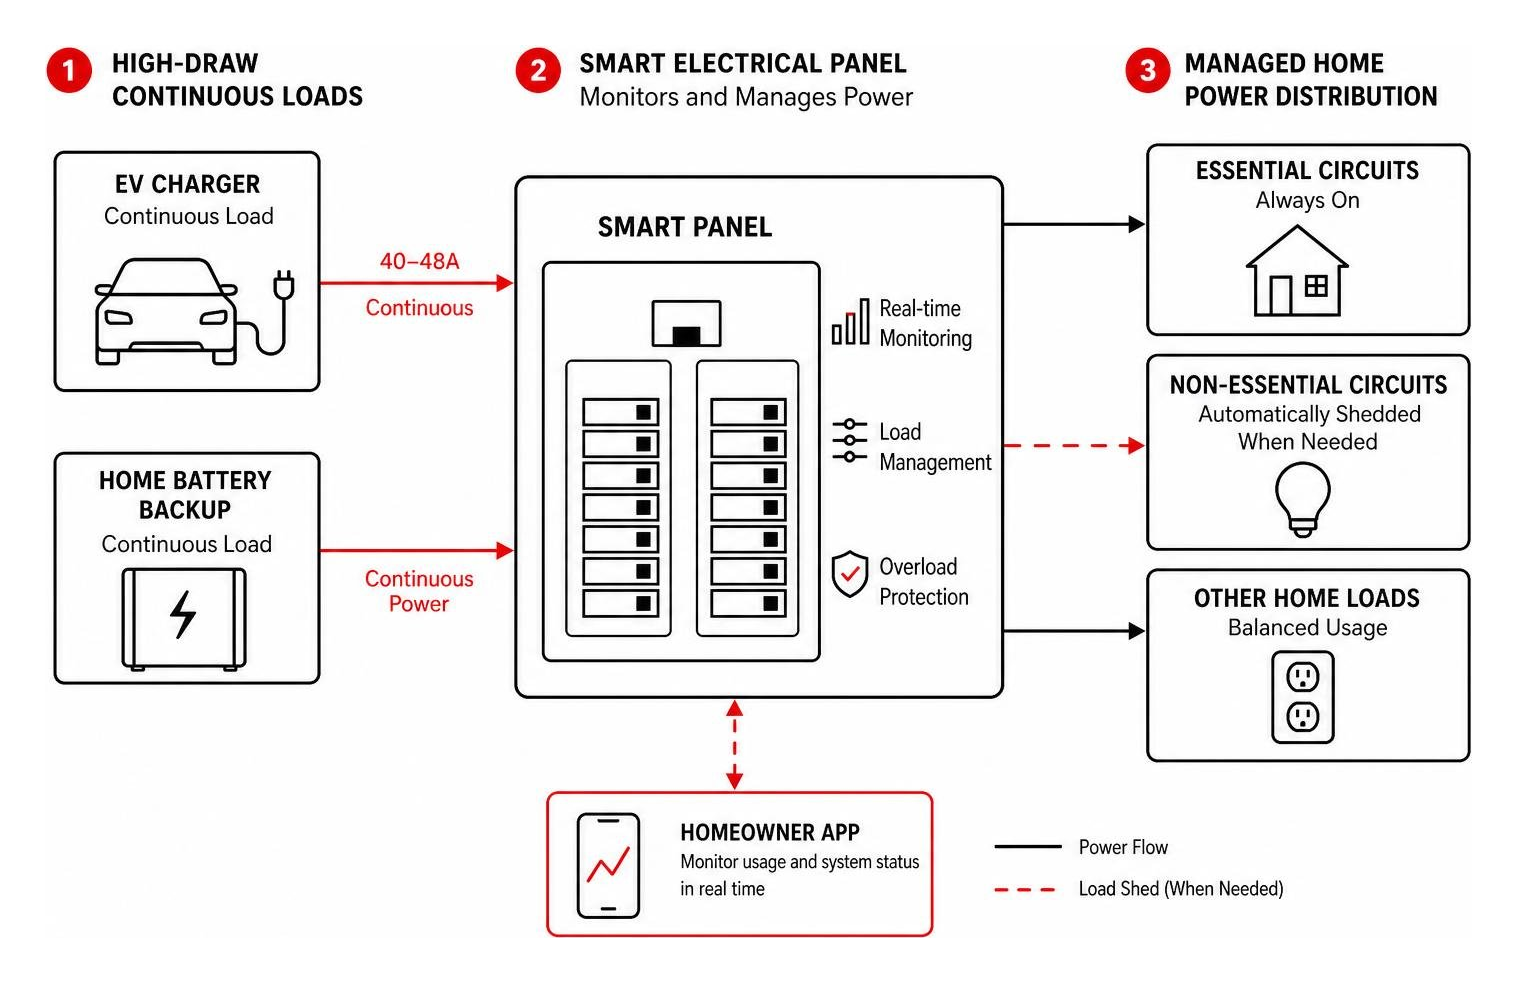
Additionally, EV chargers are continuous loads that draw high current for hours at a time. If you need to charge your electric vehicle during an outage, the generator must be sized to handle this continuous load alongside your household needs. To manage these massive draws without buying an oversized generator, we often design a system with an integrated Load Management System (LMS). An LMS automatically monitors your home's power draw and temporarily pauses ("sheds") lower-priority loads—like your EV charger or water heater—whenever your AC compressor cycles on, keeping your total electrical demand safely within your generator's capacity.

Method 3: Professional Sizing and Smart Load Management

While manual calculations and square-footage estimates are excellent for initial planning, the most accurate way to size a standby generator is to have a professional perform a code-compliant load calculation. This method utilizes the strict guidelines outlined in the National Electrical Code (NEC) 220.82 (Optional Method) for residential load calculations.

Rather than guessing your electrical demand, a licensed electrician can look at your home’s actual historical energy usage. By retrieving your 12-month peak utility demand billing history from your utility provider and multiplying that peak kW demand by 1.25, we establish a highly accurate, real-world baseline. This ensures your generator is perfectly optimized for your actual living habits without violating local electrical codes.

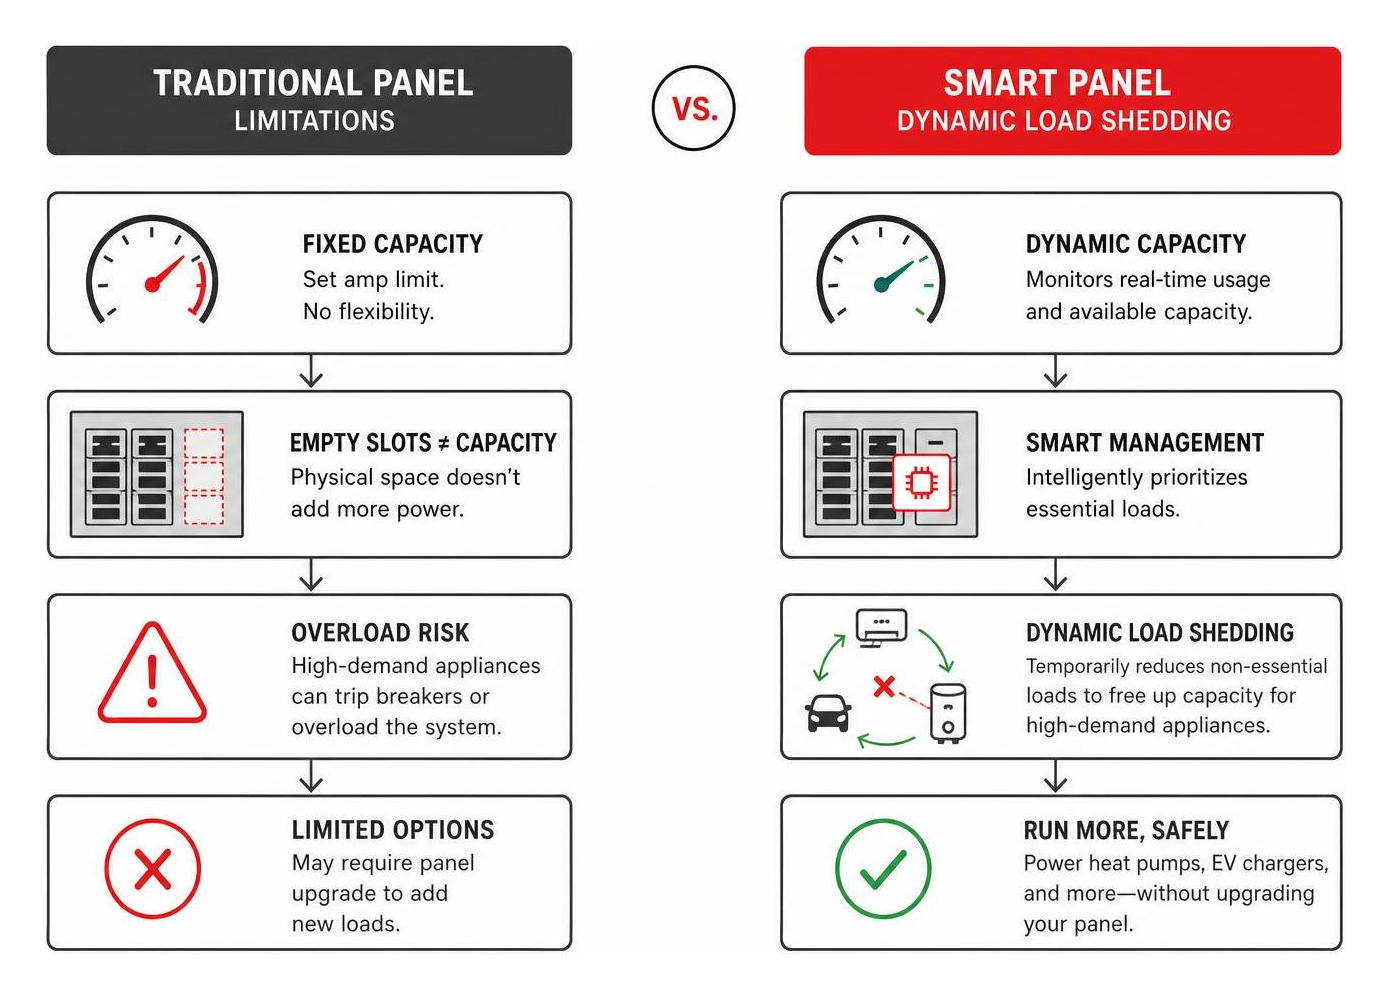
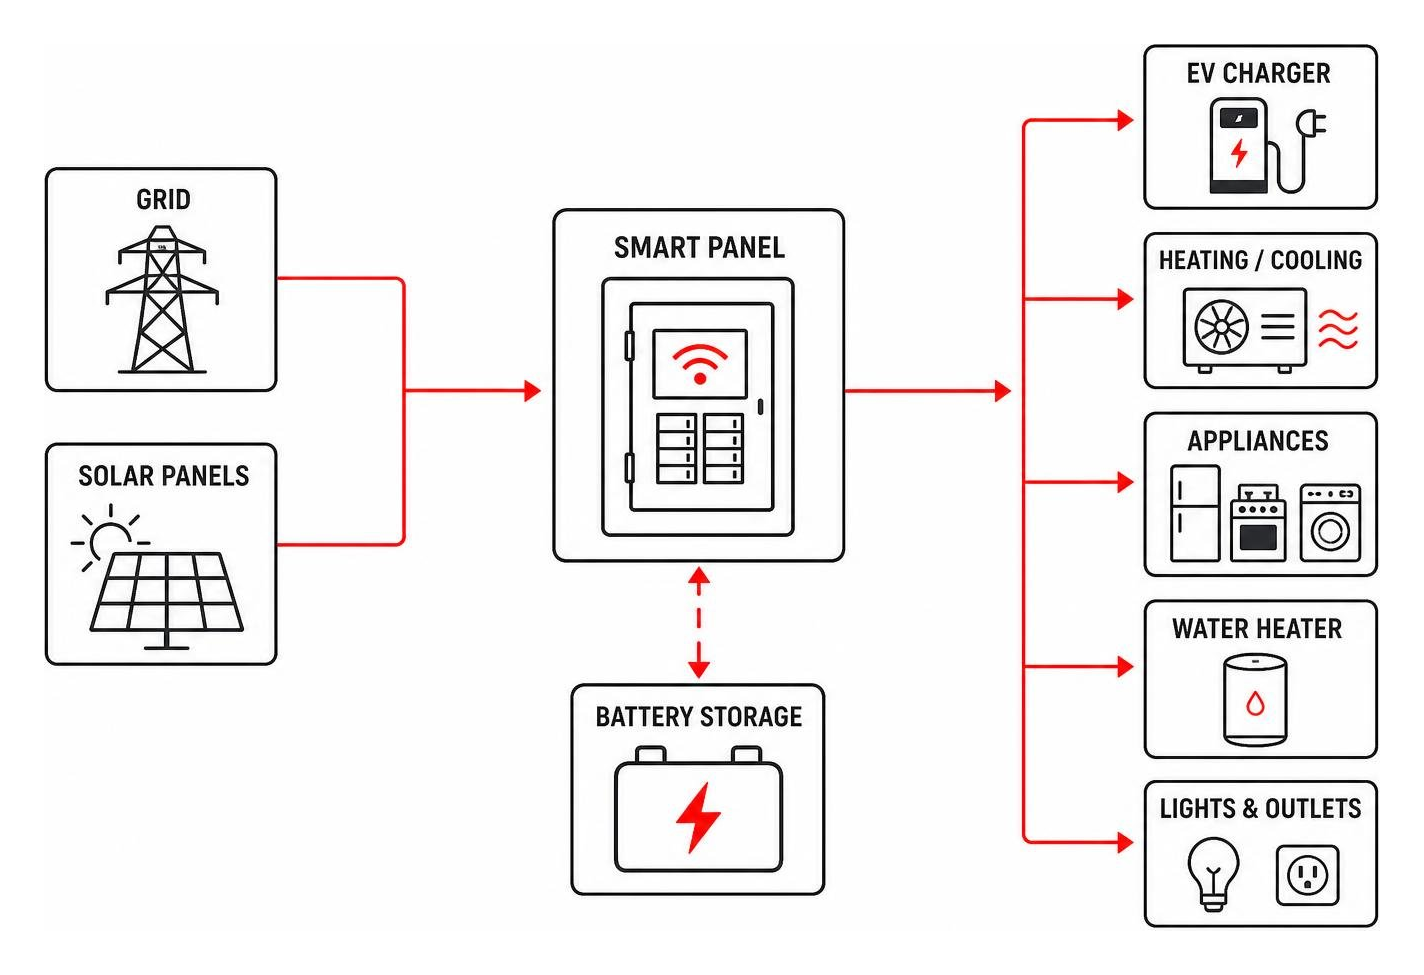
Modern electrical upgrades also allow us to integrate smart panels, such as SPAN panels, into your backup power design. A SPAN smart panel replaces your traditional breaker box and gives you complete, digital control over every circuit in your house via a smartphone app.

Instead of hardwiring only a few select circuits to a backup generator, a smart panel allows us to connect your entire home to the generator. If the power goes out, you can use the app to dynamically turn off non-essential breakers (like the guest bedroom outlets or the hot tub) with a single tap. This smart load shedding reduces your home's peak demand, allowing a smaller, quieter, and more efficient generator to back up your entire property. To understand how these components come together on installation day, read our detailed overview of Generator Installation What to Expect.

Let a Professional Show You How to Calculate Generator Size for Your House

Enlisting a licensed electrician to handle your sizing and installation is about more than just getting the math right—it is a matter of safety and strict electrical code compliance.

A professional installation ensures that your generator is connected to your home via a properly sized transfer switch. The transfer switch is a critical safety device that physically isolates your home from the utility grid when the generator is running. This prevents "backfeeding," a dangerous situation where your generator sends electricity back into the utility lines, which can injure or kill utility lineworkers working to restore power.

Furthermore, a professional installer will evaluate local physical constraints. Standby generators must comply with strict clearance rules (such as NFPA 37, which requires specific offsets from windows, doors, and combustible walls) and local HOA guidelines. A licensed expert will also verify that your existing natural gas meter or propane regulator has the proper BTU capacity and pressure to supply the generator under full load. If you are curious about which equipment brands perform best under these local conditions, check out our analysis of Which Home Generator Brand is Better for Colorado.

Sizing Standby Generators vs. Portable Generators

When planning your backup power system, you must choose between a portable generator and a permanently installed standby generator. Sizing considerations differ significantly between the two.

  • Portable Generators: These units must be wheeled out of storage, fueled manually, and started during a storm. They typically range from 3 to 10 kW. Because you must run heavy-duty extension cords or connect them to a manual transfer switch, they are best suited for backing up select, critical appliances. Portability also becomes highly impractical at larger sizes, as units over 7.5 kW often weigh more than 200 pounds and consume gasoline rapidly.
  • Standby Generators: These are permanently installed on a concrete pad outside your home, housed in a weather-protective enclosure, and connected directly to your natural gas or liquid propane line. They operate automatically via an Automatic Transfer Switch (ATS). Within seconds of detecting a grid failure, the ATS starts the generator and transfers your electrical loads, providing seamless whole-house power.

Because standby systems run on continuous fuel lines, they can run indefinitely during extended outages. To compare the long-term value of these systems against alternative backup technologies, view our Standby Generator vs Battery Backup Cost Comparison.

Frequently Asked Questions About Generator Sizing

What happens if my generator is too small or too large?

If you install a generator that is too small, it will frequently overload and shut down when you need it most. The sudden voltage drops caused by an overloaded generator can damage sensitive modern electronics and overheat the electric motors in your refrigerator, AC, and pumps.

If you install a generator that is too large, you will waste fuel and money. Additionally, running a large generator under light loads (less than 30% capacity) prevents the engine from reaching its optimal operating temperature. This leads to wet stacking, where unburned fuel and carbon build up in the engine cylinders and exhaust, degrading the system's efficiency and lifespan.

How do fuel types and power factors affect generator selection?

The fuel source you choose directly impacts your generator's continuous power output. Standby generators typically run on natural gas (NG) or liquid propane (LP). Natural gas is highly convenient because it connects directly to your utility line, providing an unlimited fuel supply during a storm. However, natural gas has a slightly lower energy density than propane, meaning a generator running on natural gas will produce roughly 10% to 15% less power than the same unit running on LP.

Power factor is another technical detail to consider. Residential generators are rated using a standard power factor of 0.8. This represents the ratio of usable real power (measured in kilowatts, or kW) to apparent power (measured in kilovolt-amperes, or kVA). A generator rated at 20 kVA with a 0.8 power factor delivers 16 kW of actual, usable power to your home ($20 \times 0.8 = 16$).

Can I use a battery backup instead of a generator?

Yes. Whole-home battery storage systems, like Franklin battery storage, are increasingly popular alternatives to traditional generators. Batteries operate silently, produce zero emissions, and integrate seamlessly with home solar arrays to provide clean, renewable backup power.

For many homeowners, a hybrid system—combining a moderately sized standby generator with a battery storage system—provides the ultimate backup solution. The battery handles quick, temporary outages silently, while the generator stands ready to support the home during prolonged grid failures. To explore which technology fits your home's needs, read our detailed comparison: Generator or Battery for Power Outages.

Conclusion

Determining how to calculate generator size for your house is the essential first step in securing reliable backup power for your family. Whether you perform a manual appliance wattage calculation, estimate your needs based on square footage, or utilize advanced smart panels to manage your loads, getting the size right ensures your home remains safe, warm, and fully operational during any power outage.

At Courtesy Electric Company, we have been serving homeowners across Denver and the Colorado Front Range for decades. We specialize in designing and installing premium backup power solutions, including Generac and Cummins standby generators, Franklin battery storage systems, and SPAN smart electrical panels.

We can help you navigate altitude derating, local building codes, and complex load calculations to find the perfect backup system for your home. To learn more about how a customized standby system can keep your household running smoothly, read about How a Whole Home Generator Protects Your Family.

Ready to secure your home's power supply? Schedule a professional consultation with Courtesy Electric Company today for a free estimate on your generator or backup power installation.

Everything You Need to Know About Electrical Panel Replacement Age

How Old Is Too Old for an Electrical Panel — and What Every Colorado Homeowner Should Know First

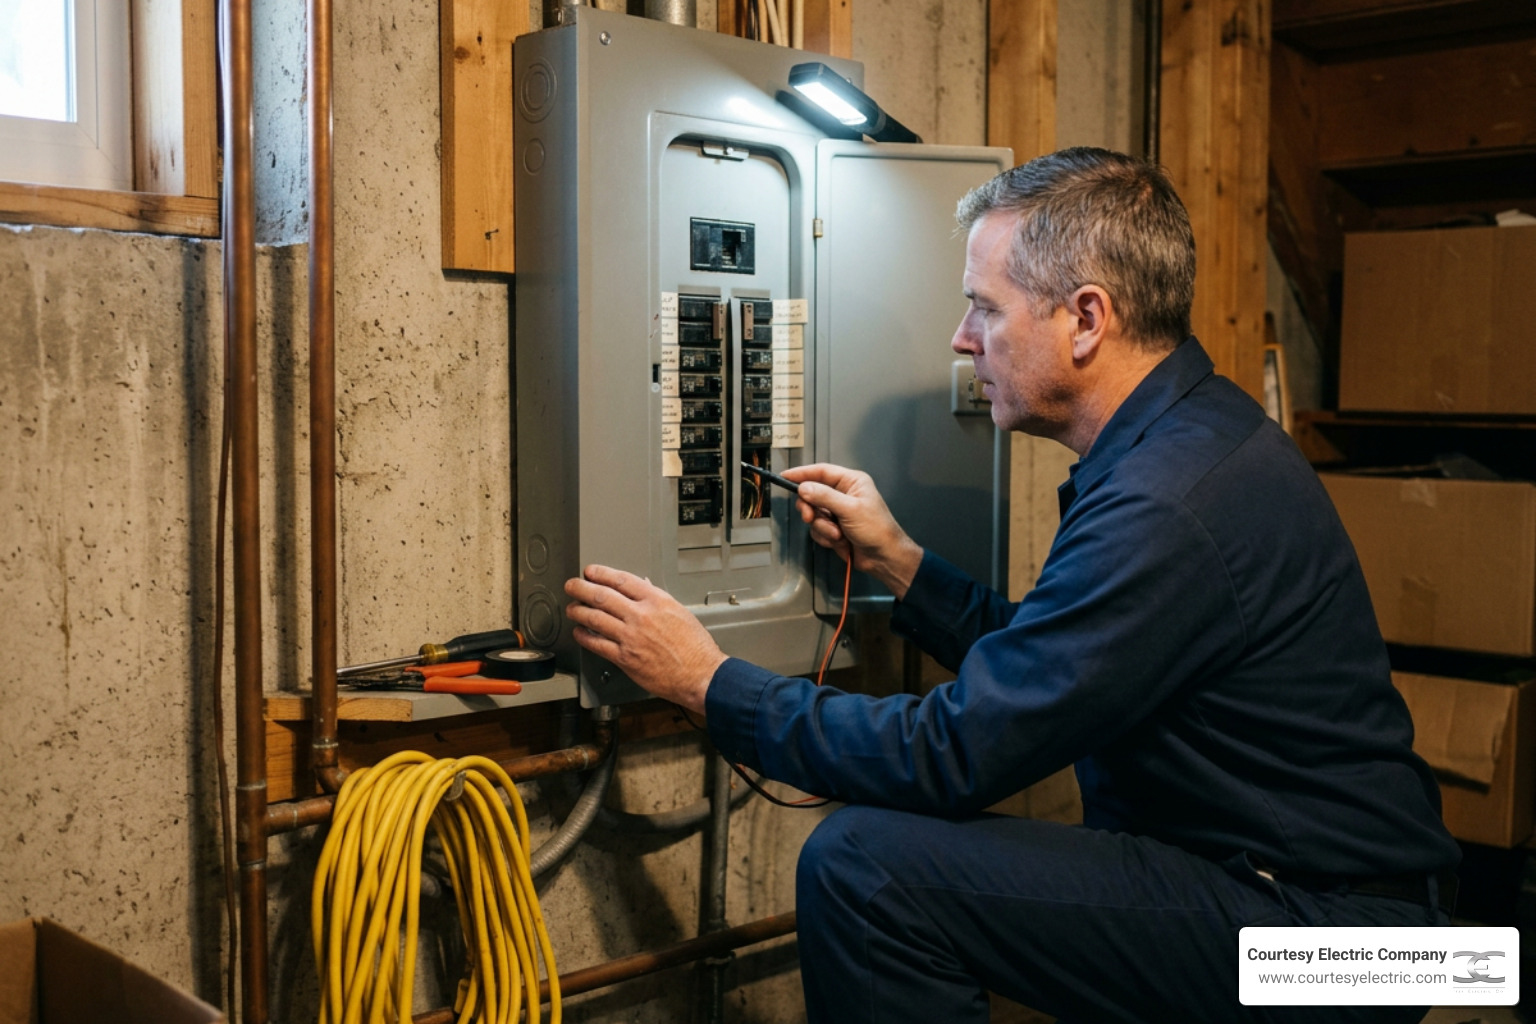
electrical panel lifespan home safety Denver Colorado

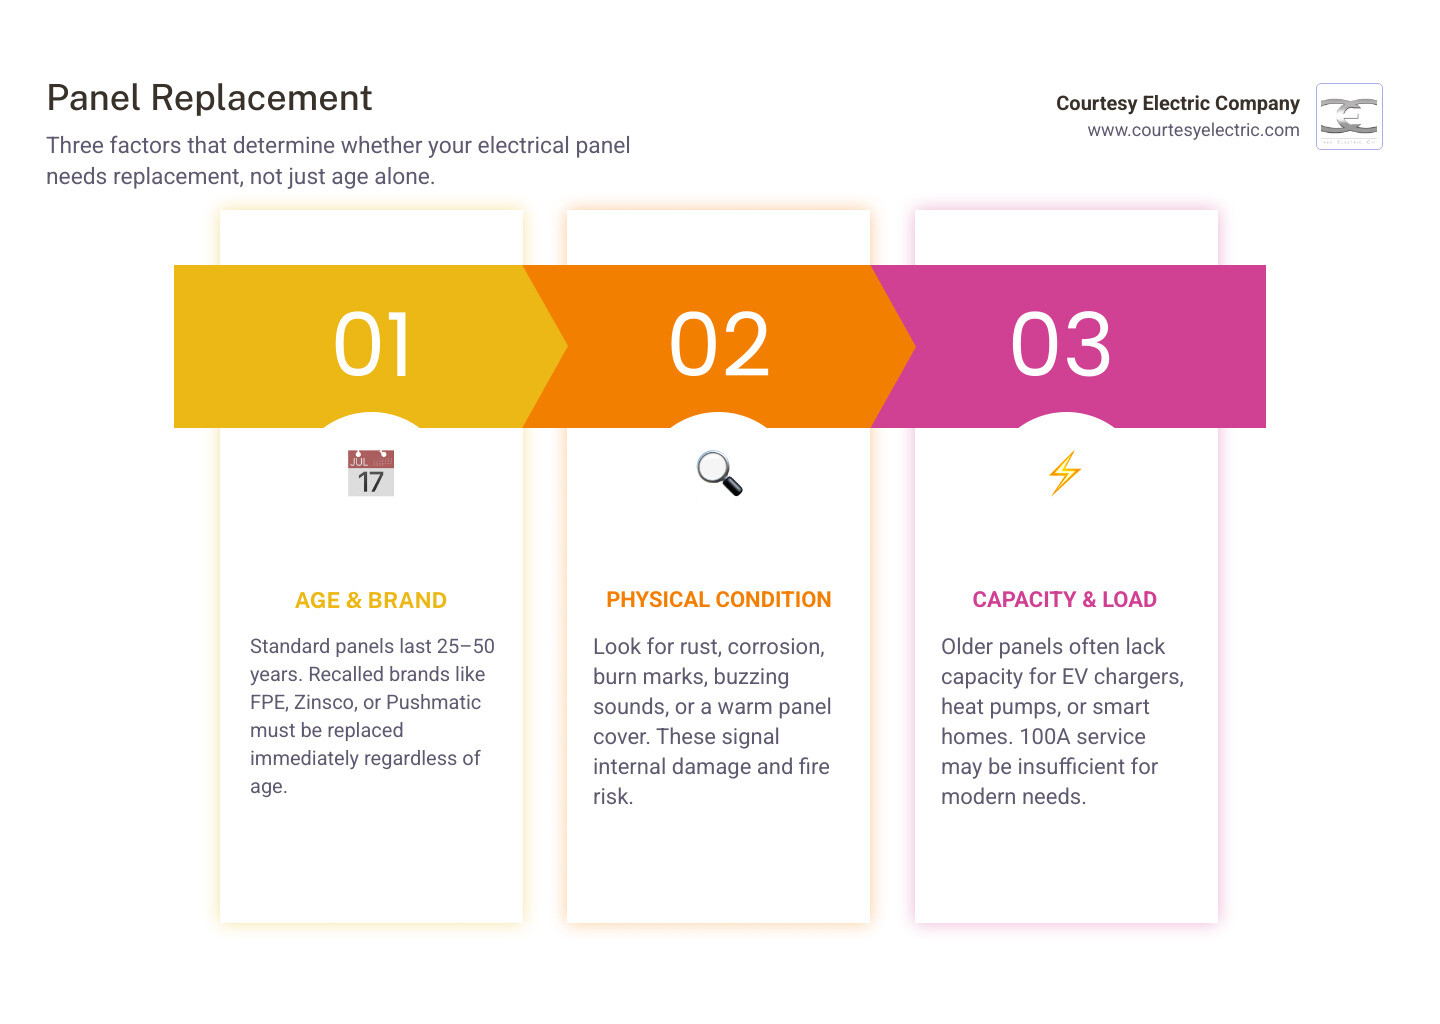
How old is too old for an electrical panel? Most electrical panels last between 25 and 50 years, but age alone does not automatically mean replacement is needed. Here is a quick breakdown:

Panel Age Recommended Action
Under 25 years Monitor for warning signs; no action needed if functioning well
25 to 40 years Schedule a professional inspection; assess condition and capacity
40 to 60 years Strong candidate for replacement; inspect for safety hazards
60+ years Replacement is strongly recommended regardless of visible condition
Any age (FPE, Zinsco, Pushmatic brands) Replace immediately — these brands have documented safety defects

The honest answer is that a 40-year-old panel may still function, but function and safety are not the same thing. Panels that age past their design window often lack the capacity for modern electrical loads, miss decades of code improvements, and contain components — especially breakers — that may no longer trip reliably when they need to. According to the U.S. Consumer Product Safety Commission, standard circuit breakers should be replaced every 30 to 40 years, even when the metal enclosure itself looks fine.

What actually triggers a replacement is usually a combination of factors: the panel's age, its brand, its physical condition, and whether it can support the way you live today. For homeowners across Denver and the Colorado Front Range, where older housing stock is common and modern electrification demands — think EV chargers, heat pumps, and smart home systems — are growing fast, getting this answer right matters more than ever.

I'm David Meyer, Vice President of Courtesy Electric, a Colorado electrical contractor with roots going back to 1976 — and questions about how old is too old for an electrical panel come up in nearly every older-home project we take on across the Front Range. In the sections below, I'll walk you through exactly what professionals look at when evaluating a panel, so you can make a confident, informed decision.

Electrical panel age lifespan guide: when to inspect, evaluate, and replace your home panel infographic

Before you decide whether to repair or replace your system, it helps to understand how we determine a panel's true condition. First, let's look at how to recognize the baseline safety of your panel and how to spot potential issues early by reading our guide on How to Spot Electrical Problems Before They Become Dangerous.

Determining Lifespan: How Old is Too Old for an Electrical Panel?

While we often use a general estimate of 25 to 50 years for the average lifespan of an electrical panel, the physical reality is more nuanced. Organizations like InterNACHI benchmark the maximum service life of an electrical service panel at roughly 60 years under ideal conditions. However, the moving parts inside that panel — the circuit breakers — have a much shorter reliable lifespan.

The U.S. Consumer Product Safety Commission (CPSC) indicates that standard circuit breakers should be replaced every 30 to 40 years. This discrepancy exists because of a physical phenomenon known as heat cycling. Every time electricity flows through a breaker, it generates a small amount of heat. As appliances turn on and off, the metal components inside the panel expand and contract. Over decades, this constant thermal shift gradually loosens terminal connections, degrades plastic housings, and fatigues the internal springs that allow a breaker to snap open during a short circuit.

Because these changes happen silently behind the metal cover, relying solely on the panel's age is a gamble. To keep your home safe, we highly recommend reading about How Often Should You Have Your Electrical System Inspected to establish a routine safety baseline.

How Old is Too Old for an Electrical Panel in Older Denver Homes?

an aging electrical panel in need of professional evaluation

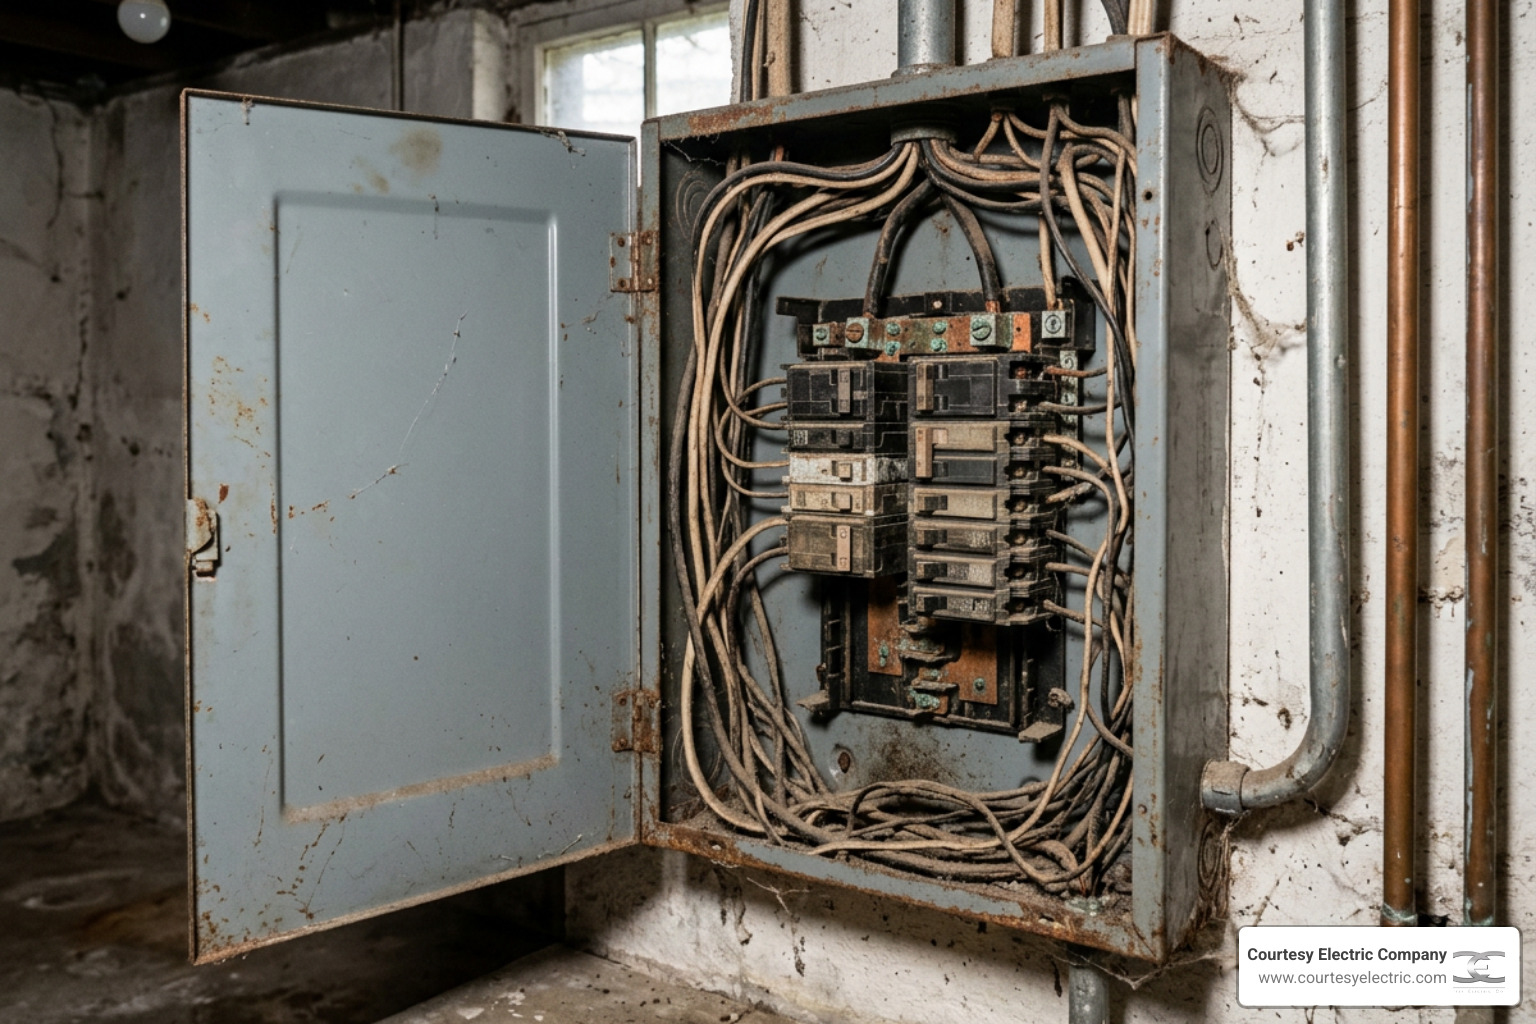
In the Denver metro area, Parker, Highlands Ranch, and the Black Forest, we have a beautiful mix of historic and mid-century homes. However, many pre-1978 properties across the Colorado Front Range still rely on their original electrical infrastructure.

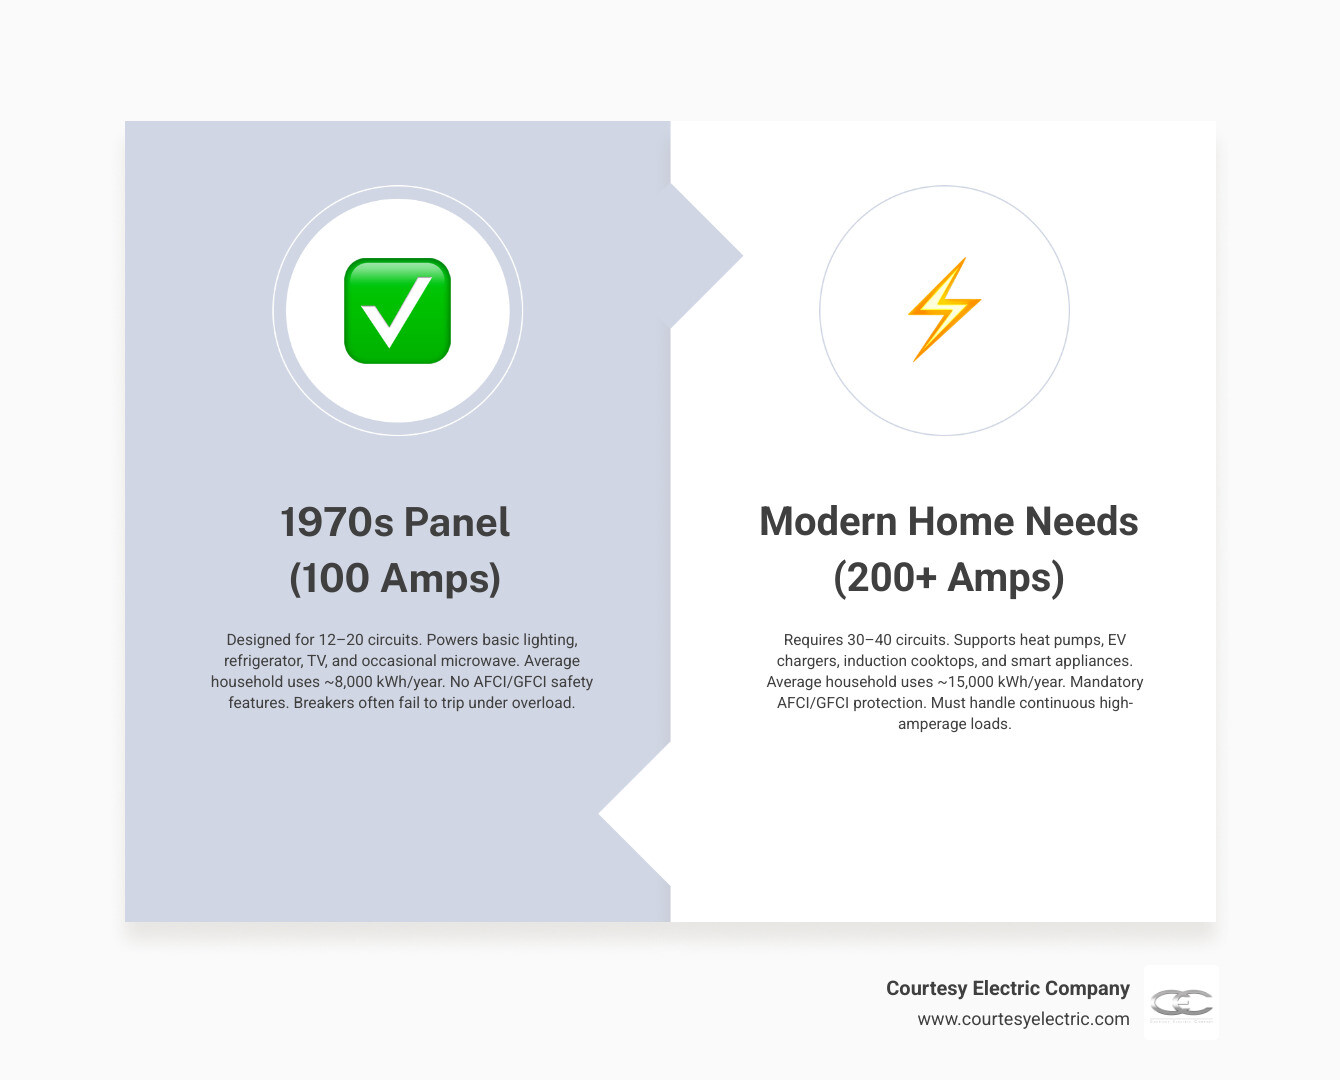
When these homes were built, a 60-amp or 100-amp electrical service was considered generous. Today, a typical family runs multiple computers, smart TVs, air conditioning units, and high-draw kitchen appliances simultaneously. An older panel in a historic Front Range home is often operating at or near its maximum physical capacity daily. This chronic stress accelerates the aging process of the internal bus bars and breakers. If your home was built before the late 1970s and has not had an electrical upgrade, it is highly likely that your panel has already aged out of its safe operating window. To see how your older home measures up, consult our Electrical Safety Checklist for Older Homes.

Decoding Manufacturer Labels and Date Codes

If you are not sure when your electrical panel was installed, you can often find clues on the unit itself. To do this safely, open the outer metal door of the panel (the door that covers the breaker switches). Do not unscrew or remove the flat metal cover plate (the deadfront) that surrounds the switches — only a licensed electrician should remove that.

Look for a manufacturer’s data sticker or a stamped metal plate, typically located on the inside of the panel door. This label contains the manufacturer’s name, the model number, and a serial number or date code.

For example, many Square D panels feature a multi-digit date code. In these configurations, the first two digits often represent the year of manufacture, and the next two represent the week. A code starting with "0235" indicates the panel was manufactured in the 35th week of 2002. Other legacy brands like Cutler-Hammer, Eaton, and General Electric use distinct serial number formats that map to specific manufacturing years.

If this label is missing, painted over, or completely unreadable, a professional evaluation by a licensed electrician is the safest way to determine the approximate age and safety of your system.

Unsafe Legacy Brands and Obsolete Panel Designs

Age is not the only reason to replace a panel. Some systems were poorly designed from the start, and others have developed known safety defects over decades of real-world use. If your home has one of these obsolete brands, it represents an immediate hazard regardless of how long it has been operating without an obvious issue.

These panels also present serious insurance complications. Many insurance companies now require homeowners to replace recalled or defective panel brands before they will issue or renew a policy. In some cases, insurers may deny claims for fire damage if the blaze was traced back to a known hazardous panel that the homeowner failed to replace. To understand how these systems compromise your home's safety, read about How Outdated Wiring Increases Fire Risk.

Recalled and Defective Panel Manufacturers

There are three major legacy brands that we recommend replacing immediately for safety reasons:

  • Federal Pacific Electric (FPE) Stab-Lok Panels: Manufactured from the 1950s through the 1980s, these panels are incredibly common in older Front Range homes. While the CPSC closed its investigation in 1983 due to budget limitations, a landmark 2002 New Jersey class-action lawsuit (Aronson v. Reliance) ruled that FPE had knowingly misrepresented its Underwriters Laboratories (UL) safety listings. Independent testing has shown that FPE Stab-Lok breakers fail to trip under overload or short-circuit conditions at rates as high as 51% to 60%. A peer-reviewed 2012 study in the IEEE Transactions on Industry Applications estimated that Stab-Lok breaker malfunctions cause roughly 2,800 residential fires, 13 deaths, and millions in property damage annually.
  • Zinsco and GTE-Sylvania Panels: Popular throughout the 1970s, Zinsco panels (and some rebranded Sylvania units) suffer from a severe design flaw. The connection clip that attaches the breaker to the main bus bar is prone to loosening. This loose connection causes electrical arcing, which generates extreme heat. Over time, the breaker can actually melt and fuse directly to the copper or aluminum bus bar. Once fused, the breaker cannot trip, allowing massive amounts of current to flow unchecked through your home's wiring.
  • Pushmatic (ITE/Bulldog) Panels: These panels are easily identified by their rectangular push-button breakers instead of traditional toggle switches. While they do not have the same catastrophic failure-to-trip rates as FPE or Zinsco, they are entirely obsolete. The internal grease inside Pushmatic breakers hardens over time, making the buttons stiff or impossible to reset. Because replacement parts are no longer manufactured, any single breaker failure typically requires a complete panel replacement.

Obsolete Designs: Split-Bus Panels and Fuse Boxes

Before modern safety standards were established, two electrical distribution designs were common in residential construction:

Split-Bus Panels: Popular before the 1980s, split-bus panels do not have a single "Main" breaker to shut off power to the entire board. Instead, they are split into two sections: an upper section containing up to six "main" breakers (which control heavy appliances like dryers or ranges, plus a sub-main breaker), and a lower section for general lighting and outlets. To completely de-energize a split-bus panel, you have to flip up to six individual switches. The National Electrical Code (NEC) no longer allows this design for new installations because it complicates emergency shut-offs.

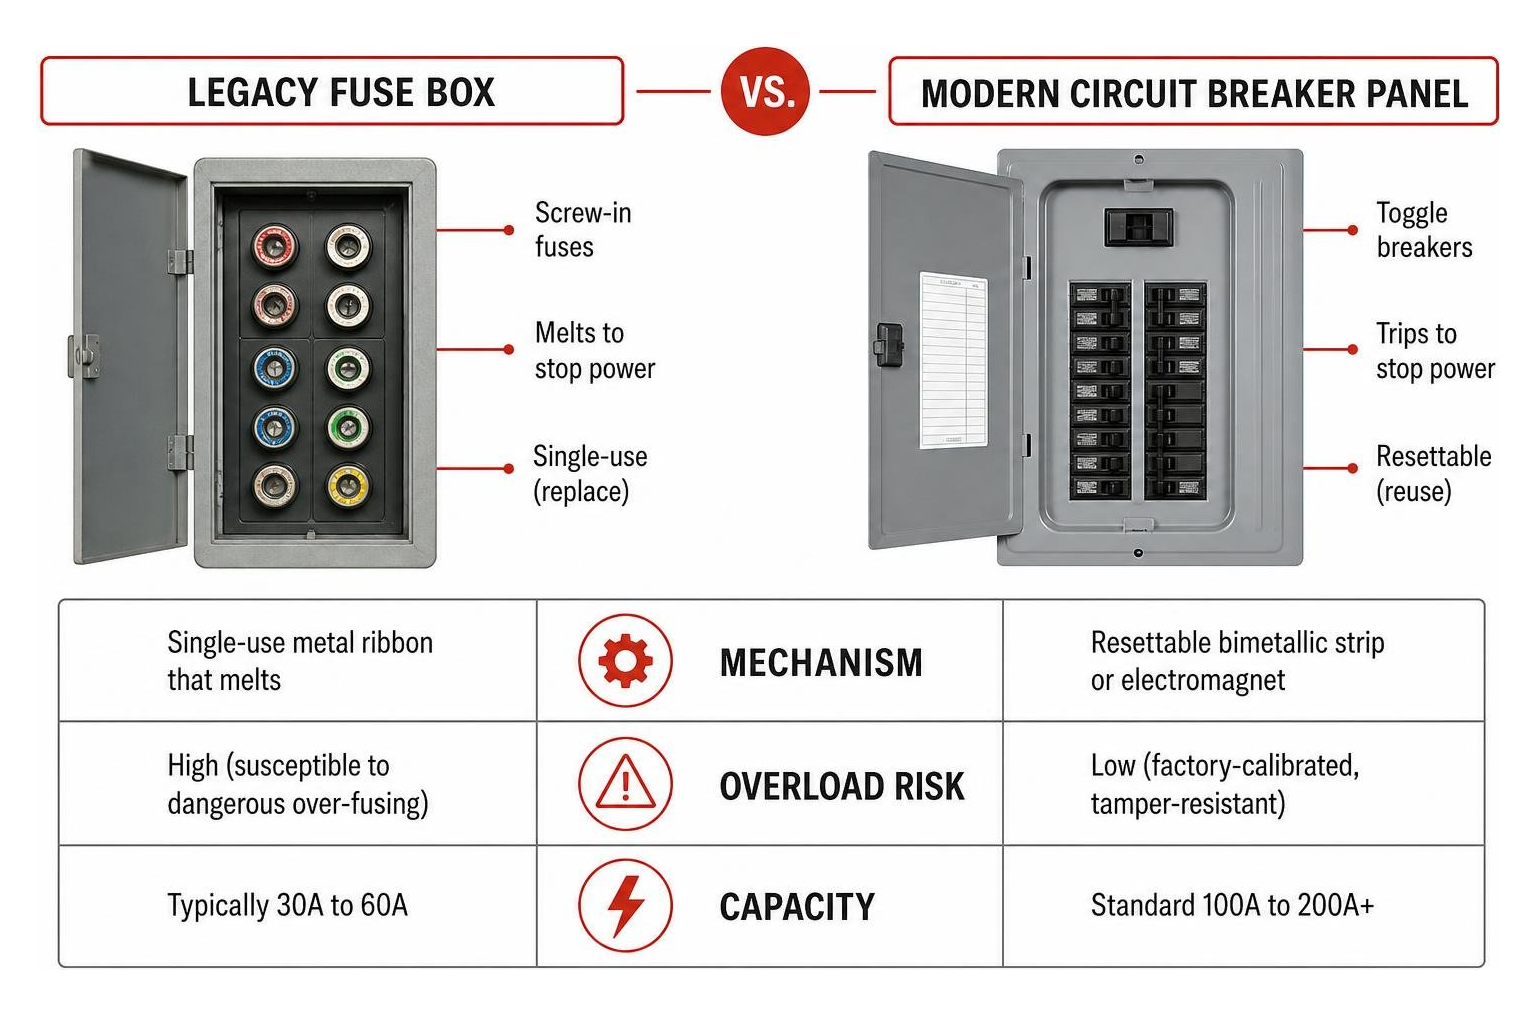
Fuse Boxes: Standard in homes built before the 1960s, fuse boxes use single-use glass fuses that melt to interrupt an electrical overload. While a fuse is technically an effective safety device, fuse boxes are highly obsolete. Because they were designed for lower historical electrical loads, homeowners often run into "over-fusing" hazards. This occurs when a homeowner gets tired of a 15-amp fuse blowing and screws in a 30-amp fuse instead. This bypasses the safety limit of the circuit's wiring, allowing the wires to overheat inside the walls without the fuse blowing.

Comparison of obsolete fuse boxes and modern circuit breaker panels

Feature Legacy Fuse Box Modern Circuit Breaker Panel
Mechanism Single-use metal ribbon that melts Resettable bimetallic strip or electromagnet
Overload Risk High (susceptible to dangerous over-fusing) Low (factory-calibrated, tamper-resistant)
Capacity Typically 30A to 60A Standard 100A to 200A+
Modern Safety Lacks AFCI/GFCI integration compatibility Native support for AFCI, GFCI, and smart tech

Physical Warning Signs of a Failing Electrical Panel

If your panel is approaching the 25-to-50-year mark, you should monitor it closely for physical signs of wear. Catching these warning signs early can prevent a catastrophic failure. For a deeper look at protecting your household, check out these Electrical Safety Tips Every Homeowner Should Know.

Signs That Tell You How Old is Too Old for an Electrical Panel

When inspecting your panel, use your senses of sight, hearing, touch, and smell. If you notice any of the following signs, your panel requires immediate professional attention:

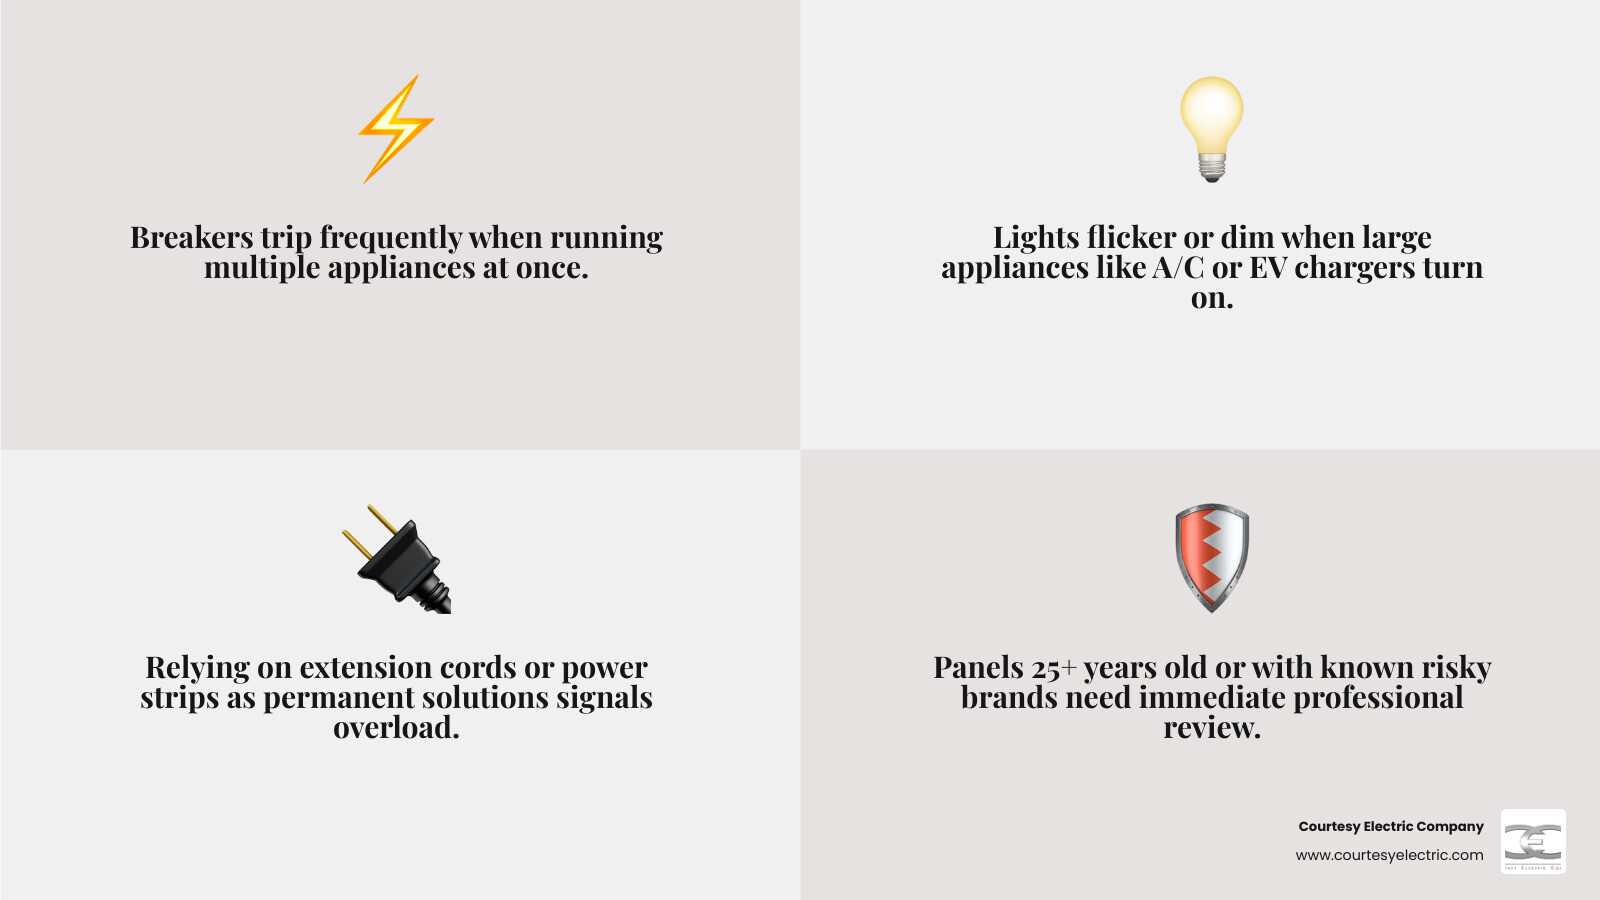
  • Frequent Breaker Trips: If a particular breaker trips repeatedly, or if resetting a breaker does not restore power, the breaker itself may have failed or the circuit is chronically overloaded.
  • Flickering or Dimming Lights: If your lights flicker or dim when a heavy appliance (like your refrigerator, microwave, or air conditioner) kicks on, your panel is struggling to distribute power.
  • Buzzing, Crackling, or Humming Sounds: A healthy electrical panel should run silently. Any buzzing or sizzling sound indicates active electrical arcing, which is a severe fire hazard.
  • Warm Panel Cover: If you place the back of your hand on the metal cover plate and it feels warm or hot to the touch, there is dangerous heat building up inside the enclosure.
  • Burning Smells: An acrid, metallic, or fishy smell near the panel suggests that plastic wire insulation or breaker casings are melting due to extreme heat.
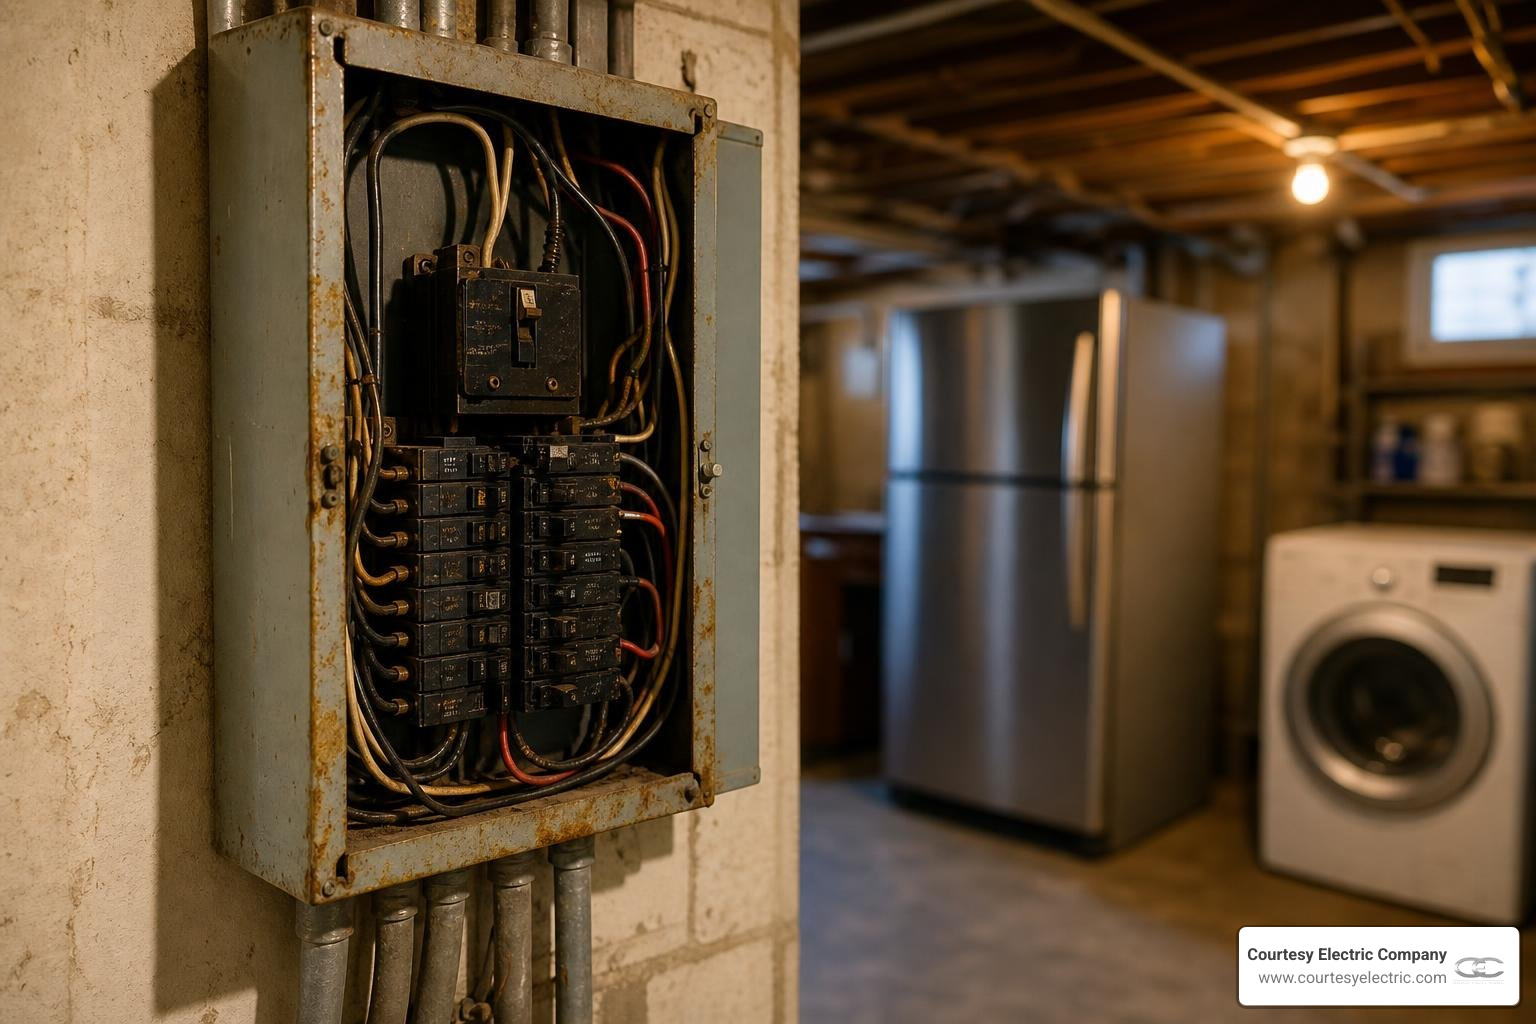
  • Rust and Corrosion: Colorado's dry climate helps protect metal, but moisture from basement walls or leaking pipes can still cause rust. If you see white powdery corrosion or rust streaks on the breakers or bus bars, the structural integrity of the electrical connections is compromised.

Hidden Hazards: Double-Tapping and Loose Connections

Some of the most dangerous panel hazards are invisible from the outside. A common code violation in older panels is "double-tapping." This occurs when two separate electrical wires are connected to a single breaker terminal designed for only one wire. Because the terminal screw cannot apply even pressure to both wires, one or both connections will eventually loosen.

Loose connections are highly susceptible to thermal expansion. As electricity flows, the loose joint heats up, causing the metal to expand. When the power is turned off, the metal cools and contracts. This cycle eventually creates a tiny gap where electricity can jump across, creating an arc. These micro-fires can smolder inside the panel, slowly carbonizing the surrounding plastic until a major fire erupts. To learn how a professional diagnostic scan can find these hidden hot spots, read about How an Electrical Inspection Prevents Problems.

Modern Capacity Demands and Future-Proofing

Even if an older electrical panel is physically clean and free of defects, it may simply lack the capacity to support modern life. Upgrading your electrical panel is not just about safety; it is also about ensuring your home can handle your current and future electrical needs. To learn more about preparing your home for the long haul, read our guide on How to Future-Proof Your Home Electrical System.

Upgrading for Modern Electrification and Smart Tech

The electrical load of the average home has grown significantly over the last decade. As we transition away from fossil fuels, we are adding high-draw electrical equipment to our homes:

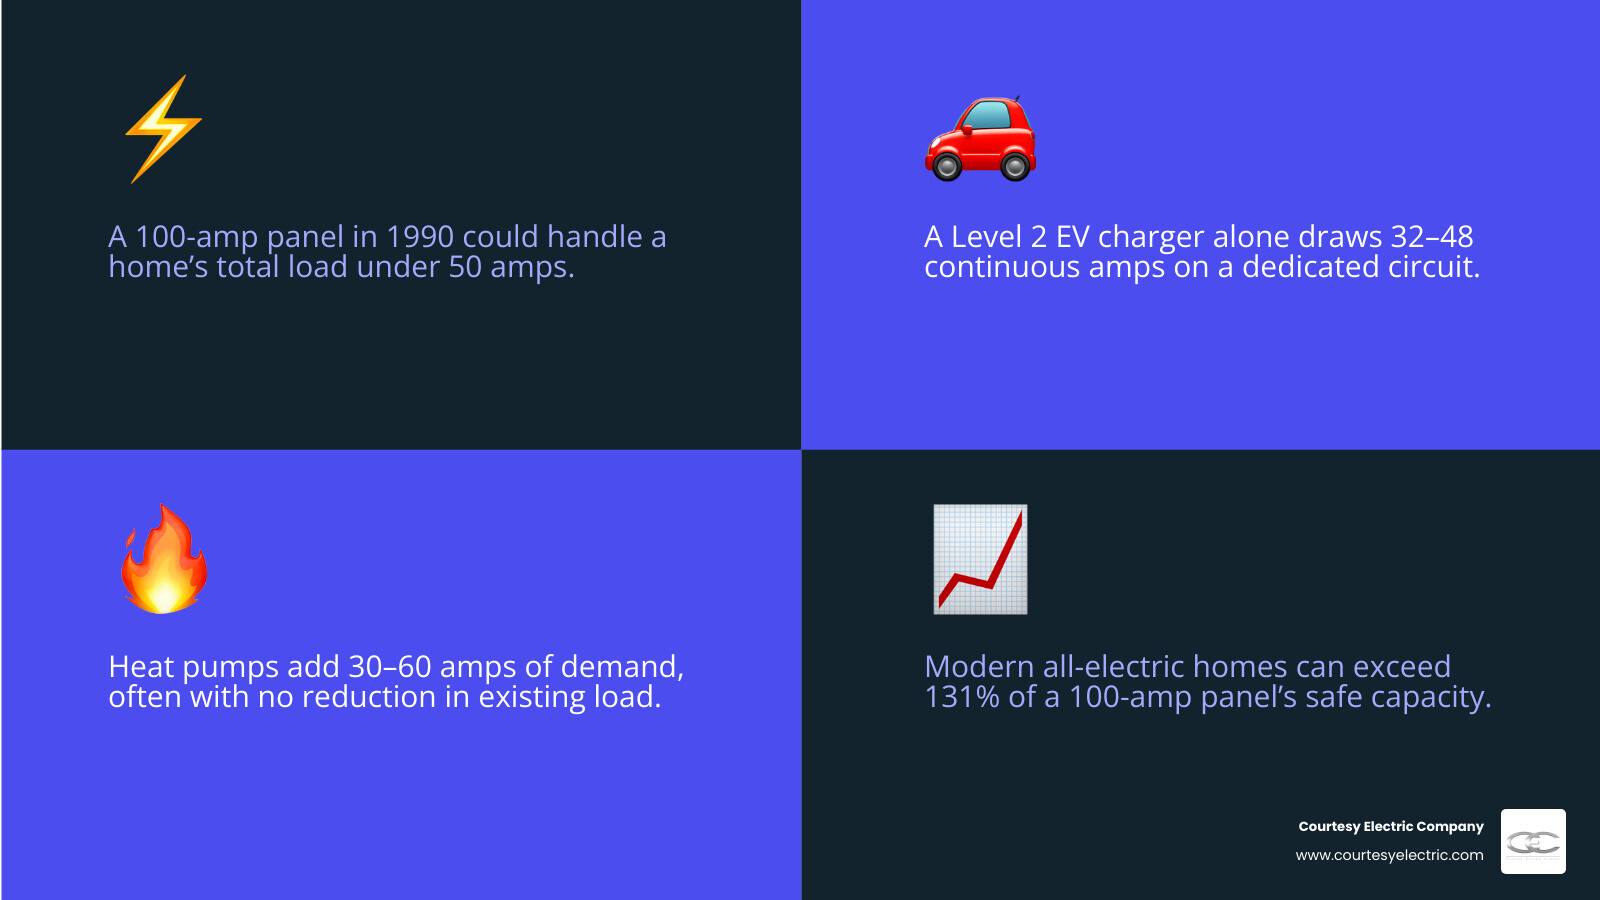
  • Level 2 EV Chargers: A standard Level 2 electric vehicle charger requires a dedicated 240-volt circuit and pulls 40 to 50 amps of continuous power. On an older 100-amp service panel, adding an EV charger can easily overload the entire system during peak usage hours.
  • Heat Pumps and Electric HVAC: High-efficiency heat pumps, electric water heaters, and induction cooktops are fantastic for energy efficiency, but they require robust electrical capacity.
  • Smart Home Tech and Smart Panels: Modern homes benefit immensely from intelligent power management. We specialize in installing SPAN smart panels, which replace traditional panels with a digital interface. A SPAN panel allows you to monitor your energy usage in real-time, prioritize circuits during a power outage, and integrate seamlessly with home battery storage systems.

To explore how these advanced systems fit into a modern home, read about Future-Proofing Your Electrical for Smart Home Technology.

Overcoming Older Home Infrastructure Challenges

Upgrading a panel in an older home often uncovers other legacy wiring issues that must be addressed to comply with current building codes:

  • Aluminum Branch Wiring: Common in homes built between 1965 and 1973, small-gauge aluminum wiring is highly prone to oxidation and loose connections at outlets and switches. While aluminum service entrance cables are still standard and safe today, older branch circuits require specialized connectors or complete rewiring.
  • Knob-and-Tube Circuits: Found in pre-1950 homes, knob-and-tube wiring lacks a ground wire and uses air space for insulation. It is completely incompatible with modern three-prong outlets and high-draw appliances.
  • Ungrounded Outlets: Many older homes have two-prong outlets that lack a safety ground path. When upgrading a panel, we can install Ground Fault Circuit Interrupter (GFCI) breakers to provide code-compliant shock protection on these ungrounded circuits without requiring a complete home rewire.

Because of these complex structural and safety challenges, panel upgrades are not a DIY project. If you are trying to decide whether to tackle a project yourself, take a look at our guide on When to Call an Electrician vs DIY.

Frequently Asked Questions about Electrical Panel Lifespan

Does age alone mean I must replace my electrical panel?

No. If your panel is a reputable modern brand (such as Square D, Eaton, or Siemens), is in excellent physical condition, shows no signs of corrosion or overheating, and has sufficient capacity for your household's electrical load, it does not need to be replaced simply because of its age. However, if your panel is over 25 years old, we highly recommend scheduling a professional inspection to verify its internal integrity.

Can an outdated electrical panel affect my homeowners insurance?

Yes, absolutely. Many insurance carriers in Colorado actively inspect homes or review construction records before renewing policies. If they discover a recalled brand like Federal Pacific or Zinsco, or if your home still uses an obsolete fuse box, they may demand an upgrade as a condition of coverage or apply substantial premium surcharges.

How long does a professional panel upgrade take?

A standard panel replacement typically takes between 4 and 8 hours to complete. During this time, your home's power will be safely disconnected. We coordinate closely with your local utility provider (such as Xcel Energy or CORE Electric Cooperative) and municipal inspectors to ensure the power is restored as quickly as possible, usually on the very same day.

Conclusion

Determining how old is too old for an electrical panel ultimately comes down to a balance of age, brand history, physical condition, and capacity. While a well-maintained panel can last up to 50 years, the safety of your home and the demands of modern appliances often make an earlier upgrade the smartest choice.

At Courtesy Electric Company, we have been serving homeowners across Denver, Parker, Highlands Ranch, the Black Forest, and the entire Colorado Front Range since 1976. Whether you need a standard panel upgrade, a smart SPAN panel installation, or a complete home backup power solution with Generac/Cummins generators and Franklin battery storage, our team is dedicated to providing quality installations built on integrity and dependability.

Ready to secure your home's electrical infrastructure? Contact us today to schedule an inspection or request a free estimate on your next upgrade by visiting our Electrical Service page.

When to Call an Electrician vs. DIY: The Ultimate Guide

When Should You Call an Electrician vs. DIY? Here's What Every Colorado Homeowner Needs to Know

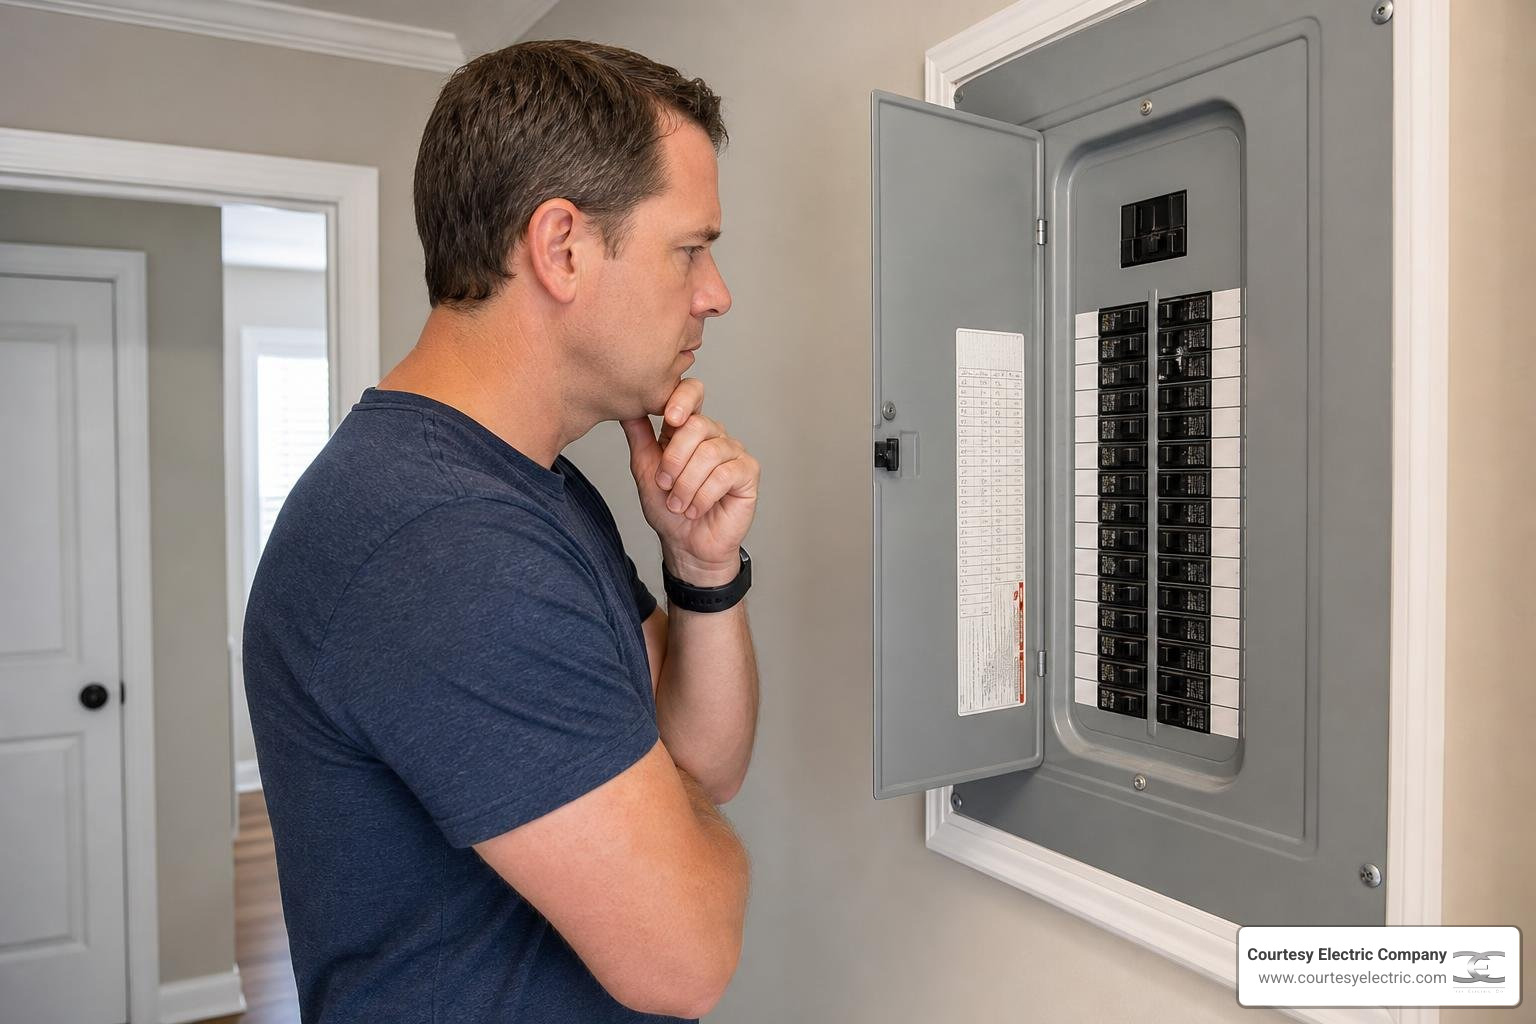
homeowner looking at electrical panel safety home improvement

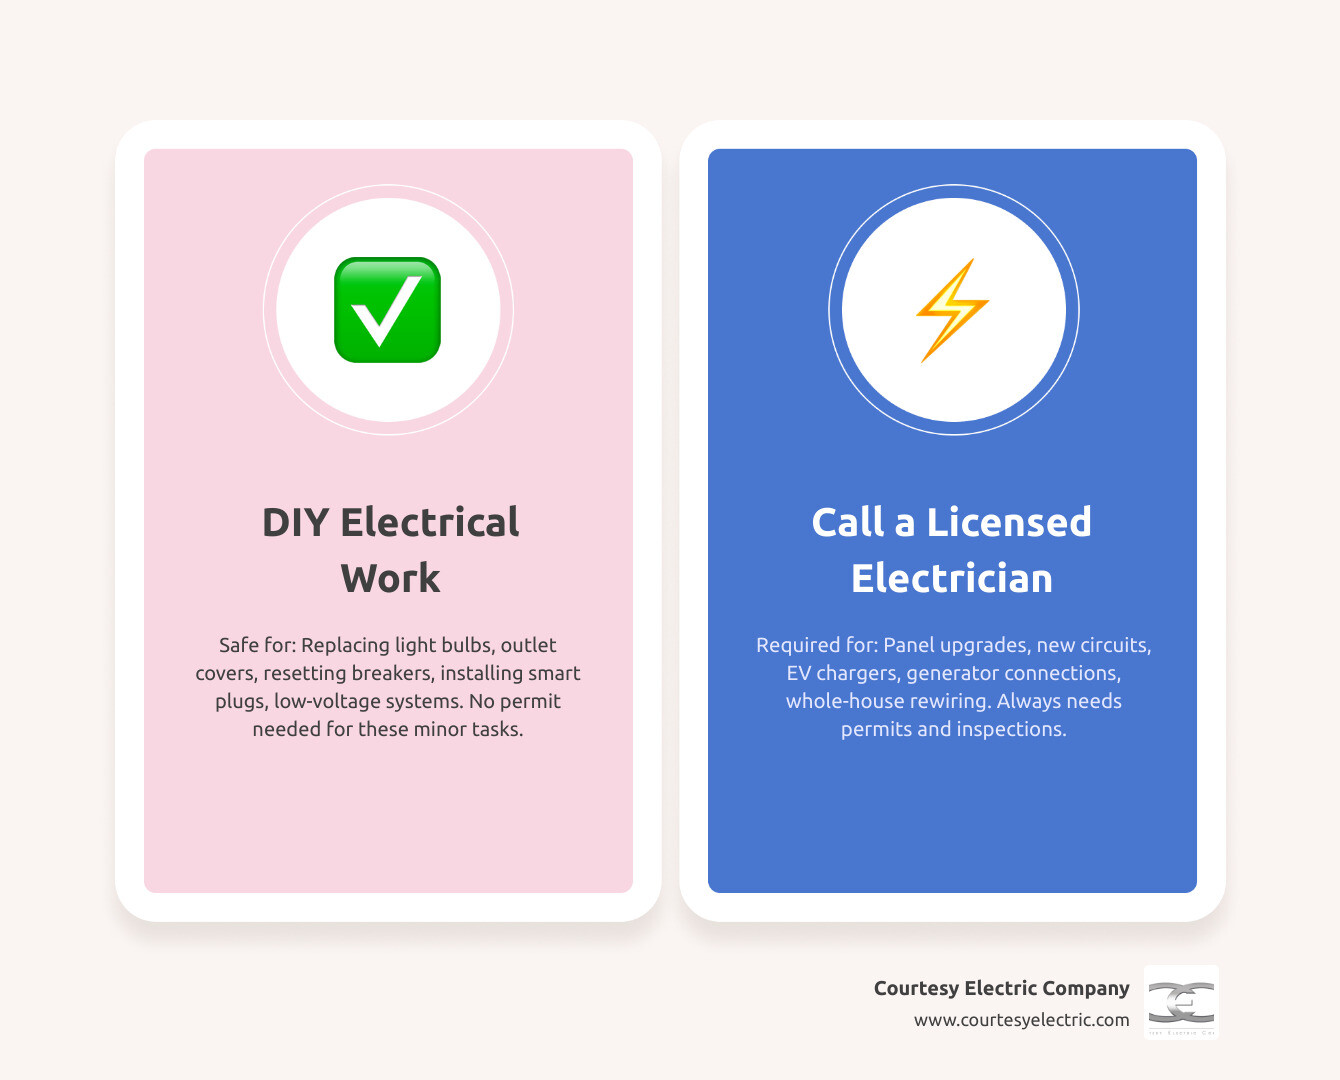
Knowing when should you call an electrician vs DIY could be the difference between a safe home and a dangerous one. Some electrical tasks are perfectly reasonable for a capable homeowner to handle. Others are legally required to be done by a licensed professional — and getting that wrong can mean electrical fires, serious injury, voided insurance, or costly code violations. Here's a quick breakdown before we dive deeper:

Call a licensed electrician for:

  • Electrical panel upgrades or replacements
  • Adding new circuits or wiring
  • EV charger installation
  • Generator and transfer switch connections
  • Whole-house rewiring
  • Any work requiring a permit

Safe for most capable DIYers:

  • Replacing light bulbs
  • Swapping outlet covers or switch plates
  • Resetting a tripped breaker
  • Installing plug-in smart devices
  • Testing and resetting GFCI outlets
  • Installing low-voltage systems (doorbell, smart thermostat)

Electrical failures cause over 50,000 home fires every year in the United States, resulting in around 500 deaths and $1.3 billion in property damage. Many of those fires trace back to improper wiring or unpermitted work. That's not meant to scare you away from every home improvement project — it's meant to help you make smart, informed decisions.

I'm David Meyer, Vice President of Courtesy Electric, a Colorado electrical contractor with roots going back to 1976. Over the decades, I've seen what goes wrong when the line between DIY and professional work gets blurred — and I've helped hundreds of Front Range homeowners understand when to call an electrician vs. DIY before a small mistake becomes a major problem. Let's walk through exactly where that line is.

DIY vs professional electrical work decision matrix infographic for homeowners infographic

Understanding the Risks: When Should You Call an Electrician vs DIY

It is incredibly easy to underestimate how complex a home's electrical system actually is. When you paint a room or hang drywall, a mistake results in an ugly wall. When you make a mistake with electrical wiring, the consequences can be immediate and catastrophic. Understanding the key differences in risk levels is the first step in deciding when should you call an electrician vs diy.

Every year, more than 30,000 injuries are reported nationally due to DIY electrical accidents. Unlike other home repairs, electricity leaves absolutely zero room for error. A single loose wire connection can create resistance, which generates intense heat and can easily ignite surrounding insulation or wood studs over time. This is why we emphasize that a basic understanding of Electrical Safety Tips Every Homeowner Should Know is vital before you touch any part of your system.

The primary physical dangers of DIY electrical work include:

  • Severe Electrical Shock and Electrocution: Even standard 120-volt household current can be fatal under the right conditions. It takes as little as 50 milliamperes of current to cause heart failure.
  • Arcing and Flash Hazards: Accidentally bridging a hot wire to a grounded surface can cause a violent electrical arc, throwing off molten metal and causing severe burns or eye injuries.
  • Hidden Fire Hazards: A poorly made connection might work perfectly fine when you first turn the power back on. However, weeks or months later, the wire can begin to spark, overheat, and cause a devastating fire. Reading up on How to Prevent Electrical Fires in Your Home can help you understand the structural risks involved with DIY modifications.
  • Code Violations: Modern building codes are highly specific. If your work does not comply with the current National Electrical Code (NEC), you run the risk of creating a hazardous environment that will fail future inspections.

Safety Risks and Warning Signs of When Should You Call an Electrician vs DIY

Sometimes, your home's electrical system will try to warn you that something is wrong. Knowing how to recognize these red flags is crucial for your safety. If you are in the middle of a DIY project and encounter any of these warning signs, you should stop working immediately, turn off the power at the main breaker, and call a professional.

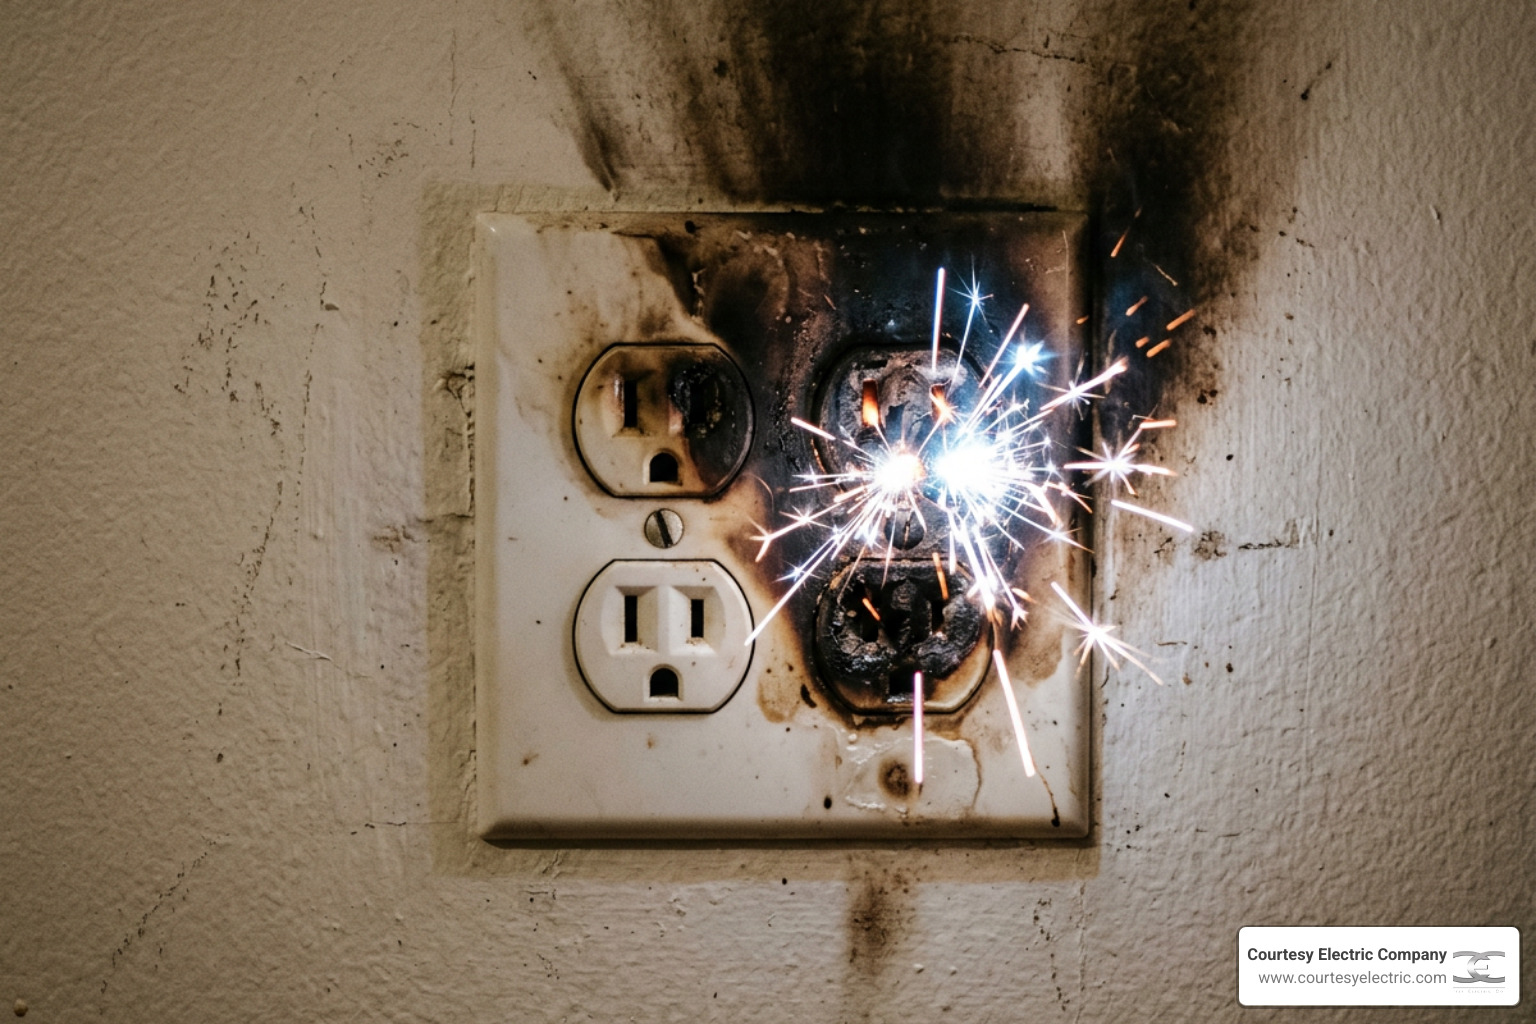
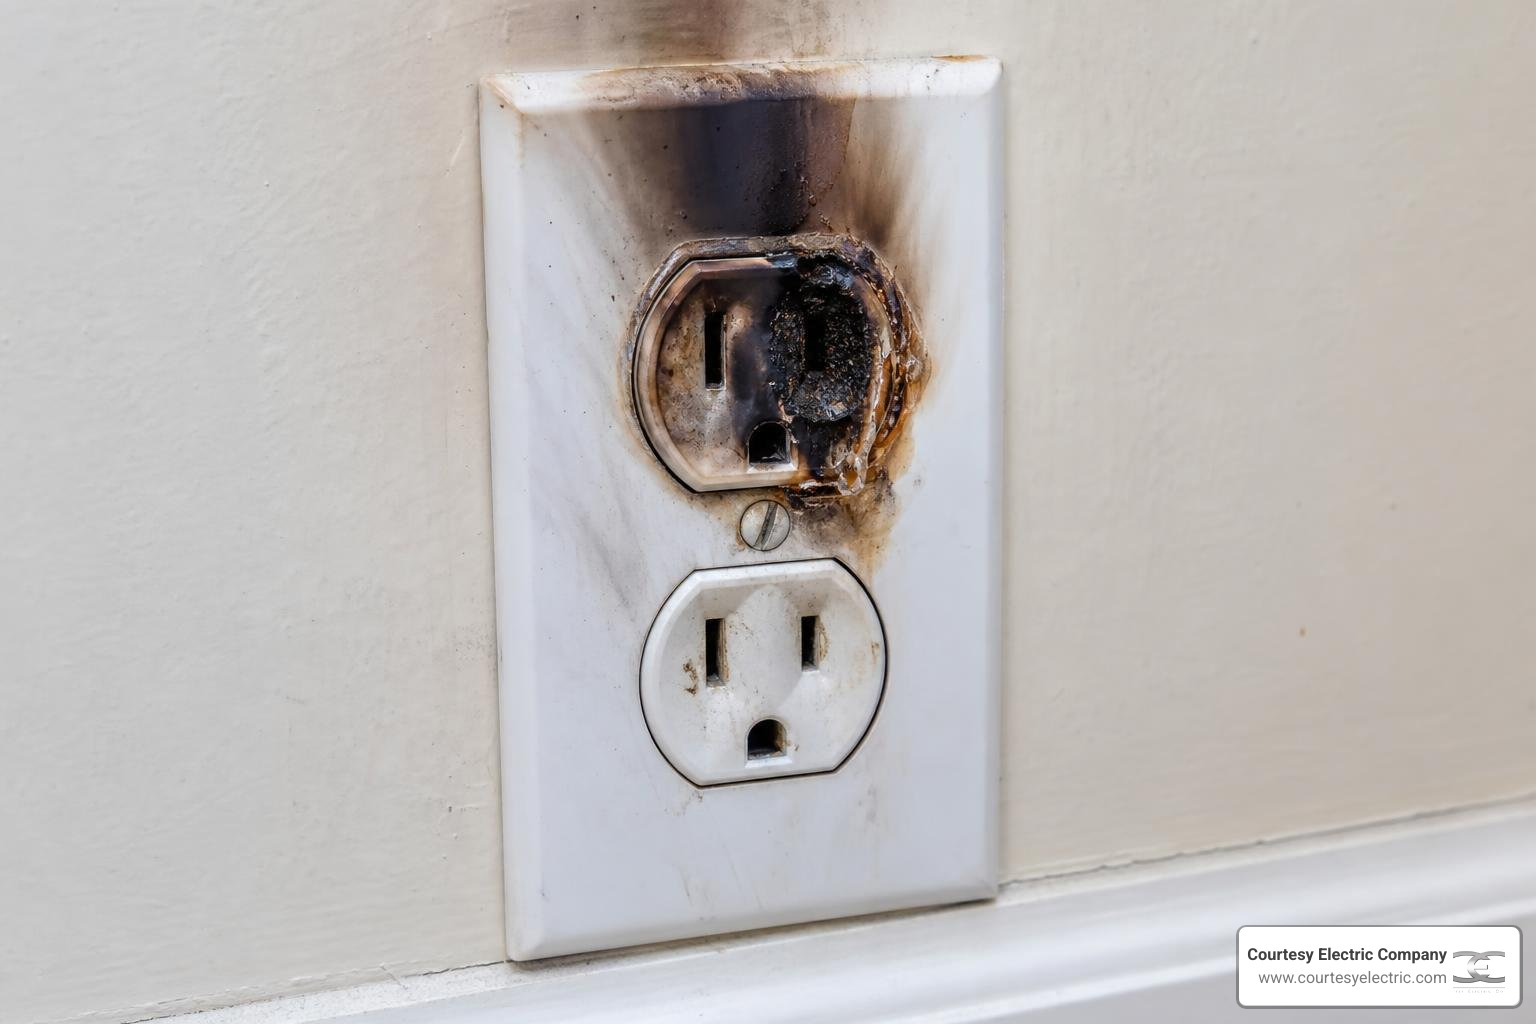
scorched electrical outlet warning sign

Keep a close eye out for these common danger signals:

  1. Burning Smells: If you smell a distinct plastic-like burning odor near an outlet, switch, or electrical panel, this is an immediate emergency. It indicates that plastic insulation is actively melting due to extreme heat or arcing.
  2. Flickering or Dimming Lights: While a single flickering bulb might just be loose, lights that flicker throughout a room or the entire house often point to a failing neutral wire, an overloaded circuit, or problems at the main panel.
  3. Buzzing or Sizzling Sounds: A healthy electrical connection is completely silent. If you hear humming, buzzing, or clicking behind your walls or inside an outlet box, it means electricity is jumping across a gap (arcing).
  4. Warm Outlets or Switch Plates: Outlets and switches should never feel warm to the touch. Warmth indicates excessive resistance and is a precursor to an electrical fire.

To protect your family, it is essential to learn How to Spot Electrical Problems Before They Become Dangerous so you can address issues before they escalate.

Financial and Insurance Consequences of When Should You Call an Electrician vs DIY

Many homeowners attempt DIY electrical work to save money. However, a single mistake can end up costing significantly more than hiring a licensed professional in the first place. The financial risks of unpermitted or improper DIY work extend far beyond the immediate cost of repairs.

One of the most critical risks involves homeowners insurance coverage. Most insurance policies contain clauses that exclude coverage for damages caused by unpermitted, unlicensed, or non-code-compliant electrical work. If a fire starts due to a DIY outlet installation or panel modification, your insurance provider has the legal right to deny your claim entirely. This leaves you personally liable for rebuilding costs, property damage, and any potential injuries.

Additionally, unpermitted work will almost certainly create major obstacles when you decide to sell your home. Real estate inspectors are trained to spot non-professional wiring, ungrounded outlets, and missing permits. When these issues are flagged, you will be required to hire a licensed electrician to tear out the improper work, pull retrospective permits, and redo the installation correctly before the sale can close.

To ensure your home remains compliant and fully protected, we recommend reviewing the Ultimate Electrical Fire Safety Checklist Home to evaluate your property's current safety standing.

Safe Electrical Tasks for Capable DIY Homeowners

We completely support homeowners who want to handle basic home maintenance. There are several simple, low-risk electrical tasks that you can safely complete yourself without needing a permit or professional training.

If you have a basic understanding of safety protocols, you can confidently tackle these projects:

  • Replacing Light Bulbs: This is the simplest task of all, but always make sure the light fixture is switched off before swapping bulbs.
  • Swapping Outlet Covers and Switch Plates: If your plastic plates are cracked or outdated, you can easily unscrew them and replace them. Just be careful not to touch the metal terminals on the sides of the outlet or switch inside the box.
  • Installing Plug-In Smart Devices: Smart plugs, smart bulbs, and plug-in home assistants do not require any physical wiring changes and are 100% safe to set up yourself.
  • Resetting Tripped Breakers: If a circuit shuts off because you ran too many appliances at once, you can safely reset the breaker at your panel. However, if the breaker trips again immediately, do not keep resetting it—this indicates a direct short circuit or a serious overload that requires professional diagnosis.
  • Testing and Resetting GFCI Outlets: You should press the "Test" button on your Ground Fault Circuit Interrupter (GFCI) outlets once a month to ensure they trip properly, then press "Reset" to restore power.
  • Low-Voltage Systems: Installing battery-powered or low-voltage devices, such as smart thermostats, video doorbells, or landscape lighting, is generally very safe because these systems operate on low voltage (typically 12 to 24 volts) that cannot deliver a dangerous shock.

Essential Safety Equipment and Knowledge for DIY Work

Before attempting even the simplest electrical DIY task, you must have the proper safety gear and a solid understanding of basic electrical concepts. Never attempt to "wing it" when working with live electricity.

At a minimum, your DIY toolkit should include:

  1. Non-Contact Voltage Tester: This is the single most important safety tool you can own. Before touching any wire, you must use this tester to verify that the power is completely off. Never rely solely on the label on your breaker panel.
  2. Insulated Hand Tools: Use screwdrivers and pliers with rubberized, insulated handles rated for electrical work.
  3. Rubber-Soled Shoes: Always wear dry, rubber-soled shoes to help insulate your body from the ground.
  4. Safety Glasses: Protect your eyes from potential sparks or debris when working inside electrical boxes.

Additionally, if you live in an older property, you should consult the Electrical Safety Checklist for Older Homes to identify potential hazards like ungrounded outlets, knob-and-tube wiring, or degraded insulation before starting any project.

Electrical Projects That Legally Require a Licensed Professional

While replacing a light switch plate is a great afternoon DIY project, major electrical work is strictly the domain of licensed professionals. Licensed electricians complete over 9,000 hours of rigorous training and field experience before they receive their credentials. This level of expertise is required because high-voltage systems and complex installations demand precision.

The following projects should never be attempted as DIY:

  • Electrical Panel Upgrades and Retrofits: Working inside your main service panel is incredibly dangerous. The main bus bars carry high-amperage current that remains fully energized even if you turn off the main breaker. Upgrading your service panel, installing a modern smart panel like a SPAN panel, or replacing old breakers must always be handled by a professional.
  • Adding New Circuits and Running New Wiring: Pulling new wires through walls, performing box fill calculations, and connecting new circuits to your breaker panel require deep technical knowledge to prevent overheating and fire risks.
  • EV Charger Installations: Modern electric vehicle chargers require dedicated 240-volt circuits that draw high amounts of continuous power. Improper installation can overload your home's electrical panel or damage your vehicle's battery.
  • Generator and Battery Backup Systems: Installing home standby generators (such as Generac or Cummins systems) or home battery storage (like Franklin Battery Storage) requires complex transfer switches to prevent "backfeeding." Backfeeding is a highly dangerous phenomenon where electricity flows backward into the utility lines, which can electrocute utility workers trying to restore power during an outage.
  • Whole-House Rewiring: If your home has outdated or failing wiring, a full replacement is required to keep your property safe. Understanding How Outdated Wiring Increases Fire Risk will help you see why this massive undertaking must be left entirely to a licensed crew.

How to Know If Your Project Requires a Permit

A simple rule of thumb to help you decide when should you call an electrician vs diy is checking whether the project requires a local building permit.

In Denver and throughout the Colorado Front Range, building codes require permits for any work that alters, extends, or upgrades your home's permanent electrical infrastructure. This includes:

  • Installing a new electrical panel or upgrading service amperage (e.g., from 100-amp to 200-amp service)
  • Adding new electrical outlets, switches, or light fixtures in entirely new locations
  • Running new wiring through walls or ceilings
  • Installing high-voltage appliances, EV chargers, generators, or solar battery systems

Permits are not just bureaucratic red tape; they exist to ensure your safety. When a permit is pulled, a third-party city or county inspector will visit your home to review the completed work and verify that it complies with the National Electrical Code (NEC). If you do not have a permit, the work is considered illegal and can result in fines, forced removal of the wiring, and major issues during future home sales.

Frequently Asked Questions About Home Electrical Work

What electrical tasks can I legally do myself in Colorado?

In most Colorado municipalities, homeowners are legally allowed to perform minor, like-for-like replacements without a permit. This means you can swap an existing standard outlet with a new standard outlet, replace an old light fixture with a new one in the exact same location, or replace a standard single-pole light switch.

However, you must still comply with all local ordinances and safety regulations. You are not legally permitted to add new wiring, install new circuits, or perform service panel modifications yourself. If you reside in a multi-family home, townhome, or condo, local codes often prohibit any DIY electrical modifications due to the shared safety risks to your neighbors.

How does unpermitted DIY electrical work affect my home's resale value?

Unpermitted electrical work is a major red flag for home buyers and real estate inspectors. During a home inspection, an inspector will easily spot non-professional wiring techniques, overfilled junction boxes, or ungrounded systems.

If unpermitted work is discovered, Colorado disclosure laws require you to inform potential buyers. This often leads to buyers demanding that you pay to have a licensed electrician evaluate and redo the work, or they may negotiate a significant reduction in your home's sale price. In some cases, buyers will simply walk away from the deal entirely to avoid inheriting a fire hazard.

When is a flickering light or warm outlet considered an emergency?

A warm outlet or switch plate is always considered an active electrical emergency. It indicates that electricity is meeting extreme resistance or that active arcing is occurring behind the wall, which can ignite a fire at any moment. You should immediately turn off the circuit breaker for that room and contact a professional.

Similarly, if your lights are flickering violently, or if half of your home suddenly loses power while the other half remains on, you may have a dropped neutral wire from the utility line. This can cause severe voltage imbalances that can destroy your appliances and create fire hazards. To learn more about protecting your property, read through these Electrical Fire Prevention Tips for Homeowners.

Conclusion

Taking care of your home is a great source of pride, but keeping your family safe should always be your top priority. While replacing switch plates or setting up smart plugs are excellent DIY projects, complex electrical work requires professional training, specialized tools, and strict adherence to local building codes.

For over four decades, Courtesy Electric Company has been the trusted name for residential electrical services across Denver and the Colorado Front Range, including Parker, Highlands Ranch, and Black Forest. Whether you are looking to upgrade your electrical panel, protect your home from winter outages with a Generac or Cummins standby generator, install a SPAN smart panel, or set up a Franklin battery storage system, our experienced team is here to help. We are dedicated to providing quality installations with integrity and dependability, and we are happy to offer free estimates on all new installations.

If you are still weighing your options on when to call an electrician vs DIY, it is always safest to consult the experts. Schedule a professional electrical service with Courtesy Electric Company today, or reach out to our friendly team for a free estimate on your next home upgrade!

How to Calculate Home Generator Size in 5 Easy Steps

Why Getting the Right Generator Size Is the Most Important Decision You'll Make for Home Backup Power

home standby generator installed outside a house during a power outage

If you're wondering what size generator do I need for my home, here's the short answer:

Home Type Home Size Recommended Generator Size
Gas appliances Up to 2,000 sq ft 14–16 kW
Gas appliances 2,000–3,000 sq ft 16–18 kW
Mixed fuel (gas heat, electric AC) Up to 2,500 sq ft 18–22 kW
All-electric (heat pump, electric water heater) Any size 22–24 kW + load management
Essentials only (any home) Any size 7,500–10,000 W portable

These are starting points. Your actual number depends on your appliances, your fuel type, and your peak electrical load — all of which we'll walk through below.

Power outages in Colorado are no longer rare events. Snowstorms, high winds, and increasing grid demand across the Front Range mean many homeowners lose power multiple times a year — sometimes for days at a stretch. A generator can keep your heat running, protect your pipes from freezing, and keep your refrigerator and medical devices online when the grid goes down.

But here's the problem most homeowners run into: they pick a generator based on square footage or a vague sense of "bigger is better," and end up with a unit that either stalls the moment the air conditioner kicks on, or costs far more than necessary to buy and fuel. Getting the sizing right from the start is the single most important step in the whole process.

I'm David Meyer, Vice President of Courtesy Electric, a Colorado electrical contracting company with roots going back to 1976. Over the years, our team has helped hundreds of Front Range homeowners answer the question of what size generator do I need for my home — from small mountain cabins to large all-electric residences in the Denver metro. In the steps below, I'll walk you through exactly how we approach that calculation so you can go into the process informed.

infographic showing 5 steps to calculate home generator size: list appliances, add running watts, account for starting

What Size Generator Do I Need for My Home?

When starting your research, it is easy to get overwhelmed by the numbers. You will see terms like "running watts," "starting watts," "surge capacity," and "kilowatts (kW)." To make an informed decision, you first need to understand how these metrics translate to the physical equipment sitting outside your home.

At its core, determining what size generator do I need for my home is a balancing act. You want a system with enough capacity to handle your peak electrical load during an outage without paying for excess capacity you will never use.

To understand the mechanics of how these backup systems operate once they are installed, it helps to read up on How Does a Standby Generator Work. For local homeowners, there are specific advantages to choosing a permanently installed system, which we cover in our guide on Whole Home Generator Benefits for Colorado Homeowners.

Determining What Size Generator Do I Need for My Home Based on Appliance Load

Many online guides attempt to size generators purely by the square footage of a home. This is a highly flawed approach. Two identical 2,500-square-foot homes in the Denver metro area can have vastly different power requirements:

  • Home A (Gas-Appliance Profile): Uses natural gas for heating, water heating, and cooking. Its primary electrical loads are a refrigerator, some lights, home electronics, and a furnace blower motor. This home might have a peak running load of only 8,000 to 13,000 watts, meaning a 14 kW to 18 kW generator is more than enough for a full-home backup.
  • Home B (All-Electric Profile): Uses an electric heat pump, an electric water heater, an electric range, and perhaps an EV charger. This home's simultaneous peak load can easily exceed 28,000 watts, requiring a much larger 22 kW to 24 kW generator equipped with smart load management.

To find your true requirement, you must calculate your actual appliance load. This means listing every device you want to power, finding its running wattage, and accounting for the high startup surge of motor-driven appliances (like your refrigerator, sump pump, and central air conditioner).

Why Sizing Matters: What Size Generator Do I Need for My Home to Avoid Stalling?

What happens if you get this calculation wrong?

If your generator is too small, the consequences are immediate and frustrating. The most common failure mode reported by homeowners during a summer outage is a generator stalling the moment the central AC compressor tries to start. When a motor-driven appliance starts up, it demands a massive, instantaneous burst of electrical current. If the generator cannot supply this surge, its voltage drops, the engine bogs down, and the unit's circuit breaker trips to protect the system. In worse-case scenarios, chronic under-sizing can cause damage to sensitive home electronics due to voltage fluctuations.

On the flip side, over-sizing your generator by too much is also a mistake. While a larger generator will easily handle any load you throw at it, it will cost more upfront and consume significantly more fuel. Standby generators run most efficiently when loaded to 50% to 75% of their rated capacity. Running a massive generator under a very light load (a condition known as "wet stacking" in diesel units, or simple fuel wastage in natural gas and propane systems) is inefficient and can lead to premature engine wear.

How to Calculate Your Home's Peak Electrical Load in 5 Steps

Calculating your home’s peak electrical load does not require an engineering degree. By following this structured, five-step process, you can build a highly accurate wattage worksheet that matches your family's actual lifestyle.

Before diving into the steps, it is worth noting that proper system design pays off during installation. You can learn more about this phase in our overview of Generator Installation What to Expect. Additionally, once your system is up and running, keeping it in top shape is essential. Be sure to review Spring Generator Maintenance After Winter to ensure your system is ready for summer storm season.

Here is the step-by-step method we use to calculate your home's peak load:

Step 1: List Essential Appliances

Start by dividing your home's electrical loads into two categories: "Must-Haves" and "Nice-to-Haves."

During a winter blizzard in Parker or Highlands Ranch, your must-haves will likely include:

  • Heating system (furnace blower or heat pump)
  • Water heater (especially if electric)
  • Sump pump and well pump (if your home relies on a well)
  • Refrigerator and freezer
  • Key lighting circuits
  • Home network (modem and Wi-Fi router)
  • Medical equipment (if applicable)

Your "Nice-to-Haves" might include your central air conditioner, clothes dryer, dishwasher, and double ovens. Write these down on a simple spreadsheet or piece of paper.

Step 2: Identify Running Watts

Every electrical appliance has a manufacturer's nameplate (usually a silver or black sticker) that lists its electrical specifications. Look for the "Running Watts" (sometimes listed as "Continuous Watts").

If the nameplate only lists Volts and Amps, you can easily calculate the wattage using this simple formula:

$$\text{Watts} = \text{Volts} \times \text{Amps}$$

For example, if a refrigerator nameplate reads 120V and 6.5 Amps:

$$120 \times 6.5 = 780 \text{ Watts}$$

Note: A typical home refrigerator runs at approximately 300 to 800 running watts once its compressor is stabilized.

Step 3: Account for Starting Watts and Motor Surge

Appliances with electric motors require an extra burst of electricity to break the motor's inertia and get it spinning. This is known as "Starting Watts," "Surge Watts," or "Locked Rotor Amps" (LRA). Starting watts are typically 2 to 3 times higher than running watts and last for only a fraction of a second.

To calculate your peak starting demand, you do not need to add up the starting watts for every appliance in your home. It is highly unlikely that your refrigerator, sump pump, and air conditioner will all start at the exact same millisecond. Instead, use this industry-standard rule of thumb:

  1. Sum the running watts of all the appliances you want to run simultaneously.
  2. Identify the single appliance with the highest starting surge (usually your central AC compressor or well pump).
  3. Add that single highest starting surge value to your total running watts.

This gives you a realistic target for your generator's maximum surge capacity.

Step 4: Apply the Safety Buffer

Never design an electrical system to run at 100% capacity. To prevent unexpected overloads and allow headroom for future appliance purchases (such as adding a hot tub, finishing a basement, or installing an EV charger), you should always add a safety factor.

We recommend adding a 20% to 25% safety margin to your calculated total.

$$\text{Minimum Generator Size} = \text{Calculated Peak Load} \times 1.20$$

This safety margin ensures your generator runs comfortably within its optimal operating sweet spot and won't trip its main breaker if someone accidentally runs the microwave while the vacuum cleaner is plugged in.

Step 5: Convert Units and Select Your Generator

Generator manufacturers rate their standby units in Kilowatts (kW). To convert your final wattage calculation into kilowatts, simply divide by 1,000:

$$\text{Kilowatts (kW)} = \frac{\text{Total Watts}}{1,000}$$

For example, if your calculated load (including the safety buffer) is 15,500 watts:

$$\frac{15,500}{1,000} = 15.5 \text{ kW}$$

In this scenario, you would round up to the next standard generator size, which would be an 18 kW unit.

Altitude Derating: A Critical Factor for Colorado Homeowners

If you live along the Front Range or up in the foothills, there is one more crucial calculation you must make: altitude derating.

Internal combustion engines need oxygen to burn fuel. Because the air is thinner at high elevations, generators lose power as altitude increases. The industry-standard rule is that a generator loses approximately 3.5% of its rated power for every 1,000 feet of elevation above 500 feet.

If you live in Denver (approx. 5,280 feet) or Black Forest (approx. 7,300 feet), your generator will produce significantly less power than its faceplate rating.

  • At 5,000 feet: A generator loses roughly 15% of its capacity. A "20 kW" generator will only deliver about 17 kW of usable power.
  • At 7,500 feet: A generator loses roughly 24% of its capacity. That same "20 kW" generator will only deliver about 15.2 kW.

Our team always factors in altitude derating when designing systems for Front Range homeowners to ensure your generator performs flawlessly when a mountain blizzard hits.

Sizing by Home Profile: 2,000 Sq Ft Homes and Central Air Conditioning

To give you a clearer picture of how these calculations work in the real world, let's look at some common home configurations we encounter throughout Denver, Parker, and the wider Front Range.

If you are located in the high country, you can read our specialized Generators Installation in Fraser Co page or check out the Generators Fraser Co Complete Guide for localized high-altitude advice.

Sizing for a 2,000 Square Foot House

A 2,000-square-foot home is the sweet spot for many Colorado families. However, the fuel configuration of the home dictates the generator size:

Appliance Profile Key High-Draw Appliances Typical Peak Load Recommended Standby Generator
Gas-Appliance Profile Gas furnace, gas water heater, gas range, standard refrigerator, lights, electronics. 8,000 – 11,000 W 14 kW – 16 kW
Mixed-Fuel Profile Gas furnace, electric water heater, electric oven, 3-ton central AC unit. 14,000 – 18,000 W 18 kW – 20 kW
All-Electric Profile Electric heat pump, electric water heater, electric cooktop, clothes dryer. 22,000 – 26,000 W 22 kW – 24 kW (with Load Management)

As you can see, transitioning from gas to electric appliances dramatically increases your backup power requirements. This is why we perform a comprehensive, on-site load evaluation before recommending a specific model.

Sizing for Central Air Conditioning

Central air conditioning is often the single largest electrical load in a modern home. Sizing a generator to run an AC unit requires looking closely at the compressor's startup demand.

A standard 4-ton central AC unit typically requires about 4,000 to 5,000 running watts, but its startup surge can easily reach 12,000 to 16,000 watts.

  • Without a Soft Start Kit: Running a 4-ton AC unit along with your home's basic essentials on a standard 14 kW air-cooled generator is highly risky. The massive startup surge will often stall the generator engine.
  • With a Soft Start Kit: A soft starter is an inexpensive accessory that can be installed on your AC compressor. It electronically smooths out the startup current, reducing the initial surge by up to 60%. This simple upgrade allows a smaller, more fuel-efficient generator (like a 14 kW or 18 kW unit) to easily power your central air conditioning without stalling.

For very large homes with multiple AC zones or exceptionally heavy electrical loads, we sometimes recommend upgrading to a larger, liquid-cooled generator. These units feature automotive-style engines that handle heavy motor starting surges with ease.

Frequently Asked Questions about Generator Sizing

When choosing a backup power system, homeowners often ask similar questions. Here are clear answers to help you navigate the process.

If you already own a system and are noticing performance issues during testing, you should read about Signs Your Generator Needs Professional Attention. To keep your investment running smoothly for decades, consult our guide on How Often Should You Service Your Standby Generator.

What is the difference between running watts and starting watts?

Running watts (also known as rated or continuous watts) are the constant, steady-state power an appliance needs to keep operating. Starting watts (also known as surge or peak watts) represent the brief, intense burst of power an electric motor needs for the first few seconds when starting from a dead stop. Always size your generator's surge capacity to match your highest starting watt load.

Can a 14 kW generator run a 4-ton central AC unit?

In a typical gas-appliance home, a 14 kW generator can comfortably run your lighting, refrigerator, home electronics, and basic appliances. However, a standard 4-ton AC unit has a startup surge of up to 16,000 watts, which exceeds the continuous rating of a 14 kW generator.

To run a 4-ton AC on a 14 kW generator, you must either:

  1. Install a Soft Start Kit on your AC compressor to lower the starting surge.
  2. Use a Load Management Module to temporarily shed other high-draw appliances when the AC kicks on.
  3. Size up to a 16 kW or 18 kW generator to provide native headroom for the surge.

Do I need a load management module for my home generator?

A load management module (sometimes called a smart switch or circuit-shedding controller) is an incredibly useful piece of technology. It monitors your generator's total load in real-time. If your generator is running close to its capacity and a high-draw appliance (like an electric water heater or AC unit) turns on, the module will temporarily "shed" (turn off) non-essential circuits for a few minutes to prevent the generator from overloading.

Using load management allows you to install a smaller, more affordable, and more fuel-efficient generator while still protecting your home from unexpected blackouts. It is highly recommended for all-electric homes.

Conclusion

Determining what size generator do I need for my home is not a decision you have to make based on guesswork. By listing your essential appliances, calculating running and starting wattages, applying a safety margin, and factoring in Colorado's unique altitude derating, you can select a backup power system that provides total peace of mind without breaking your budget.

At Courtesy Electric Company, we have been serving homeowners across Denver, Parker, Highlands Ranch, Black Forest, and the entire Front Range since 1976. As certified installers of industry-leading backup systems, including Generac and Cummins generators, Franklin battery storage, and SPAN smart panels, we handle the entire process from initial load calculation to final inspection.

If you are ready to protect your home and family from the next major grid outage, we are here to help. Contact us today for a free, professional electrical load assessment and estimate on our electrical-service.

In Depth Guide to Circuit Breaker Tripping Frequently

Circuit Breaker Tripping Frequently What It Means

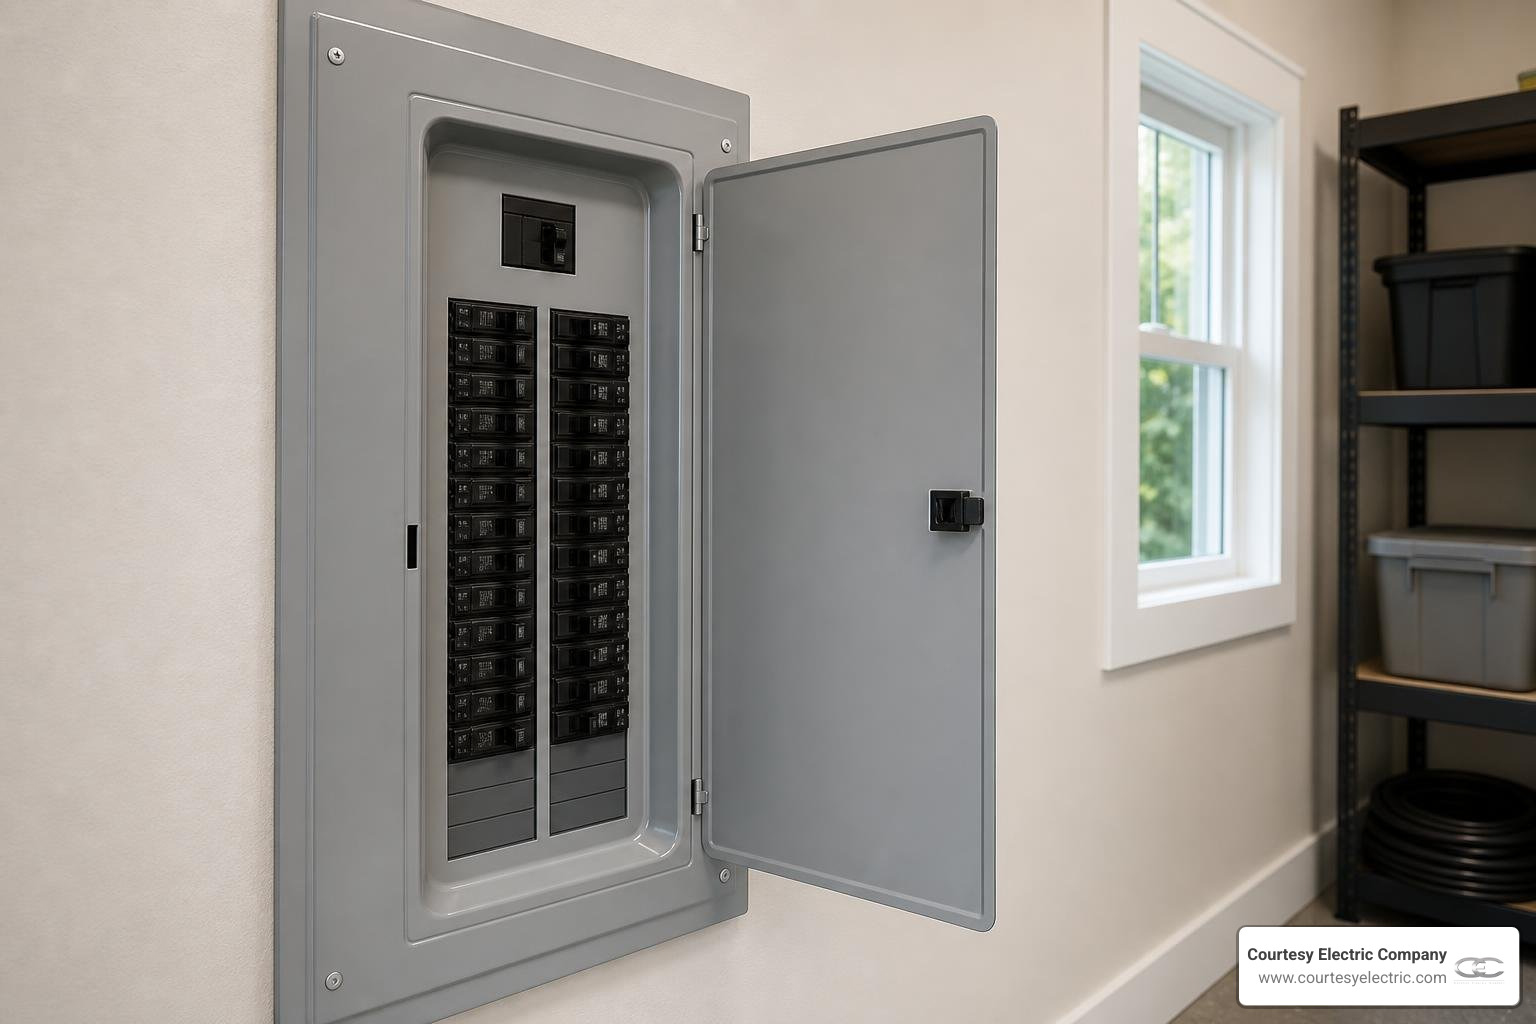
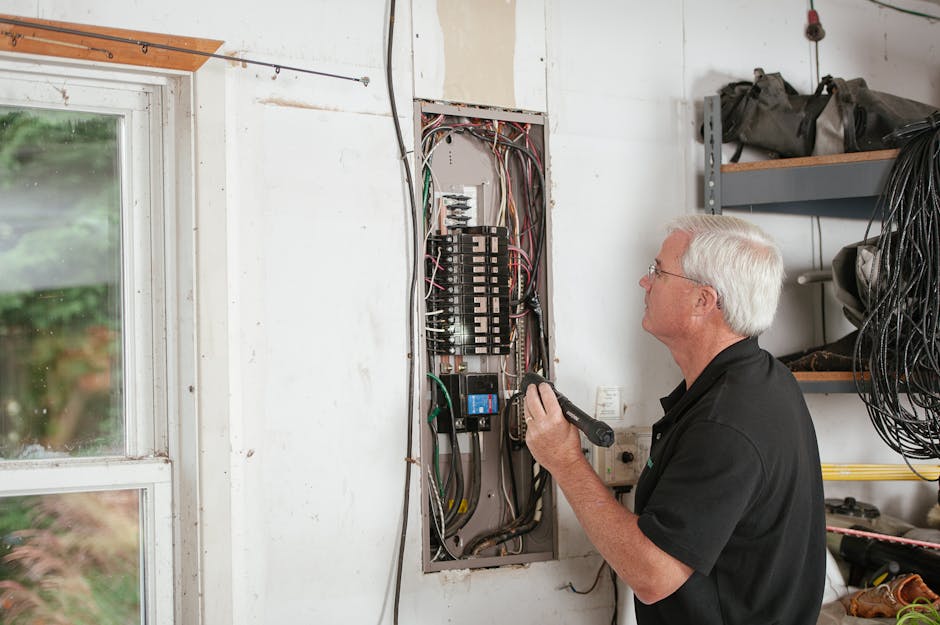
circuit breaker panel in a home

Circuit breaker tripping frequently what it means is something every homeowner should understand — because it's rarely just a minor annoyance. When your breaker trips, it's your electrical system sending you a clear signal that something needs attention.

Quick Answer: What Does a Frequently Tripping Circuit Breaker Mean?

A circuit breaker that keeps tripping is telling you one of the following:

  • Overloaded circuit - Too many devices are drawing power from a single circuit at the same time
  • Short circuit - A hot wire and a neutral wire have made contact, causing a dangerous surge of current
  • Ground fault - A hot wire is contacting a ground wire or a grounded surface, often in a damp area
  • Failing breaker - The breaker itself is worn out and tripping even under normal load
  • Outdated panel - Your electrical panel can't keep up with your home's modern power demands

A single trip after running too many appliances at once is usually nothing to worry about. But if it keeps happening, your electrical system is warning you — and that warning is worth taking seriously. According to the NFPA, electrical distribution and lighting equipment caused an average of 31,647 home structure fires per year between 2019 and 2023, resulting in $1.6 billion in property damage annually.

Here in Colorado, Front Range homes face unique pressures: cold winters push heating systems hard, EV chargers and smart home devices are adding new loads to older panels, and many homes were wired decades before those demands existed. That combination makes understanding your breakers more important than ever.

I'm David Meyer, Vice President of Courtesy Electric Company — a Colorado-based electrical contractor with roots going back to 1976. Over the decades, I've seen how circuit breaker tripping frequently, and what it means for a home's safety, is one of the most misunderstood issues homeowners face. In this guide, I'll walk you through exactly what's happening inside your panel, how to respond safely, and when it's time to call in a professional.

infographic showing five common causes of frequent circuit breaker tripping with warning signs for each

When we think about our home’s electrical system, we often treat it like plumbing: power flows through the wires, out of the outlets, and into our devices. But unlike plumbing, where a leak is easily visible, electrical issues can hide behind drywall for years. That is why your breaker panel exists. It is the brain and the safety shield of your home’s electrical infrastructure.

A single, isolated trip is often just a sign that you asked too much of a single room’s outlets. Perhaps you tried to run a high-wattage space heater while vacuuming the carpet. But when you experience repeated tripping, the situation changes from a simple user error to a structural warning.

A breaker that keeps tripping means your electrical system is repeatedly operating outside of its safe design limits. It is a protective response, not a failure of the breaker itself. When a breaker trips, it physically opens the circuit, stopping the flow of electricity before the copper wiring inside your walls can heat up to the point of melting its insulation or igniting nearby wooden framing. To help you protect your family, we have compiled a guide on How to Spot Electrical Problems Before They Become Dangerous to show you what else to look out for.

Is it safe to keep resetting a breaker that trips repeatedly?

The short answer is absolutely not. We understand the temptation. You are in the middle of working in your home office in Highlands Ranch, or cooking dinner in Parker, and the power cuts out. You walk down to the basement, flip the plastic switch back to "ON," and go back to your day.

However, resetting a breaker that trips repeatedly is incredibly risky. Each time a breaker trips, it is responding to an active hazard. By forcing it to reset without resolving the root cause, you are subjecting your wiring, connections, and appliances to cumulative thermal and mechanical stress.

Think of it this way: every time electricity surges through a short circuit or an overloaded wire, it generates intense, localized heat. If you reset the breaker over and over, that heat builds up. Eventually, the insulation on your wires will degrade, leading to a permanent failure or, worse, an electrical fire. For more essential tips on keeping your household out of harm's way, read our Electrical Safety Tips Every Homeowner Should Know.

Why does my breaker trip when nothing seems to be running?

It can be incredibly baffling when a breaker trips in the middle of the night or in a room where absolutely nothing is turned on. When this happens, homeowners often assume the breaker itself must be broken. While a bad breaker is possible, there are other hidden factors at play:

  • Phantom Loads: Many modern electronics draw power even when turned "off." Things like chargers, smart TVs, game consoles, and microwave clocks continuously pull small amounts of electricity. If a circuit is already sitting near its maximum capacity, these background loads can push it over the edge.
  • Background Appliances: You might not think anything is running, but hidden appliances like sump pumps, water heaters, refrigerator compressors, or outdoor security lighting might share that same circuit and cycle on automatically.
  • Hidden Short Circuits: If a wire inside your wall has been damaged by pests, or if a connection inside an outlet box has come loose, a short circuit can occur completely independent of whether you have appliances plugged in.

Over time, older home wiring degrades, making these mystery trips more common. Understanding How Outdated Wiring Increases Fire Risk can shed light on why older homes in historic areas of Denver experience these frustrating issues.

The Three Main Causes of a Tripping Breaker

To solve the mystery of why your electricity keeps cutting out, we must look at the three primary electrical phenomena that trigger a breaker's safety mechanisms.

an overloaded electrical outlet with too many power strips and plugs connected

Electrical Issue What Causes It? Danger Level Primary Warning Signs
Overloaded Circuit Too many high-draw appliances running simultaneously on one line. Moderate Warm outlets, flickering lights, breaker trips after several minutes of use.
Short Circuit A hot wire makes direct contact with a neutral wire, dropping resistance to zero. High Burning smell, black soot around outlets, breaker trips instantly upon resetting.
Ground Fault A hot wire touches a ground wire or a metal box, often due to moisture. High Tripped GFCI outlets, shock sensations when touching appliances, frequent trips in kitchens/baths.

Overloaded Circuits: The Most Common Culprit

An overloaded circuit is the most common reason why your circuit breaker keeps tripping. It is a simple matter of math. Every circuit in your home is rated for a specific maximum amperage—usually 15 amps or 20 amps.

A 15-amp circuit can safely handle about 1,800 watts of continuous electrical load, while a 20-amp circuit can handle around 2,400 watts. If you plug in a hair dryer (1,500 watts) and a space heater (1,500 watts) on the same 15-amp circuit, you are asking for 3,000 watts of power. The bimetallic strip inside your thermal-magnetic breaker will slowly heat up from this excess current, eventually bending and tripping the breaker to save your wires from melting.

To prevent this, you need to distribute your high-wattage appliances across different circuits. We recommend reviewing the Ultimate Electrical Fire Safety Checklist Home to evaluate how your home's appliances are distributed.

Short Circuits: A Direct Path of Low Resistance

While an overload is a slow, thermal process, a short circuit is a sudden, violent event. In a healthy circuit, electricity travels along the hot wire, passes through the resistance of an appliance (like a lightbulb or toaster), and returns safely along the neutral wire.

A short circuit occurs when the hot wire makes direct contact with the neutral wire before reaching the appliance. Because there is no longer any resistance to slow down the electrical current, the flow of electricity spikes instantly to dangerous levels.

The electromagnetic coil inside your breaker detects this sudden spike and trips the breaker in a fraction of a second. Short circuits are often caused by loose wire connections, damaged appliance cords, or insulation chewed away by pests. If you suspect a short, check out our guide on Electrical Fire Prevention Tips for Homeowners to protect your property.

Ground Faults: When Current Escapes the Circuit

A ground fault is a specific type of short circuit. It happens when the hot wire comes into contact with the ground wire, a grounded metal junction box, or a grounded portion of an appliance.

Ground faults are particularly common in areas where moisture is present, such as kitchens, bathrooms, basements, and outdoor patios. Water is an excellent conductor of electricity, and if it seeps into an outlet or outdoor fixture, it can easily bridge the gap between a hot wire and the ground.

Because ground faults present a severe shock hazard, the National Electrical Code requires Ground Fault Circuit Interrupter (GFCI) protection in these areas. If you live in an older home that lacks these modern safety upgrades, our Electrical Safety Checklist for Older Homes is an invaluable resource for identifying where your home might be vulnerable.

How to Safely Reset a Tripped Breaker and Spot Warning Signs

If a breaker trips in your home, you should always follow a safe, structured process to restore power. Do not simply rush to the panel and flip switches blindly.

  1. Unplug Devices: Before you touch the panel, walk through the area that lost power. Unplug any high-draw appliances that were running when the power went out. This prevents an immediate re-overload when you turn the power back on.
  2. Locate the Panel: Open your electrical panel door. Look for a breaker toggle switch that is not aligned with the rest. Tripped breakers usually sit in a middle position between "ON" and "OFF," often showing a small red or orange indicator window.
  3. Stand to the Side: For safety, stand slightly to the side of the panel rather than directly in front of it, and look away as you flip the switch. Wearing safety glasses is a great precaution.
  4. The Full Off Trick: You cannot simply flip a tripped breaker back to "ON." You must first push the switch firmly to the "OFF" position until you hear a distinct click. This resets the internal spring mechanism. Once it is fully off, flip it back to "ON."
  5. Restore Power Gradually: Walk back to the room and plug your devices back in one by one, waiting a minute between each to ensure the circuit remains stable.

If you are hesitant about handling your electrical panel, it is always best to defer to the experts. Read our guide on When to Call an Electrician vs DIY to understand where to draw the line.

Circuit Breaker Tripping Frequently What It Means When It Trips Instantly

If you reset a breaker and it trips instantly—with a loud click or even a visible spark—stop touching it.

An immediate trip upon reset is a classic diagnostic signal that a severe short circuit or ground fault is active on the line. The breaker is doing its job perfectly by refusing to allow electricity to flow into a dangerous path. Continuously trying to force the breaker to stay on during an active short circuit can cause catastrophic damage to your panel and poses an immediate fire risk. Leave the breaker off and call a licensed professional. To learn how to read these silent warnings, consult our article on How to Spot Electrical Problems Before They Become Dangerous.

Warning Signs of a Failing or Bad Circuit Breaker

Like any mechanical device, circuit breakers do not last forever. While high-quality breakers can perform reliably for decades, they eventually wear out, weaken, or suffer internal damage. Here are the clear warning signs that a breaker itself has gone bad:

  • The panel or breaker feels hot to the touch.
  • You notice a persistent burning plastic or metallic odor near the electrical panel.
  • The breaker toggle feels loose, wobbly, or refuses to click into the "OFF" or "ON" position.
  • You see visible scorch marks, soot, or corrosion on the breaker casing or the metal bus bars behind it.
  • The breaker trips even when absolutely nothing is plugged into the circuit.

If you notice any of these warning signs, especially in an older home, it is a clear indicator of structural wear. Refer to our Electrical Safety Checklist for Older Homes to evaluate your system's components.

When to Upgrade Your Electrical Panel or Add Dedicated Circuits

Sometimes, the issue isn't a short circuit, a ground fault, or even a bad breaker. Sometimes, your home's electrical panel simply cannot keep up with the demands of modern life.

Circuit Breaker Tripping Frequently What It Means for Your Panel Capacity

Many homes across the Colorado Front Range—especially those built in the 1970s, 80s, or early 90s—were built with 100-amp electrical panels. At the time, 100 amps was plenty of power for a family's needs.

But today, our homes are packed with high-draw electronics. Between central air conditioning, hot tubs, electric vehicle (EV) charging stations, induction cooktops, and smart home systems, a 100-amp panel can easily become overloaded. In fact, approximately 31% of single-family homes in the United States still operate on panels rated at 100 amps or less.

If your breakers are tripping frequently because you are running standard household appliances, it is a sign that your panel is operating at its maximum capacity. Upgrading to a 200-amp service, or installing a modern SPAN smart panel, allows you to monitor your energy usage in real-time and distribute loads intelligently. Discover how to prepare your home for the next generation of technology by reading How to Future-Proof Your Home Electrical System.

The Importance of Routine Electrical Inspections

The best way to deal with a frequently tripping breaker is to prevent it from happening in the first place. Regular preventative maintenance is key to keeping your home safe and functional.

Loose connections, minor corrosion, and outdated components can all be caught during a routine electrical inspection before they escalate into costly repairs or safety hazards. If you are wondering how often you should have a professional look over your panel and wiring, we have broken down the recommended schedules in our guide on How Often Should You Have Your Electrical System Inspected.

Conclusion

A circuit breaker that trips frequently is not a nuisance to be ignored or bypassed with tape—it is a vital safety system working exactly as designed to protect your home and family. Whether you are dealing with a simple overloaded circuit, a hidden ground fault in a damp basement, or an outdated panel that is struggling to keep up with your modern lifestyle, identifying the root cause is the only way to ensure lasting peace of mind.

At Courtesy Electric Company, we have been serving homeowners across Denver, Parker, Highlands Ranch, Black Forest, and the entire Colorado Front Range since 1976. Our mission is built on quality, integrity, and dependability. Whether you need a simple breaker replacement, a full 200-amp panel upgrade, a SPAN smart panel installation, or a home standby generator to protect against unpredictable Colorado weather, our team of experienced professionals is here to help.

Don't guess when it comes to your family's safety. Schedule professional electrical service today and let our experts restore safety, balance, and reliability to your home’s electrical system.

A Practical Guide to Why Your Home Needs More Electrical Capacity

Why Your Home Needs More Electrical Capacity Than Ever

modern home electrical panel with circuit breakers in a well-lit residential utility room

Why your home needs more electrical capacity than ever comes down to one simple fact: the average American household now runs appliances and devices that simply did not exist when most homes were wired.

Here is why modern homes are outgrowing their electrical systems:

  • EV chargers draw 32-48 amps continuously on a dedicated circuit
  • Heat pumps add 30-60 amps of demand while removing little to no existing electrical load
  • Induction ranges pull up to 50 amps, replacing gas appliances that used almost no electricity
  • Hot tubs require a dedicated 40-amp circuit
  • Home offices, multiple screens, and smart devices layer constant background loads on top of everything else

A 100-amp panel was perfectly adequate in 1990 for a refrigerator, a furnace fan, a television, and a window air conditioner. In July 2026, that same panel may be asked to power an EV charger, a heat pump, an induction range, a hot tub, and a home office simultaneously — a combined demand that can hit 131% of its safe limit.

That gap between what your panel was built for and what your household actually needs is exactly what this guide is designed to help you understand and solve.

I'm David Meyer, Vice President of Courtesy Electric, and after decades of hands-on work upgrading electrical systems across Denver and the Colorado Front Range, I have seen why your home needs more electrical capacity than ever — and what it actually takes to keep pace with modern demands safely and affordably. In the sections ahead, I will walk you through how to assess your current system, calculate your real load, and choose the right path forward.

Modern household electrical load vs 1990s load: EV charger 40A, heat pump 50A, induction range 50A, hot tub 40A vs 1990s

Why Your Home Needs More Electrical Capacity Than Ever

For decades, a 100-amp electrical panel was the gold standard for residential properties. It easily managed a household's baseline needs, which typically consisted of lighting, a few kitchen appliances, a television, and a standard HVAC blower motor. However, as we transition deeper into a fully electrified era, that baseline is no longer sufficient.

The shift from fossil fuels to clean electricity has fundamentally altered how our homes consume power. By swapping out gas furnaces for high-efficiency electric heat pumps and trading traditional gas stoves for high-performance induction cooktops, we are shifting massive energy demands onto our home's electrical backbone.

Unlike older appliances that cycled on and off briefly, modern electrical assets often represent continuous loads. A continuous load is defined by the National Electrical Code (NEC) as a load where the maximum current is expected to continue for three hours or more. When you plug in an electric vehicle, it draws a heavy, uninterrupted stream of power for several hours straight. This steady draw places continuous thermal and electrical strain on your panel.

Understanding How Electrification Is Changing Home Electrical Needs is the first step toward avoiding unexpected system failures. To keep your household running smoothly without overloaded circuits, learning How to Future-Proof Your Home Electrical System is essential.

The Generational Gap: Why Your Home Needs More Electrical Capacity Than Ever

Consider a typical home built in 1994 along the Colorado Front Range. At that time, residential electrical systems were designed for a world of incandescent light bulbs, corded landline phones, and perhaps a single desktop computer shared by the entire family. The daily electrical load was highly predictable and relatively low.

Today, that same home in Denver, Parker, or Highlands Ranch is operating in a completely different reality. We now live in multi-screen households where multiple family members work from home. Home offices require dedicated setups with multiple monitors, high-speed network routers, and localized climate control.

When you add smart home systems, home theater setups, and continuous charging for laptops, tablets, and phones, the background idle load of a modern home can easily surpass the peak electrical demand of a 1990s household. This massive generational gap is a primary driver behind Future-Proofing Your Electrical for Smart Home Technology.

High-Draw Appliances Driving the Shift

While smart gadgets and computers add to the background noise, the true capacity killers are large, high-draw appliances. Installing just one or two of these modern luxuries can instantly push an older 100-amp panel past its physical limits.

  • Level 2 EV Chargers: Charging an electric vehicle at home is incredibly convenient, but a Level 2 charger typically requires a dedicated 240-volt circuit drawing 32 to 48 amps continuously. Adding this single device can consume nearly half of a 100-amp panel's entire capacity.
  • Heat Pumps: Replacing a gas furnace with an electric heat pump is a fantastic way to improve efficiency, but it adds 30 to 60 amps of demand to your panel while removing virtually zero existing electrical load.
  • Induction Ranges: Highly responsive and safe, an induction stove can pull up to 50 amps when running at peak capacity.
  • Hot Tubs: A popular addition for relaxing after a day in the Rockies, a standard residential hot tub requires a dedicated 40-amp to 50-amp circuit to run its heaters and pumps simultaneously.

Before bringing any of these upgrades home, it is critical to evaluate if your system is prepared. Learn more by reading Does Your Electrical Panel Support an EV Charger and discover How to Choose the Right Home EV Charger to match your home's available capacity.

The Hidden Risks of an Overloaded Electrical Panel

When a home's electrical demand exceeds its capacity, the risks are rarely sudden or dramatic at first. Instead, they manifest as slow, silent, and potentially dangerous issues.

The most common sign of an overloaded system is nuisance tripping, where circuit breakers frequently shut off power to prevent overheating. While a tripping breaker means the safety system is doing its job, relying on it as a daily regulator is highly dangerous.

Over time, running an electrical panel near its maximum capacity causes silent degradation. Constant heavy loads generate heat within the panel, which can degrade internal components, weaken breaker spring tension, and make plastic parts brittle. If a breaker's internal spring loses tension, it may fail to trip during a future overload, creating a severe fire hazard.

Regular maintenance and professional evaluations are crucial to keeping your home safe. Understanding How an Electrical Inspection Prevents Problems can save you from catastrophic failures, and recognizing the Signs Your Home Is Due for an Electrical Inspection will help you catch hazards before they escalate.

The Misleading Nature of 'Adequate' in Home Inspections

When buying or selling a home in the Denver area, you will often see the word "adequate" used in home inspection reports to describe the electrical system. It is vital to understand that "adequate" is transaction language, not a technical guarantee of modern usability.

An inspector's "adequate" rating simply means the electrical panel met the minimum safety and capacity standards of the year the home was built. It does not mean the panel has the capacity to support your modern lifestyle, an EV charger, or a basement remodel. Relying on an outdated standard can leave you with a system that struggles to power your daily life safely. To keep your system aligned with actual usage, it is helpful to know How Often Should You Have Your Electrical System Inspected.

Rising Utility Rates and System Inefficiency

As of July 2026, electricity costs across the United States have continued their steady climb. Recent data from the U.S. Energy Information Administration (EIA) shows that the all-sector average retail electricity price rose significantly over the past year, compounding the financial impact of home energy use.

When an electrical system is overloaded or operating near its maximum threshold, it becomes highly inefficient. High resistance in strained circuits leads to heat loss. This means you are paying for electricity that is literally dissipating into the air as wasted heat inside your walls and panel.

By upgrading your capacity or utilizing smart energy management, you can eliminate these costly inefficiencies. Discover How Energy Management Reduces Your Electric Bill and explore practical strategies on How to Reduce Your Summer Electric Bill with Smart Technology.

How to Calculate Your Home's Total Electrical Load

an experienced electrician performing a professional load calculation on a residential electrical panel

Before making any major changes to your electrical system, you must determine your home's actual load. Professional electricians do this using the National Electrical Code (NEC) Article 220 guidelines.

The calculation involves converting volt-amperes (VA)—the standard unit for electrical power capacity—into amperes (amps), which represents the electrical current flowing into your home. The basic formula is:

$$\text{Amps} = \frac{\text{Volt-Amperes (VA)}}{\text{Volts (typically 240V for residential service)}}$$

There are two primary ways to calculate this: the Standard Calculation Method and the Optional Calculation Method. Many electricians prefer the Optional Method (NEC Article 220 Part IV) for existing homes because it applies realistic diversity factors, recognizing that you are highly unlikely to run every single appliance in your home at the exact same second.

Step-by-Step NEC Article 220 Load Calculation

To perform a proper load calculation, a professional electrician follows a structured sequence:

  1. General Lighting and Receptacles: Multiply the total finished square footage of the home by 3 VA.
  2. Small Appliance and Laundry Circuits: Add 1,500 VA for each small appliance branch circuit (minimum of two for the kitchen) and another 1,500 VA for the laundry circuit.
  3. Apply Demand Factors: For the general load calculated in steps 1 and 2, the standard method takes the first 3,000 VA at 100%, and the remaining portion is calculated at a reduced percentage (typically 35%). The optional method simplifies this by taking the first 10,000 VA of all combined loads at 100% and the remaining load at 40%.
  4. Fixed Appliances: Add the nameplate rating of all fixed appliances, such as the dishwasher, water heater, and garbage disposal.
  5. Heating vs. Cooling: Calculate both the heating and air conditioning loads. Since you will not run your furnace and your air conditioner at the same time, only include the larger of the two numbers in your final calculation.

Real-World Load Scenarios: Why Your Home Needs More Electrical Capacity Than Ever

To see these calculations in action, let us look at two common home profiles in the Front Range region:

  • The All-Electric Family Home (2,400 sq. ft.): Imagine a home in Parker equipped with an electric heat pump, electric range, electric clothes dryer, water heater, and a single Level 2 EV charger. The total connected load is approximately 55 kVA. When run through the NEC load calculation, this home requires a minimum of a 200-amp service to operate safely.
  • The Luxury Home (3,500 sq. ft.): Consider a larger property in Black Forest featuring two HVAC zones, an electric range, a pool pump, a hot tub, a workshop sub-panel, and two EV chargers. The total connected load climbs to approximately 95 kVA. This setup easily exceeds the limits of a 200-amp service, requiring either a 400-amp service upgrade or a smart load management system.

In a typical older home with a 100-amp panel, adding an EV charger, a hot tub, and an induction stove can easily push the calculated load to 131 amps. This puts the system 31% over its safe capacity limit, leading to frequent trips and safety hazards. Managing your power demands becomes even more critical during extreme weather; learn How to Manage Electrical Demand During Hot Weather to protect your home.

Upgrading Your Panel vs. Smart Load Management

When your load calculation reveals that your home has outgrown its capacity, you have two primary paths forward: a traditional physical service upgrade or installing a smart energy management system.

Traditionally, the solution was straightforward: upgrade from a 100-amp panel to a 200-amp or 400-amp service. This process involves replacing your physical panel cabinet, upgrading the outdoor utility service mast, and coordinating with your local utility provider (such as Xcel Energy or CORE Electric Cooperative) to run heavier-gauge service wires. While this provides a robust, high-capacity foundation, it can sometimes involve significant utility delays or complex excavation if your service lines are underground.

Today, smart panels like the SPAN panel and intelligent load management devices like the DCC-9 offer a highly effective alternative. Instead of simply accepting more raw power from the grid, smart systems dynamically monitor and manage how your home uses its existing capacity.

Feature Traditional Panel Upgrade Smart Energy Management (e.g., SPAN Panel)
Primary Approach Increases total physical electrical capacity (amps) Dynamically manages and prioritizes existing capacity
Grid Coordination Requires coordinate utility shutoffs and line upgrades Minimizes or eliminates the need for utility-side upgrades
Control Level Standard manual circuit breakers Digital, app-based control with real-time monitoring
Future-Proofing Adds raw headroom for future physical circuits Optimizes circuit sharing, solar, and battery storage
Load Shedding None (breakers simply trip when overloaded) Automatic, non-disruptive throttling of low-priority loads

Can You Electrify Without a Full Panel Upgrade?

Yes! For many homes, full electrification is entirely possible without a costly physical service upgrade. By choosing highly efficient, power-smart appliances and utilizing smart circuit-sharing devices, you can maximize your existing panel's footprint.

For example, a DCC-9 or similar energy management device can monitor your main panel's real-time consumption. If you are charging your EV and suddenly turn on your electric oven and clothes dryer, the load manager will temporarily pause or throttle the EV charger. Once the kitchen and laundry cycles complete, the system automatically restores full power to your vehicle.

This smart orchestration allows you to live a modern, electrified lifestyle without overloading your system. To weigh your options, take a closer look at Smart Energy Management vs Traditional Panel and explore the extensive Energy Management System Benefits for Homeowners.

Tracking and Controlling Energy Room by Room

Modern smart panels and whole-home energy monitors (like the Emporia Vue or Sense) give you unprecedented visibility into your household's electrical behavior. Rather than waiting for your utility bill at the end of the month, you can track exactly how many watts your refrigerator, entertainment system, or basement heater is drawing in real time.

This granular control allows you to identify energy hogs, schedule high-draw appliances for off-peak hours, and keep your total household demand safely below your panel's physical limits. Discover the advantages of this technology in our guide on How to Track and Control Energy Use Room by Room.

Frequently Asked Questions about Home Electrical Capacity

We receive many questions from Front Range homeowners looking to modernize their properties. Here are some of the most common inquiries regarding home electrical capacity:

Can I run a Level 2 EV charger on a 100-amp panel?

It depends entirely on your home's other electrical loads. If your home uses gas for heating, hot water, and cooking, you may have enough remaining capacity to support a Level 2 EV charger. However, if your home is already mostly electric, adding a continuous 32-amp to 48-amp EV load will likely overload a 100-amp panel. In these situations, using a smart load management device like a DCC-9 is an excellent way to safely add a charger without a full service upgrade.

What is the difference between the NEC Standard and Optional calculation methods?

The Standard Method is a conservative calculation that applies strict demand factors and assumes a higher likelihood of simultaneous appliance use. The Optional Method (allowed under NEC Article 220 Part IV for existing single-family homes) applies a more realistic diversity factor. It calculates the first 10,000 VA of load at 100% and everything else at 40%, which often results in a lower, more accurate reflection of real-world daily power usage.

How do smart panels like SPAN help avoid utility service upgrades?

Smart panels like SPAN replace your traditional breaker box with an intelligent, software-controlled system. If your home's total demand approaches your panel's physical limit, the SPAN panel automatically sheds or throttles lower-priority circuits (like an EV charger or a guest room heater) to protect your main service. This dynamic load shedding ensures your system never exceeds its safe threshold, allowing you to add new electric appliances without needing a larger service line from the utility company.

Conclusion

diagram showing the flow of power from the grid and solar panels through a smart panel to home appliances and battery storage

Ensuring your home has adequate electrical capacity is no longer just about convenience—it is about safety, efficiency, and preparing your property for the future. Whether you are adding an EV charger in Denver, installing a heat pump in Highlands Ranch, or building out a workshop in Black Forest, having a robust electrical backbone is essential.

At Courtesy Electric Company, we have been serving homeowners across Denver and the Colorado Front Range since 1976. Our experienced team specializes in providing top-tier Electrical Service and modern Residential solutions. From traditional panel upgrades to cutting-edge SPAN smart panels, Franklin battery storage systems, and Generac or Cummins standby generators, we have the expertise to design and install the perfect power plan for your home.

If you are ready to evaluate your home's electrical capacity and explore your options, we are here to help. Contact us today to schedule a free estimate on your next installation, and let us help you power your future safely and reliably.

The Ultimate Guide to What a Home Electrical Inspection Includes

What Does a Home Electrical Inspection Include — and Why It Matters for Your Home's Safety

professional electrician inspecting a home electrical panel

What does a home electrical inspection include is one of the most important questions a homeowner can ask — and the answer goes far beyond a quick glance at a breaker panel. Here is a fast overview of what a standard inspection covers:

  • Main electrical panel and service disconnect — amperage rating, working clearances, breaker condition, bonding, and grounding
  • Service entrance conductors — the cables bringing power into your home from the utility
  • Branch circuit wiring — wire gauge, cable anchoring, and proper routing through walls and studs
  • Outlets and switches — mounting heights, polarity, grounding, and box sizing
  • GFCI protection — required in kitchens, bathrooms, garages, laundry rooms, and exterior areas
  • AFCI protection — required on new or remodeled circuits in bedrooms and living areas
  • Grounding and bonding systems — grounding electrodes, metal pipe bonding, and continuous grounding paths
  • Signs of overheating or fire risk — double-tapped breakers, incorrect wire sizes, recalled panels, and outdated wiring types
  • Smoke and carbon monoxide alarm presence — inspectors note whether they exist, though testing is not always required

A home electrical inspection is a detailed, system-wide safety assessment. According to industry data, 86% of home inspections uncover at least one issue, and electrical defects rank as the second most common finding — appearing in nearly 1 in 5 inspections. For homeowners in older properties, the stakes are even higher: 68% of homes built before 1980 have at least one code deficiency, and homes purchased without an electrical inspection are more than twice as likely to experience an electrical-related insurance claim within the first two years of ownership.

Whether you are buying a home, planning a renovation, or simply want peace of mind about your family's safety, understanding what inspectors look for puts you in control of the process — not at the mercy of it.

I'm David Meyer, Vice President of Courtesy Electric, a Colorado electrical contracting company with roots going back to 1976, and I've spent my career working in the field alongside the inspectors, code books, and real-world electrical systems that define what a home electrical inspection includes. In the sections below, I'll walk you through every stage of the process — from rough-in to final sign-off — so you know exactly what to expect and how to be ready.

home electrical inspection process overview infographic with key components checked infographic

Understanding the Basics: What Does a Home Electrical Inspection Include?

At its core, a home electrical inspection is a comprehensive evaluation of your entire electrical system to verify that it is safe, functional, and compliant with local and national safety standards. Rather than just making sure the lights turn on, this process focuses heavily on preventative maintenance and electrical safety. It is designed to identify hidden hazards—such as overloaded circuits, deteriorating insulation, or improper DIY modifications—before they escalate into shocks, power failures, or electrical fires.

As a professional team serving the Denver area, we always emphasize that these inspections are rooted in the National Electrical Code (NEC). The NEC is updated regularly to reflect modern safety advancements and changing household power demands. While existing electrical installations do not always require retroactive updates, any new work, remodeling, or system modifications must strictly adhere to the latest code standards.

Understanding the health of your system requires regular check-ups. To keep your home safe, it is helpful to know how often should you have your electrical system inspected and to learn how to spot electrical problems before they become dangerous. By staying proactive, you can address minor issues—such as flickering lights, warm switch plates, or buzzing sounds—before they become major safety concerns.

What Does a Home Electrical Inspection Include During a Real Estate Transaction?

When buying or selling a home in the Colorado Front Range, an electrical inspection plays a pivotal role in the transaction. However, there is a major difference between a general home inspection and a specialized electrical inspection.

A general home inspector evaluates the entire property and checks the electrical system broadly. They will typically test a representative number of outlets (usually one per room), check for the presence of GFCI protection, and look inside the service panel if it is safe to do so. However, general home inspectors are restricted by their standards of practice; they do not perform advanced diagnostic testing, measure voltage or amperage, or diagnose the root causes of complex electrical defects.

If a general inspector flags an issue, or if you are dealing with a property disclosure that mentions electrical modifications, you need a licensed electrical contractor to perform a deep-dive evaluation. We inspect every circuit, evaluate the panel’s true capacity, and check for hidden safety hazards. For home sellers, addressing these electrical defects before listing the property prevents transaction delays. For home buyers, a specialized inspection report serves as a powerful negotiating tool to ensure you do not inherit costly, hazardous wiring problems.

What Does a Home Electrical Inspection Include for Older Properties?

Older homes across Denver, Parker, and Highlands Ranch possess incredible architectural charm, but their legacy electrical systems were never designed to handle today’s power demands. In the 1950s, a standard home might have had a 60-amp service. Today, with electric vehicles, central air conditioning, smart appliances, and home offices, modern homes routinely require 100-amp or 200-amp service.

When evaluating pre-1980s homes, inspectors pay close attention to legacy wiring methods and signs of degradation. Common issues include:

  • Knob-and-Tube Wiring: Found in homes built before the 1940s, this system uses single conductors run through ceramic knobs and tubes. It lacks a grounding conductor, and its rubberized cloth insulation becomes extremely brittle over time.
  • Single-Strand Aluminum Wiring: Common in homes built between the late 1960s and mid-1970s, aluminum branch circuit wiring poses a significant fire hazard. Aluminum expands and contracts at a different rate than copper, which eventually loosens connections at outlets and switches, leading to overheating.
  • Unprotected Romex or Frayed Insulation: Rodents, heat, and age can degrade wire sheathing in attics and crawlspaces, exposing live conductors.

If you own or are looking to purchase an older property, we highly recommend reviewing this electrical safety checklist for older homes and recognizing the clear signs your home is due for an electrical inspection to protect your investment.

The Two Stages of Electrical Inspections: Rough-In vs. Final

For new construction, home additions, or major remodeling projects in Colorado, the electrical inspection process is split into two distinct, legally required phases. These municipal code compliance reviews ensure that the electrical work is safe at every step of the construction process.

rough-in electrical wiring in wall studs

Inspection Phase When It Occurs Key Inspector Focus Areas
Rough-In Inspection After boxes and cables are run, but before insulation, drywall, or plaster is installed. Wire routing, cable anchoring, box depth, stud protection, and wire length.
Final Inspection After walls are closed, painted, and all light fixtures, switches, outlets, and appliances are installed. Device functionality, correct polarity, GFCI/AFCI operation, and panel labeling.

The Rough-In Inspection Phase

The rough-in inspection is the most technical phase because the walls are completely open, giving the inspector an unobstructed view of the entire infrastructure. During this walk-through, the inspector verifies that the physical installation of the cables and boxes complies with the NEC. Key checkpoints include:

  • Cable Anchoring and Wire Staples: Cables must be secured to wall studs using approved staples. The first staple must be placed no further than 8 inches from the electrical box, and subsequent staples must be placed at least every 4 feet.
  • Stud Penetration and Protective Metal Plates: When horizontal wire runs pass through holes bored in wood studs, the edge of the hole must be at least 1.25 inches from the edge of the stud. If the hole is closer, protective metal plates must be installed on the face of the stud to prevent drywall screws or nails from puncturing the wire.
  • Wire Sheathing and Box Entry: Cable sheathing must extend at least 1/4 inch into the electrical box to ensure the built-in clamps grip the protective outer jacket rather than the individual insulated conductors.
  • Usable Wire Length: There must be at least 8 inches of usable wire length extending from the face of the box. This ensures there is plenty of conductor length to make secure connections to outlets or switches, with room for future repairs.

The Final Inspection Phase

The final inspection occurs at the very end of the project, right before the space is put into daily use. The walls are closed, painted, and all finishes are complete. The inspector's job during this phase is to confirm that the completed system is fully functional and safe for the occupants.

The inspector will systematically test the outlets to ensure proper polarity and grounding. They will verify that all light fixtures are securely mounted and operational, and that dedicated appliance circuits are running correctly. The inspector will also test safety devices like GFCIs and AFCIs to confirm they trip instantly under fault conditions. Finally, they will verify that the main service panel has been completely finished, with all breaker spaces clearly and accurately labeled.

Key Components Evaluated: From the Panelboard to the Outlets

A comprehensive electrical inspection covers your entire system, tracing the path of electricity from the utility lines outside your home all the way to the individual outlets in your living room. To help you understand this pathway, we recommend looking over these electrical safety tips every homeowner should know.

Main Electrical Panelboard and Service Disconnect

The main electrical panelboard is the heart of your home's electrical system. It distributes power to individual branch circuits and houses the safety breakers that protect your home from overloads. Because of its critical role, inspectors evaluate it with extreme care.

  • Working Space and Clearances: The panelboard must be easily accessible in an emergency. Code requires a clear working space in front of the panel that is at least 36 inches deep, 30 inches wide, and 6.5 feet high. The panel cannot be located in prohibited areas, such as bathrooms, clothes closets, or directly over stairway steps.
  • The Six Disconnect Rule: For safety, a person must be able to shut off all electrical power to the home with no more than six motions of the hand while standing at one location.
  • Main Bonding Jumper: This is the single most important safety connection in your system. It bonds the neutral bus bar directly to the metal panel enclosure, creating a low-impedance path that ensures a breaker will trip instantly if a hot wire accidentally touches a grounded metal component.
  • Subpanel Separation: In any downstream subpanel, the neutral and ground wires must be kept completely isolated from each other. They are only bonded together at the main service panel. If they are joined in a subpanel, neutral currents can travel over the safety grounding system, creating a severe shock hazard.

Outlets, Switches, and Box Sizing

Moving from the panel to the individual rooms, inspectors check the devices that you interact with daily:

  • Mounting Heights: Standard electrical outlets must be mounted at least 15 inches above the finished floor, and wall switches must be at least 48 inches above the floor, unless local accessibility guidelines require adjustments.
  • Wire Gauge Compliance: The size of the wire must match the rating of the breaker. Standard 15-amp circuits require 14-gauge copper wire, while 20-amp circuits require heavier 12-gauge copper wire. Using 14-gauge wire on a 20-amp breaker is a serious code violation and fire hazard.
  • Box Capacity and Sizing: Electrical boxes must have enough physical volume to safely house all the wires, wire nuts, and devices installed inside them. Overcrowded boxes lead to pinched wires and short circuits.
  • Device Polarity: Outlets must be wired with correct polarity—meaning the hot wire connects to the brass terminal, the neutral to the silver terminal, and the ground to the green screw. Incorrect polarity can cause appliances to remain energized even when turned off.

Common Defects and Red Flags

During an inspection, certain findings are immediate red flags that require urgent remediation. To learn more about protecting your home from these hazards, check out these electrical fire prevention tips for homeowners.

  • Double-Tapped Breakers: This occurs when two separate circuit wires are connected under a single screw terminal on a breaker that is only designed for one wire. This loose connection can arc, overheat, and cause a fire.
  • Incorrect Wire Sizes: Finding thin wire connected to a high-amperage breaker is a common DIY mistake that must be corrected immediately.
  • Recalled or Hazardous Panels: Brands like Federal Pacific Electric (FPE), Zinsco, and Challenger are notorious for breaker failures. These breakers frequently fail to trip during an overload, allowing the system to overheat and catch fire.
  • Single-Strand Aluminum Branch Wiring: As mentioned, solid aluminum wire on 15-amp and 20-amp circuits is highly unstable and requires specialized copalum crimping or complete rewiring.

Safety Devices and Code Compliance: GFCI, AFCI, and Grounding

Modern electrical codes focus heavily on active safety technologies designed to prevent electrical shocks and home fires. During an inspection, verifying these safety systems is a top priority.

Ground Fault Circuit Interrupters (GFCI)

GFCI protection is designed to prevent severe electrical shock. A GFCI outlet constantly monitors the balance of electrical current passing through the hot and neutral wires. If it detects a tiny imbalance—as small as 4 to 6 milliamperes, which indicates that current is leaking or passing through a person to the ground—the GFCI cuts off the power in milliseconds.

GFCI protection is strictly required for all 15- and 20-amp receptacles located near water sources or wet environments. This includes kitchen countertops, bathrooms, laundry rooms, unfinished basements, crawlspaces, garages, and all exterior receptacles.

Arc Fault Circuit Interrupters (AFCI)

While GFCIs protect people from shocks, AFCIs are designed to protect homes from fires. An AFCI breaker detects dangerous electrical arcing—which occurs when electricity jumps across a damaged or loose connection, creating intense heat that can ignite nearby wood or insulation.

The NEC requires AFCI protection on all new or remodeled residential branch circuits supplying outlets in family rooms, dining rooms, living rooms, parlors, libraries, dens, bedrooms, sunrooms, recreation rooms, closets, hallways, and laundry areas.

Grounding and Bonding Systems

Grounding and bonding are the silent safety nets of your home's electrical system.

  • Grounding connects the entire electrical system to the earth using grounding electrodes (typically two copper rods driven at least 8 feet into the ground, spaced at least 6 feet apart). This channels stray electrical surges, such as lightning strikes, safely into the ground.
  • Bonding physically connects all non-current-carrying metal parts of your home's infrastructure—such as metal water pipes, gas lines, and structural steel—to the grounding system. This ensures that if a hot wire accidentally touches a metal pipe, the system will immediately short-circuit and trip the breaker, rather than leaving the metal pipe energized and dangerous to touch. Inspectors will also check for a bonding jumper wire that jumps across your water meter to maintain a continuous grounding path.

How Homeowners Should Prepare for an Electrical Inspection

Whether you are preparing for a municipal code inspection on a remodel or having our team perform a preventative safety check, taking a few simple steps ahead of time will ensure the process goes smoothly and efficiently.

Ensuring Physical Access and Safety

Inspectors need clear, unobstructed access to all major electrical components. You can prepare by:

  • Clearing the Panelboard: Move all stored boxes, tools, or furniture at least 3 feet away from your main electrical panel and any subpanels.
  • Clearing Outlets and Switches: Move heavy furniture, beds, or bookshelves away from walls so the inspector can easily access and test the receptacles in each room.
  • Replacing Bulbs: Replace any burned-out light bulbs before the inspection. If a light doesn't turn on, the inspector cannot easily tell if the bulb is dead or if there is a wiring failure.
  • Labeling the Panel: Ensure all circuit breakers are clearly and accurately labeled. Unlabeled panels slow down the inspection and are an automatic code violation on new work.

Documentation and Communication

Having the right information ready for the inspector goes a long way in building trust and ensuring a successful review:

  • Gather Permits and Records: If you've had recent electrical work done, have the permit records, construction plans, and previous inspection reports easily accessible.
  • List Known Issues: Prepare a written list of any known electrical quirks in the home—such as a switch that feels warm, a breaker that trips occasionally, or a light that flickers when the microwave runs.
  • The Professional Advantage: Building inspectors appreciate working with trusted, licensed professionals. When they see clean, organized work completed by an experienced local team, the inspection often proceeds much faster.

Frequently Asked Questions about Electrical Inspections

How long does a typical home electrical inspection take?

A standard whole-house electrical safety inspection typically takes between 1 to 3 hours. The exact duration depends on the size of your home, the complexity of your electrical system, and whether there are older wiring methods present. A modern, 2,000-square-foot home with a single panel might take about 90 minutes, whereas an older historic home with multiple subpanels and legacy wiring can take several hours to evaluate thoroughly.

What happens if the inspection reveals problems or fails?

If an inspection reveals code violations or safety hazards, the inspector will issue a detailed correction notice. If it is a municipal inspection for a permit, the work cannot be covered with drywall, and a certificate of occupancy will not be issued until the problems are corrected. You will need to have a licensed electrician address the flagged issues, after which you will schedule a re-inspection for final approval.

What should I expect in the final inspection report?

Following a professional safety inspection, you will receive a comprehensive written report detailing the condition of your home’s electrical system. The report will identify any active code violations, safety hazards, or aging components nearing the end of their lifespan. At Courtesy Electric, we prioritize these findings, helping you understand which issues require immediate safety remediation and which are recommended upgrades for the future.

Conclusion

Understanding what a home electrical inspection includes is the first step toward securing your home's safety and ensuring your electrical system is prepared for the future. From validating the main bonding jumper in your panel to testing the GFCI protection in your kitchen, every checkpoint in an inspection plays a vital role in protecting your family and property.

At Courtesy Electric Company, we have been serving homeowners, builders, and businesses across Denver and the Colorado Front Range since 1976. We specialize in complete residential electrical services, from modern infrastructure design to advanced home energy management. If your inspection reveals that your system needs an upgrade, we can help you transition to the future of home energy with SPAN smart electrical panels, Franklin battery storage systems, and premium Generac or Cummins standby generators.

Don't leave your home's safety to chance. Contact our team today for a professional evaluation, and let us help you build a reliable, modern, and completely code-compliant electrical system.

Schedule your professional electrical service today

Signs Your Home Needs an Electrical Panel Upgrade

Is Your Electrical Panel Trying to Tell You Something?

signs your home needs an electrical panel upgrade

The signs your home needs an electrical panel upgrade are easy to miss — until they become a real problem. Here's a quick look at the most common warning signs:

  • Breakers trip frequently — especially when running multiple appliances
  • Lights flicker or dim when large appliances kick on
  • You rely on extension cords and power strips as permanent solutions
  • Your panel is 25+ years old or still uses fuses instead of breakers
  • You smell burning or notice scorch marks near the panel
  • The panel buzzes, hums, or feels warm to the touch
  • You're adding high-demand devices like an EV charger, hot tub, or central A/C
  • You have a known problem brand like Federal Pacific Electric or Zinsco
  • Rust, corrosion, or water damage is visible on the panel
  • Your home has two-prong outlets throughout

If any of these sound familiar, your panel may be struggling to keep up with your home's electrical demands — and that's worth taking seriously.

Most homeowners don't think much about their electrical panel until something goes wrong. But your panel is the central hub that controls power distribution to every outlet, appliance, and light in your home. As the average U.S. household's annual electricity use has more than doubled since 1970 — now exceeding 10,700 kWh per year — older panels are increasingly being pushed beyond what they were designed to handle. And for Colorado Front Range homeowners adding EV chargers, smart home systems, or backup power solutions, an underpowered panel isn't just inconvenient — it can be a genuine safety hazard.

I'm David Meyer, Vice President of Courtesy Electric, and with nearly 50 years of hands-on electrical contracting experience behind our team, I've seen how signs your home needs an electrical panel upgrade often go unnoticed until the risks become serious. In this guide, I'll walk you through exactly what to watch for and what to do about it.

Infographic showing 10 warning signs your home needs an electrical panel upgrade, including tripping breakers, flickering

Understanding Your Home’s Electrical "Brain"

Interior of a modern circuit breaker panel showing organized wiring and clean breakers

If you think of your home’s electrical wiring as the central nervous system, the electrical panel is undoubtedly the brain. It is the central hub where the main power line from the utility company enters your home and is divided into individual circuits. Each circuit is protected by a breaker (or a fuse in older systems) that acts as a safety gate.

The primary job of this "brain" is to ensure that no single circuit carries more electricity than its wires can safely handle. When a circuit is overloaded, the breaker "trips," cutting off the flow of electricity to prevent the wires from overheating and starting a fire. This makes the panel your home's most important safety device.

In May 2026, we are seeing more demand on these systems than ever before. Modern homes in the Denver area aren't just powering light bulbs and refrigerators; they are charging vehicles, running high-efficiency heat pumps, and managing complex smart home integrations. If your panel was installed in the 1980s or 90s, it was designed for a world before smartphones, streaming devices, and home offices.

For many homeowners, the first step in an upgrade is moving from an outdated fuse box to a modern circuit breaker system. While both serve the same basic purpose, the technology is vastly different.

Comparing Fuse Boxes and Modern Circuit Breaker Panels

Feature Fuse Box (Pre-1960s) Modern Circuit Breaker Panel
Safety Mechanism A filament melts to break the circuit. A mechanical switch flips to break the circuit.
Resetting Must replace the entire fuse with a new one. Simply flip the switch back to the "on" position.
Capacity Usually 30–60 amps; limited circuits. 100–400 amps; supports many circuits.
Insurance Often leads to higher premiums or denial. Standard for modern safety compliance.
Risk Factor High risk of "over-fusing" (using wrong size). Built-in protection against manual overrides.

If you are currently relying on a fuse box, it is one of the most definitive signs your home needs an electrical panel upgrade. You can learn more about our comprehensive Electrical Service options to see how we transition older homes into the modern era.

10 Critical Signs Your Home Needs an Electrical Panel Upgrade

Identifying signs your home needs an electrical panel upgrade early can save you from a middle-of-the-night emergency or, worse, a house fire. Electrical issues are often like a "check engine" light in your car; they might seem like a minor nuisance, but they usually indicate a larger underlying problem.

It is vital to know how to spot electrical problems before they become dangerous. In many cases, the panel won't just stop working; it will give you subtle clues that it is struggling to keep up with your daily energy usage.

Frequent Breaker Trips and Signs Your Home Needs an Electrical Panel Upgrade

We’ve all been there: you turn on the microwave while the toaster is running, and suddenly the kitchen goes dark. While an occasional trip is the breaker doing its job, frequent tripping is a major red flag.

Breakers trip because the circuit is drawing more current than it can handle. Over time, constant overloading causes "breaker fatigue," where the mechanical components inside the breaker wear down and become unreliable. If you find yourself walking to the garage or basement once a week to flip a switch, your panel is telling you that your home’s electrical load exceeds its current capacity. These electrical safety tips every homeowner should know can help you manage loads in the short term, but a panel upgrade is the only permanent fix.

Outdated Fuse Boxes and Obsolete Brands

If your home was built before 1960, there is a high probability it originally utilized a fuse box. Fuses aren't inherently "broken," but they were never meant to handle the 10,700+ kWh that modern households consume. Furthermore, certain brands of panels installed between the 1950s and 1980s are now known to be defective.

Federal Pacific Electric (FPE) and Zinsco panels are two of the most notorious. These panels have a high failure rate where the breakers fail to trip even during a massive surge, leading to melted wires and fires. Many insurance companies in Colorado will actually refuse to cover a home or will significantly increase premiums if these brands are present. Checking your panel for these names is a critical part of any electrical safety checklist for older homes.

Physical Damage and Signs Your Home Needs an Electrical Panel Upgrade

Physical deterioration is a clear indicator that it's time for a replacement. Rust or corrosion on the panel box usually means moisture has found its way in, which is a recipe for disaster when combined with electricity.

You should also use your other senses. Do you hear a buzzing or hissing sound coming from the panel? That's often the sound of electrical arcing. Does the panel cover feel warm to the touch? A warm panel suggests that the connections inside are loose or that the system is severely overloaded. These are immediate how to prevent electrical fires in your home warning signs that require professional attention.

Reliance on Extension Cords and Power Strips

Are extension cords running under your rugs or along your baseboards? While they are fine for temporary use (like holiday lights), they are not meant to be permanent fixtures.

Heavy reliance on power strips and extension cords usually means your home doesn't have enough outlets or circuits to support your lifestyle. This forces too much power through a single outlet, which can overheat the wires behind the wall. Upgrading your panel allows an electrician to add dedicated circuits for your high-demand areas, which is a key item on the ultimate electrical fire safety checklist home.

The Dangers of Ignoring an Outdated System

Ignoring the signs your home needs an electrical panel upgrade isn't just a matter of convenience; it’s a matter of safety. According to industry statistics, electrical panels and their associated wiring cause approximately 5-7% of home fires annually. Panels that are over 25 years old account for a disproportionate share of these incidents.

When a panel fails to regulate the flow of electricity, several dangerous things can happen:

  1. Electrical Fires: Overloaded wires generate heat. If the breaker doesn't trip to stop the flow, that heat can ignite the insulation or surrounding wood framing.
  2. Appliance Damage: Modern electronics (like your $2,000 smart fridge or OLED TV) are sensitive to voltage fluctuations. An outdated panel can "leak" electricity or cause surges that fry delicate circuit boards.
  3. Electrical Shock: Outdated systems often lack proper grounding. Without a safe path for excess electricity to travel to the ground, that electricity might find a path through you.

Understanding how outdated wiring increases fire risk is essential for any homeowner in an older Denver neighborhood. A panel upgrade is essentially an insurance policy for your home's most expensive assets.

Modern Power Demands in 2026: Why 100 Amps Isn't Enough

In the past, a 60-amp or 100-amp panel was the gold standard. In 2026, those numbers are quickly becoming obsolete. The "standard" modern home now requires at least a 200-amp service to function efficiently.

Why the sudden jump? Consider what we are adding to our homes:

  • Electric Vehicles (EVs): A Level 2 EV charger can draw 30–50 amps on its own. If you have a 100-amp panel, your car could be taking up half of your home's total capacity while it charges.
  • Electrification: As more homeowners move away from gas and toward electric heat pumps and induction cooktops, the demand on the panel skyrockets.
  • Smart Home Tech: While individual smart bulbs don't use much power, the cumulative effect of dozens of connected devices, security systems, and high-powered mesh Wi-Fi routers adds up.
  • Home Additions: Adding a hot tub, a finished basement, or an ADU (Accessory Dwelling Unit) almost always necessitates a panel upgrade.

At Courtesy Electric, we specialize in modern Services that address these 2026 demands. We often recommend SPAN smart panels, which allow you to monitor and control your energy usage circuit-by-circuit from your phone. This is the future of home energy management, allowing you to prioritize power to essential appliances during an outage or manage your EV charging based on utility rates.

What to Expect During a Professional Panel Replacement

Many homeowners put off an upgrade because they fear the process will be long, messy, and leave them without power for days. In reality, a standard residential panel upgrade is a highly coordinated event that usually takes between 4 and 8 hours.

Here is the general roadmap for a professional upgrade:

  1. The Assessment: We perform a load calculation to determine exactly what size panel you need (usually 200-amp, but sometimes 400-amp for larger estates).
  2. Permitting: In Denver and the Front Range, a panel upgrade requires a permit. We handle all the paperwork to ensure your upgrade is legal and code-compliant.
  3. Utility Coordination: We coordinate with Xcel Energy or your local utility to disconnect the power from the street.
  4. The Swap: Our licensed electricians remove the old equipment, install the new panel, and reconnect all your existing circuits.
  5. Inspection: Once the work is done, a city or county inspector will visit to verify that everything meets the National Electrical Code (NEC).

It is crucial to understand when to call an electrician vs DIY. While you might be comfortable changing a light fixture, a panel upgrade involves handling the main service lines that carry enough current to be fatal. This is strictly a job for licensed professionals.

Frequently Asked Questions about Electrical Panels

How long does an electrical panel typically last?

Most electrical panels have a functional lifespan of 25 to 40 years. However, "functional" doesn't always mean "safe" or "adequate." Even if a 35-year-old panel isn't sparking, it likely lacks modern safety features like Arc Fault Circuit Interrupter (AFCI) protection, which is designed to detect dangerous electrical arcs before they start a fire. We recommend a professional visual inspection every 3 to 5 years for homes over two decades old.

Do I need a permit for a panel upgrade in Colorado?

Yes. All jurisdictions across the Colorado Front Range require permits and inspections for electrical panel replacements. This isn't just a "red tape" issue; it’s for your protection. The inspection ensures the work was done safely, which is vital for your homeowner's insurance and for when you eventually decide to sell your home.

Can I upgrade my panel to support a whole-house generator?

Absolutely. In fact, many homeowners choose to upgrade their panel specifically because they want to install a Generac or Cummins standby generator. During the panel upgrade, we can install a transfer switch that allows your home to automatically switch from grid power to generator power during an outage. This is a great time to also consider battery storage solutions like Franklin Battery Storage for a truly resilient home.

Conclusion

Recognizing the signs your home needs an electrical panel upgrade is the first step toward a safer, more efficient home. Whether you are dealing with flickering lights, an aging fuse box, or you are simply ready to prepare your home for an electric vehicle, the team at Courtesy Electric is here to help.

Since 1976, we have served the Denver and Colorado Front Range communities with quality, integrity, and dependability. From Parker to Highlands Ranch and up through the Black Forest, we specialize in everything from basic panel retrofits to advanced SPAN smart panel installations and backup power systems.

Don't wait for a total system failure to address your home's electrical "brain." Contact us today to schedule your free estimate. Our experts will evaluate your current system and provide a clear, professional plan to bring your home into the modern age of energy. Explore our full range of Electrical Service options and let us give you the peace of mind you deserve.

How Much Does Battery Storage Save During Outages? Survival Guide

How Much Does Battery Storage Save During Outages — And Is It Worth It in Colorado?

home battery backup system in a modern Colorado home

How much does battery storage save during outages depends on several factors — but here's a quick answer for most Colorado Front Range homeowners:

Quick Answer: Battery Storage Savings During Outages

Savings Category Estimated Value
Food spoilage prevention ~$500 per outage event
Avoided hotel stays ~$150+ per night
Load loss reduction Up to 95.8% of expected energy loss
Annual expected load loss (without battery) 0–63 kWh per household
Annual expected load loss (with battery) 0–15 kWh per household
Resilience value vs. battery cost (base case) ~14% of battery cost covered by outage savings alone

The bottom line: a home battery system significantly reduces the energy and financial losses caused by grid failures, though outage savings alone rarely cover the full cost. The strongest case for battery storage comes when you stack outage protection with daily energy management benefits.

Power outages in the United States hit their highest level in a decade in 2024, with 27 separate billion-dollar weather disasters recorded by NOAA that year. For homeowners across Denver and the Colorado Front Range, that trend is hard to ignore. A summer storm or a winter ice event can knock out the grid for hours — or days — leaving families scrambling to protect their food, their pipes, their medical equipment, and their peace of mind.

The U.S. economy loses between $28 billion and $169 billion every year because of power outages. At the household level, that translates into spoiled groceries, damaged property, lost productivity, and in some cases, serious safety risks. A home battery backup system is increasingly the answer homeowners are turning to — but the real question is whether the savings justify the investment.

I'm David Meyer, Vice President of Courtesy Electric, and over my career installing and designing battery backup systems across Colorado, I've helped dozens of homeowners work through the exact math of how much does battery storage save during outages before they commit to a system. In this guide, I'll break down the numbers honestly — from food spoilage and load loss to payback periods and smart energy strategies — so you can make a confident, informed decision.

infographic showing battery storage savings during outages including food spoilage, load loss reduction, and resilience

The Financial Impact of Grid Failures and How Much Does Battery Storage Save During Outages

When the power goes out, the clock starts ticking on your wallet. While we often think of blackouts as a minor inconvenience, the financial reality of prolonged grid failures is steep. For a typical family in Parker, Highlands Ranch, or Black Forest, a sudden blackout can quickly lead to hundreds or thousands of dollars in unrecoverable losses.

By installing a modern energy storage system, you create a personal safety net. We often look at the return on investment of home energy upgrades through the lens of monthly utility bill reductions. However, a major part of the equation is "avoided costs"—the money you don’t have to spend because your power stayed on.

To determine if a backup system makes sense for your home, it helps to look at the regional factors. Our local grid faces unique challenges, from heavy spring snows that snap power lines to intense summer thunderstorms and high-wind events. Understanding these regional risks is the first step in evaluating whether Is Home Battery Storage Worth It In Colorado for your specific household needs.

Calculating the Value of Lost Load (VOLL)

Economists and grid planners use a metric called the Value of Lost Load (VOLL) to quantify the economic impact of power interruptions. VOLL is essentially the monetary value that consumers place on a kilowatt-hour of uninterrupted electricity. While a standard kWh of electricity from the grid might cost you a fraction of a dollar, the value of that same kWh during a critical outage is exponentially higher.

Without battery storage, the average annual expected loss of load for a single-family home ranges from 0 to 63 kWh, depending on local grid reliability and weather patterns. When you integrate a home battery system, this annual expected loss of load drops dramatically to between 0 and 15 kWh.

In fact, academic research shows that solar battery storage can mitigate up to 95.8% of expected load loss during long-duration power interruptions (those lasting over 24 hours) for a typical single-family home. To understand how your home handles this transition seamlessly during a blackout, it helps to understand How Does A Home Battery Backup System Work to isolate your home from the utility grid and establish a self-sustaining microgrid.

diagram showing grid isolation and microgrid creation during an outage

How Much Does Battery Storage Save During Outages by Preventing Food Spoilage and Property Damage

Let's look at the direct, tangible household savings. When the grid fails, the most immediate casualty is usually the contents of your refrigerator and freezer. The USDA notes that a refrigerator will keep food safely cold for only about 4 hours during a power outage, while a full freezer can hold its temperature for up to 48 hours if the doors remain closed.

For a family with a fully stocked fridge and a chest freezer, losing all that food can easily cost $500 or more in a single event. A home battery backup keeps your appliances running continuously, completely eliminating this risk.

Beyond food, there are even more severe property damage risks:

  • Frozen Pipes: During Colorado winters, a prolonged outage can cause indoor temperatures to plummet. Without a furnace blower or boiler pump running, pipes can freeze and burst, leading to thousands of dollars in water damage.
  • Basement Flooding: If a heavy summer storm knocks out power, your sump pump stops working. A battery backup ensures your sump pump keeps running, preventing a flooded basement.
  • Medical Equipment: For households relying on CPAP machines, oxygen concentrators, or home dialysis, keeping the power on is a matter of physical safety, not just comfort.

By protecting these critical systems, a battery system acts as an insurance policy. You can read more about selecting and sizing a system to cover these exact household risks in our Home Battery Storage Complete Guide.

Battery Storage vs. Standby Generators: A Backup Power Comparison

When Front Range homeowners realize they need reliable backup power, they usually find themselves choosing between two primary technologies: a battery storage system or a traditional standby generator. Both systems are designed to keep your lights on, but they go about it in very different ways, with distinct financial and operational profiles.

To help you visualize how these two options stack up over time, let's look at a direct comparison:

Feature Battery Storage System Standby Generator (Gas/Propane)
Fuel Source Solar energy or stored grid power Natural gas, liquid propane, or diesel
Fuel Costs $0 (when paired with solar) Variable (subject to utility gas/propane rates)
Maintenance Virtually none (solid-state electronics) Annual oil changes, spark plugs, and engine runs
Noise Level Silent (0 dB) Loud (60–70+ dB)
Emissions Zero local emissions Carbon monoxide and greenhouse gases
Daily Value High (can perform time-of-use shifting) None (only operates during grid outages)
Lifespan 10 to 15 years 15 to 20+ years (with proper maintenance)

For a deeper dive into which technology aligns with your home's layout and goals, check out our comparison on Battery Storage Vs Generator Which Is Better For Backup.

Operational Differences and Fuel Independence

Standby generators rely on internal combustion engines. This means they require regular mechanical maintenance, generate significant noise, and emit exhaust fumes that must be carefully vented away from your home. Furthermore, standby generators require a continuous supply of fuel—either natural gas piped from your utility or liquid propane stored in a large tank on your property.

A battery storage system, on the other hand, is completely silent and produces zero emissions. Because it is a solid-state electronic system, there are no moving parts to wear out, meaning it requires virtually no ongoing maintenance.

The biggest operational advantage of a battery system comes when it is paired with solar panels. This combination allows you to achieve true energy independence. When evaluating Generator Or Battery For Power Outages Is A Generator Or Battery Better For Power Outages, the ability to generate your own fuel from the sun is a massive differentiator.

How Much Does Battery Storage Save During Outages Compared to Generator Fuel Costs

During an extended, multi-day outage, a standby generator can consume a significant amount of fuel. If you are running a 20 kW generator on liquid propane, you could easily burn through 2 to 3 gallons of fuel per hour under moderate load. Over a three-day outage, that can add up to hundreds of dollars in fuel costs alone—assuming fuel delivery trucks can even access your property during a major winter storm or natural disaster.

A solar-plus-storage system bypasses this fuel constraint entirely. During the day, your solar panels power your home's immediate loads and send any excess electricity to recharge your batteries. At night, your home runs off the stored battery power.

This continuous cycle allows you to ride out multi-day outages without spending a single penny on fuel or worrying about utility gas lines being shut down for safety. For homeowners who want the ultimate level of resilience, we also design custom hybrid systems where How Generators And Batteries Can Work Together to provide a multi-layered backup strategy.

Maximizing Your Return on Investment with Smart Energy Management

While the peace of mind during a blackout is invaluable, a home battery system shouldn't just sit idle waiting for the grid to fail. In fact, if you only look at the "resilience value" of a battery—the money saved purely during outages—it typically covers about 14% of the system's total cost over its lifetime. To make the investment truly cost-effective, you need to put your battery to work every single day.

modern smart electrical panel installed next to a home battery storage system in a garage

This daily value is unlocked through smart energy management. By utilizing your battery to manage how and when you draw power from the utility grid, you can generate ongoing savings that dramatically shorten your payback period.

This is where upgrading to a modern smart electrical panel makes a world of difference. When comparing a Smart Energy Management Vs Traditional Panel, a smart panel gives you the digital controls needed to automatically optimize your battery usage based on real-time utility rates.

Integrating Smart Panels for Load Shedding

One of the challenges of backup power is sizing. If you want to back up your entire home—including high-load appliances like your air conditioner, electric range, and EV charger—you would need a very large, expensive battery array.

A smarter, more cost-effective approach is to pair your battery with a smart electrical panel, such as a SPAN panel. Instead of physical critical load panels that permanently wire only a few circuits for backup, a smart panel allows you to dynamically manage your loads through a mobile app.

During an outage, a smart panel can automatically shed non-essential loads—like your guest bedroom outlets or your hot tub—to ensure your battery power is reserved for your refrigerator, internet, and furnace blower. This intelligent load shedding can easily double or triple your battery's effective runtime during an outage. To see how this works in real-time, you can explore How To Track And Control Energy Use Room By Room.

Leveraging Incentives and Tax Credits

To maximize your return on investment, it is essential to take advantage of all available financial incentives. The federal government offers a substantial 30% Residential Clean Energy Credit (under Section 25D) for qualified battery storage installations, which directly reduces your federal tax liability.

In addition to federal incentives, Colorado homeowners can often stack state-level incentives, utility rebates, and demand-response programs. Many local utilities offer programs that pay you to allow them to occasionally draw a small amount of power from your battery during periods of extreme grid strain, turning your battery into an active income generator.

Navigating these programs can be complex, but we make it simple. You can read our complete guide on Federal Tax Credits For Battery Storage And Span Panels to learn how to maximize your savings.

Frequently Asked Questions about Battery Storage Savings

How long can a home battery run during an outage?

The runtime of a home battery system depends on three main factors: the total usable capacity of your battery, the electrical load of the appliances you choose to run, and whether you have solar panels to recharge the system during the day.

If you are only powering critical loads—such as your refrigerator, LED lighting, Wi-Fi router, and a few device chargers—a standard 13.5 kWh battery can easily keep your home running for 24 hours or more on a single charge. When paired with solar panels, this backup duration can extend indefinitely, as the system recharges every day the sun shines. To learn more about high-performance options, read about the Franklin Battery Storage Benefits Explained.

Does a solar battery completely eliminate outage losses?

While a solar battery system can mitigate up to 95.8% of expected load loss during a major outage, it is important to have realistic expectations. A battery system will eliminate losses like food spoilage, frozen pipes, and lost internet connectivity, but it is not designed to run your entire home at full capacity indefinitely unless you have sized a very large system.

To get the most out of your system, we recommend working with an experienced professional to design a customized backup plan. This ensures your system is sized correctly to keep your household safe and comfortable. For a detailed look at planning your backup strategy, check out our guide on Choosing The Right Backup Power For Colorado.

Can I charge my battery with solar panels when the grid is down?

Yes, but only if your system is designed with "islanding" capabilities. Standard grid-tied solar systems without batteries are legally required to shut down during a power outage. This safety feature prevents your solar panels from sending electricity back into the utility lines, which could severely injure utility workers who are trying to repair the grid.

When you install a battery backup system, the system's inverter is designed to automatically isolate your home from the utility grid during a blackout. This creates a localized microgrid, allowing your solar panels to safely continue operating, powering your home, and recharging your batteries even when the rest of the neighborhood is completely dark. You can learn more about this process in our article on How Does A Home Battery Backup System Work.

Conclusion

At the end of the day, answering how much does battery storage save during outages requires looking at both direct financial protection and daily energy management. While avoiding spoiled food, frozen pipes, and hotel stays provides immediate, tangible savings during a blackout, the true financial victory comes from stacking those resilience benefits with daily time-of-use savings and smart energy controls.

At Courtesy Electric Company, we have been serving homeowners across Denver and the Colorado Front Range since 1976. We specialize in designing and installing high-quality backup power solutions, including Franklin battery storage systems and SPAN smart electrical panels, tailored specifically to our local climate and grid conditions.

If you are ready to protect your home from future grid failures while taking control of your daily energy bills, we are here to help. Schedule a free estimate with Courtesy Electric Company today, and our team of local experts will design the perfect backup system for your home and budget.

How Often Do Whole Home Generators Need Maintenance? The Easiest Way to Know

Your Whole Home Generator Is Only as Reliable as Its Last Service

whole home standby generator outside a house in Colorado

How often do whole home generators need maintenance is one of the most important questions you can ask as a homeowner — and the short answer is: more often than most people think.

Here's a quick breakdown:

Maintenance Type Frequency
Visual inspection (leaks, debris, rust) Weekly
Battery terminal check and cleaning Monthly
Exercise cycle (auto-run test) Weekly or monthly
Oil and oil filter change Every 100 hours of runtime, or annually
Air filter replacement Annually or every 100 hours
Spark plug inspection/replacement Every 100 hours of runtime
Professional full-service visit Once a year, or every 100–200 hours of runtime

Most standby generators sit quietly in your yard for months at a time, which makes it easy to forget they exist — until a Colorado storm knocks out the grid and you need that machine to start without hesitation. The problem is, a generator that isn't regularly maintained is a generator that's likely to let you down at exactly the wrong moment. Neglect builds up slowly: a corroded battery terminal here, a dirty air filter there, and before long you've got a machine that won't fire up when your family needs it most.

I'm David Meyer, Vice President of Courtesy Electric, a Colorado electrical contractor with roots going back to 1976, and understanding how often whole home generators need maintenance is something I deal with directly through our backup power installation and service work across Denver and the Front Range. Let's walk through everything you need to know to keep your generator ready when it counts.

infographic showing whole home generator maintenance schedule by task and frequency infographic

How Often Do Whole Home Generators Need Maintenance?

Determining how often your generator needs a tune-up is not a one-size-fits-all answer. It operates on two distinct clocks: a calendar schedule and a runtime schedule.

Even if we experience a mild year in Denver with zero power outages, your standby generator still requires attention. Standby units are mechanical engines, much like the one in your car. When an engine sits idle for months, seals can dry out, battery charges can deplete, and moisture can accumulate in the engine block. This is why understanding how often should you service your standby generator is essential for protecting your investment.

At a bare minimum, a professional technician should perform a comprehensive service on your whole home generator once a year. However, if our unpredictable Colorado weather forces your generator to run frequently, you will need to schedule service based on operating hours rather than the calendar.

technician servicing whole home generator

Hourly vs. Calendar Schedules: How Often Do Whole Home Generators Need Maintenance in a Typical Year?

For most homeowners in communities like Highlands Ranch or Parker, a typical year consists of the generator remaining in "standby" mode, occasionally running its weekly self-exercise cycle. In this standard scenario, your primary maintenance milestone is the annual professional service.

However, when the generator is actively running to power your home, the clock shifts to operating hours. The standard maintenance intervals for key components are:

  • Every 50 to 60 Hours of Use: The engine oil should be checked and, depending on the manufacturer and environmental conditions, changed to maintain engine reliability.
  • Every 100 Hours of Use: Change the engine oil and the oil filter. Clean or replace the air filter, and inspect the spark plugs for wear or cracks.
  • Every 200 Hours of Use: Replace the spark plugs, conduct a full cooling system inspection, and check the valve clearances.

For a detailed look at how these intervals apply to the most common systems in Colorado, you can read our generac generator maintenance schedule explained guide.

How Often Do Whole Home Generators Need Maintenance During Extended Outages?

When a severe winter blizzard hits the Black Forest or a heavy spring storm downs power lines along the Front Range, your generator transitions from a backup safety net to your primary utility provider. During these extended outages, the maintenance schedule accelerates dramatically.

If your generator is running continuously for 24 hours or more, you must treat it like a car on a cross-country road trip. You should shut the unit down safely once a day to check the oil level. Running an engine continuously under load consumes oil, and letting the oil level drop too low can cause catastrophic engine failure.

Additionally, if the outage lasts several days, you may easily surpass the 50-hour or 100-hour runtime thresholds. This means you will need to perform an oil and filter change right in the middle of the outage to keep the system running smoothly. For practical steps on how to handle these situations safely, check out our generator maintenance tips for homeowners.

Essential Standby Generator Maintenance Tasks

To ensure your standby generator remains in peak operating condition, several critical tasks must be performed regularly. Neglecting these core responsibilities can lead to sudden engine failure and can even void your manufacturer's warranty.

Here are the essential maintenance tasks that keep your generator healthy:

  • Oil and Oil Filter Replacement: Just like your vehicle, your generator relies on clean oil to lubricate moving parts, reduce friction, and dissipate heat. Always replace the oil filter concurrently with an oil change to prevent clean oil from being immediately contaminated by debris left in an old filter.
  • Air Filter Maintenance: Your generator's engine needs to breathe. Dirty air filters restrict airflow, preventing the engine from drawing the required amount of clean air to combustion efficiently. Air filters should be inspected regularly and replaced annually.
  • Spark Plug Service: Spark plugs should be checked for carbon buildup, proper gapping, and structural cracks. Replacing them every 100 to 200 hours of runtime ensures clean ignition and smooth engine operation.
  • Battery Inspection and Cleaning: Battery failure is the single most common reason a generator fails to start during an outage. Corrosion on battery connections blocks the electrical current needed to crank the engine. Clean the terminals monthly and replace the battery entirely every 3 to 5 years.

To help you prepare your system for the changing seasons, we have put together a guide on spring generator maintenance after winter to address cold-weather wear and tear.

While some basic tasks are easy to handle yourself, complex electrical and mechanical diagnostics require professional expertise. If you notice any unusual vibrations, strange noises, or fluid leaks, you should look for the signs your generator needs professional attention right away. Taking action early is the best way to learn how to extend the life of your standby generator.

Maintenance Task DIY Friendly? Requires Professional? Why It Matters
Visual Inspection & Debris Clearing Yes No Keeps intake vents clear of snow, leaves, and pests.
Battery Terminal Cleaning Yes No Prevents corrosion from blocking the starter motor's power.
Oil & Filter Changes Yes (with tools) Yes Essential for engine lubrication and cooling.
Spark Plug Replacement Yes (with tools) Yes Ensures reliable ignition and prevents engine misfires.
Transfer Switch Inspection No Yes High-voltage component; critical for safe power transfer.
Electrical Load Testing No Yes Verifies the generator can handle your home's full power load.

How Fuel Type and Colorado Climate Affect Your Service Schedule

The fuel your generator runs on—and the unique climate of the Colorado Front Range—plays a massive role in how often your system needs maintenance.

Standby generators typically run on natural gas (NG) or liquid propane (LP), while some larger residential or commercial units use diesel. Natural gas and propane burn very cleanly, which means they produce less carbon buildup in the engine compared to gasoline or diesel. However, they still require regular oil and filter changes because the engine oil breaks down over time due to heat and engine stress.

Our Colorado climate introduces specific challenges that homeowners in other parts of the country don't have to worry about:

  • Freezing Temperatures: Winter temperatures in Denver, Parker, and the Black Forest can drop well below freezing. Cold weather makes engine oil thick and sluggish, which puts extra strain on the starter battery. Installing a cold-weather kit—which includes a thermostatically controlled battery warmer and oil heater—is highly recommended for our region.
  • High Altitude: The thin air of the Front Range affects the air-to-fuel ratio in combustion engines. Generators installed at high altitudes often need to be properly configured or "derated" by a professional to ensure they run efficiently without running too rich, which can clog spark plugs and exhaust systems.
  • Heavy Snowfall: Snow and ice can quickly accumulate around your generator's outer enclosure, blocking the air intake and exhaust vents. If the engine cannot draw in fresh air or expel exhaust gases, it will overheat and shut down automatically.

To ensure your system is ready for our rapid weather shifts, we recommend reviewing our guide on generator maintenance before colorado storm season.

Frequently Asked Questions About Standby Generator Lifespan

How long does a well-maintained home generator typically last?

A well-maintained standby generator commonly lasts 20 to 30 years. Because these units are designed for emergency backup use rather than continuous daily operation, they accumulate run hours slowly. In terms of overall engine life, you can expect a quality generator to provide between 1,500 and 3,000 hours of operating service. To learn more about maximizing the return on your investment, explore our standby generator lifespan guide 2026.

What are the most common reasons a generator fails to start?

The absolute most common reason a standby generator fails to start is a dead or weak starter battery. Over time, the battery loses its ability to hold a charge, especially during cold Colorado winters.

For portable generators, the most common culprit is stale fuel and a clogged carburetor. Gasoline starts to degrade in as little as 30 days, leaving behind a gummy residue that blocks fuel flow. While standby generators running on natural gas or propane don't suffer from stale fuel, they can still fail to start due to blocked fuel lines, corroded electrical connections, or neglected spark plugs. If your system is aging and showing frequent starting issues, it might be time to read about when should you replace your generator.

How does proper maintenance affect the generator warranty?

Skipping your scheduled maintenance doesn't just risk a power failure—it can also void your manufacturer's warranty. Leading brands require documented proof of regular maintenance to honor warranty claims. If a major engine component fails and you cannot produce a maintenance log showing that the oil, filters, and spark plugs were serviced at the required intervals, the manufacturer may deny your claim.

Keeping a detailed service log is the easiest way to protect your warranty and ensure your system remains covered. For more details on the connection between routine upkeep and financial protection, see how proper maintenance extends generator life.

Conclusion

Your whole home generator is a major investment designed to protect your family, your comfort, and your property during unexpected power outages. But remember: a generator is only as reliable as its last service. By keeping up with weekly visual checks, monthly battery cleanings, and scheduling a professional annual service, you can rest easy knowing your home will stay bright and warm when the grid goes dark.

At Courtesy Electric Company, we have been serving homeowners across Denver, Parker, Highlands Ranch, the Black Forest, and the wider Colorado Front Range since 1976. We specialize in high-quality standby generator installations, smart home panel upgrades, and complete residential electrical services.

Whether you need to set up an annual maintenance plan for your generator or you are looking to upgrade your home's electrical system, our experienced team is here to help with honest advice and professional workmanship.

Ready to ensure your backup power system is prepared for whatever Colorado weather throws our way? More info about electrical services is just a click away. Contact us today to schedule your maintenance visit or request a free estimate on a new installation!

A Quick Start Guide to How EV Chargers, Heat Pumps & Batteries Change Panel Needs

Understanding How EV Chargers Heat Pumps and Batteries Change Your Panel Needs

modern home electrical panel with smart energy management and home electrification

How EV chargers, heat pumps, and batteries change your panel needs is one of the most important questions Colorado homeowners are facing right now — and the answer isn't always simple. Here's a quick overview before we dive in:

Quick Answer: How Each Technology Affects Your Electrical Panel

Upgrade Typical Dedicated Circuit Needed Key Panel Impact
Level 2 EV Charger (48A) 60A dedicated circuit Requires open breaker slot + capacity headroom
Heat Pump (central) 40-60A dedicated circuit Adds significant continuous load, especially in winter
Home Battery Storage 30-60A+ depending on system Requires critical load subpanel or smart panel integration
All three combined 150A+ simultaneous draw possible May push a 100A or 200A panel to its limits without load management
  • About 20% of homes need some kind of electrical upgrade before installing an EV charger alone
  • Most homes use less than 80A at any one time — even on a 100A panel — but adding multiple high-draw devices changes that math fast
  • Smart load management can often help a 200A panel handle what would otherwise require a 400A service upgrade
  • A 100A panel may struggle without smart workarounds; a 60A panel will almost certainly need a full upgrade

The core issue is this: your electrical panel was sized for the home you had, not the home you're building toward. When you add a Level 2 EV charger, a heat pump, and a battery backup system — even in stages — your panel has to handle loads it was never designed for. And if you install these upgrades in the wrong order, or without a clear electrical plan, you can end up paying for the same work twice.

I'm David Meyer, Vice President of Courtesy Electric, a Colorado-based electrical contractor with roots going back to 1976, and I've seen how understanding how EV chargers, heat pumps, and batteries change your panel needs before you buy equipment can save homeowners thousands of dollars and months of frustration. Let's walk through exactly what you need to know so you can electrify your home the smart way.

infographic showing simultaneous electrical draw of EV charger, heat pump, and battery storage on a home panel infographic

To understand why your panel feels the squeeze when you start adding modern clean energy upgrades, it helps to think of your electrical system as a highway. Your main service panel is the toll booth, and every appliance in your home is a car trying to get through.

Historically, home electrical panels in Denver and across the Front Range were sized based on a simple set of assumptions. Builders assumed you would run a refrigerator, a clothes dryer, some lights, and maybe a central air conditioner. Because you rarely ran everything at the exact same moment, the total electrical load was highly diversified.

But home electrification is fundamentally changing the traffic patterns on that highway. When we add high-draw devices like a Level 2 EV charger, a central heat pump, and home battery storage, we are introducing massive, sustained electrical demands.

The concept of simultaneous draw is where many homeowners run into trouble. If your family is cooking on an electric range, running the clothes dryer, heating the home with a heat pump, and charging an EV at the same time, your peak demand spikes dramatically. To determine if your current setup can handle this, read our detailed guide on Does Your Electrical Panel Support an EV Charger.

How EV Chargers Heat Pumps and Batteries Change Your Panel Needs for Space vs. Capacity

When we evaluate a home's readiness for electrification in communities like Parker or Highlands Ranch, we look at two entirely different constraints: panel space and panel capacity.

  • Panel Space (Breaker Slots): This is a physical limitation. Do you have empty physical slots in your metal panel box to snap in a new, double-pole 240-volt circuit breaker? If your panel is completely full of breakers, you have a physical space problem.
  • Panel Capacity (Amperage): This is an electrical limitation. Your home's main service is rated for a specific maximum amperage—typically 100 amps, 150 amps, or 200 amps. This rating is determined by the size of the wires coming from the utility company (like Xcel Energy) and the rating of your main breaker.

You can easily have plenty of physical breaker slots but zero remaining electrical capacity. Conversely, you can have a high-capacity 200-amp panel that is completely out of physical space. Understanding these differences is the first step in learning How to Future-Proof Your Home Electrical System.

The Impact of Continuous Loads and the NEC 80% Rule

Why does a single EV charger or heat pump place such a heavy burden on your panel? It comes down to how the National Electrical Code (NEC) defines a continuous load.

A continuous load is any electrical load where the maximum current is expected to continue for three hours or more. Unlike a microwave or toaster that runs for a few minutes, an EV charger will pull maximum current for hours at a time. The same is true for a heat pump keeping your home warm during a freezing night in the Black Forest.

Under the NEC 80% rule, a circuit breaker can only be loaded to 80% of its maximum rating for continuous loads. This safety margin prevents breakers from overheating. For example:

  • A 48-amp Level 2 EV charger requires a dedicated 60-amp circuit breaker ($48\text{A} \div 0.80 = 60\text{A}$).
  • A 32-amp charger requires a dedicated 40-amp circuit breaker.

This means you cannot simply add up the face-value amps of your appliances; you must factor in this 25% safety buffer for continuous loads. To see how these rules apply to different charging setups, explore our comparison of Level 1 vs Level 2 EV Charger for Home Use.

Evaluating Your Current Electrical Panel Capacity

Before you buy an EV or sign a contract for a heat pump, you need to establish your electrical baseline.

electrician performing a residential load calculation

A proper evaluation involves three steps:

  1. Identify the Main Breaker: Open your panel door and look for the single largest switch, usually located at the very top or bottom. It will have a number stamped on it (e.g., 100, 150, or 200). This tells you your total service capacity.
  2. Perform a Physical Inspection: Look for open slots, but also keep an eye out for warning signs. If you see rusted metal, scorched plastic, or feel warmth radiating from the panel, your panel may be outdated or unsafe.
  3. Conduct a Formal Load Calculation: This is a mathematical assessment of your home's square footage and existing appliances to determine how much capacity is actually left.

Because of the safety risks and complexity involved, you should have a professional evaluate your system. Find out more about How Often Should You Have Your Electrical System Inspected to keep your home safe.

Here is how standard household appliances compare to major clean energy upgrades:

Appliance Typical Amperage Voltage Continuous Load?
Refrigerator 15A 120V No
Electric Clothes Dryer 30A 240V No
Central Air Conditioner 30A - 40A 240V No
Level 2 EV Charger (48A) 60A (circuit size) 240V Yes
Central Heat Pump 40A - 60A (circuit size) 240V Yes
Home Battery Storage 30A - 60A (circuit size) 240V Yes

How EV Chargers Heat Pumps and Batteries Change Your Panel Needs During Peak Winter Heating

In Colorado, winter changes everything. If you are planning a heat pump retrofit, you have to plan for our coldest nights.

While modern cold-climate heat pumps are incredibly efficient, they sometimes rely on auxiliary electric resistance heat strips (often called "heat strips" or "emergency heat") when outdoor temperatures plummet far below freezing. These backup heat strips draw massive amounts of electricity—often requiring an additional 40 to 60 amps of dedicated panel capacity on top of the heat pump compressor itself.

If your EV charger is trying to charge your vehicle at 48 amps while your heat pump is running its auxiliary heat strips on a January night, an unmanaged 100-amp or even 200-amp panel can easily overload and trip the main breaker. This is why seasonal peak demand must be factored into your load planning. To learn how to balance these unique seasonal loads, check out the Energy Management Options for Colorado Homes.

Smart Alternatives to Avoid a Full Panel Upgrade

Many homeowners assume that adding an EV charger and a heat pump automatically requires a traditional panel upgrade. Fortunately, modern technology offers several clever, code-compliant ways to bypass a full service replacement.

These alternatives focus on amperage avoidance—using smart hardware to manage how and when your home consumes power so you never exceed your existing panel's limits. To compare these paths, read our analysis of Smart Energy Management vs Traditional Panel.

Dynamic Load Balancing and Smart Panels

The most advanced alternative is a smart electrical panel, such as a SPAN panel. Unlike a traditional "dumb" panel that simply trips a breaker when too much current flows, a smart panel dynamically monitors and manages your electrical circuits in real time.

With dynamic sequencing and load shedding, a smart panel can run a complex home on a 200-amp service that would normally require a 400-amp upgrade. For example, if you are running your electric range and dryer simultaneously, the smart panel can automatically pause or throttle down your EV charger for a few minutes. Once the high-demand appliances turn off, the panel resumes full-power EV charging. You won't even notice the interruption, and your main service line is never overloaded. Discover How Energy Management Reduces Your Electric Bill using these smart technologies.

Circuit Sharing and Lower-Amperage Charging Options

If you only need to manage two high-draw appliances, a physical smart circuit splitter is a highly effective, lower-cost alternative.

A smart splitter allows two appliances—like an electric clothes dryer and an EV charger—to share a single 240-volt circuit. The splitter gives priority to one appliance (usually the dryer). When you turn the dryer on, the splitter automatically pauses power to the EV charger. When the dryer cycle finishes, power seamlessly switches back to the vehicle.

Additionally, many homeowners overestimate how much charging speed they actually need. Opting for a lower-amperage charger (such as a 24-amp or 30-amp charger on a 40-amp circuit) can still easily restore more than 150 miles of range overnight. This simple adjustment can keep your total load within your existing panel's capacity. For help choosing the right charging speed, read our guide on How to Choose the Right Home EV Charger.

The Best Order of Operations for Home Electrification

One of the most common mistakes we see is homeowners buying appliances one at a time without a master plan. They install solar, then run out of physical breaker space for an EV charger, and later realize they have to rip out and rewire their system to add a battery.

home battery backup system installed next to an electrical panel

To avoid expensive rework, we recommend creating a "one-page electrical roadmap" and following this order of operations:

  1. Perform a Comprehensive Load Calculation First: Assess your panel's current capacity and plan for all anticipated electrical upgrades over the next three to five years.
  2. Address Infrastructure and Panel Needs: Upgrade your panel, add a subpanel, or install a smart panel like SPAN before purchasing major appliances.
  3. Install Solar and Battery Storage: Plan your battery integration early so you can organize your critical load circuits from the start.
  4. Add EV Charging and Heat Pumps: Integrate these high-draw appliances into your pre-planned, managed electrical system.

By establishing your electrical foundation first, you ensure that every subsequent upgrade integrates seamlessly. To plan your system step-by-step, review our Home Battery Storage Complete Guide.

Integrating Battery Storage and Critical Load Panels

Adding a home battery backup system, like Franklin Battery Storage, changes how your electrical panel operates. During a utility outage, a battery cannot power your entire home indefinitely; instead, it needs to isolate and power your most important appliances.

Traditionally, this requires installing a physical critical loads subpanel. An electrician physically moves your essential circuits—such as your refrigerator, select lights, heating controls, and well pump—from your main panel into this dedicated subpanel.

However, if you install a smart panel like SPAN, you can bypass the physical subpanel entirely. The smart panel allows you to dynamically choose and change your critical backup loads directly from an app on your phone during an outage. Understanding How Does a Home Battery Backup System Work is essential for designing a resilient home backup system.

Frequently Asked Questions About Panel Upgrades

Navigating home electrification can raise a lot of questions. Here are some of the most common questions we hear from homeowners across the Denver metro area. If you are evaluating your overall backup strategy, you can also learn more about whether Is Home Battery Storage Worth It in Colorado.

Do I need a panel upgrade to switch to a heat pump if I already have central AC?

In many cases, no. If your home is already equipped with a standard central air conditioner, you already have a dedicated 240-volt circuit running to your outdoor condenser unit. Because a heat pump uses the exact same refrigeration cycle to both cool and heat your home, we can often utilize your existing AC circuit and breaker to install a heat pump retrofit without adding any new electrical load to your panel.

However, if your new heat pump requires auxiliary electric backup heat strips to handle extreme winter temperatures, those heat strips will require their own dedicated high-amperage circuit. We can help you evaluate your specific heating requirements and existing panel capacity to find the safest, most efficient path forward. Explore our Residential services to see how we handle these retrofits.

How do home batteries and solar panels interact with my main panel?

Rooftop solar and home battery systems do not behave like traditional, power-consuming appliances. Instead, they feed power back into your electrical system. Because of this, they are subject to strict safety rules, such as the NEC 120% rule.

This rule dictates that the combined power input from your utility main breaker and your solar inverter cannot exceed 120% of your panel's busbar rating. If your solar system produces more power than this limit allows, it can trigger a mandatory panel upgrade—even if your home's actual power consumption hasn't changed. Properly designing your system's wiring pathways is critical to avoiding these unexpected code violations. Learn more about How Generators and Batteries Can Work Together to optimize your home's power distribution.

What incentives are available in Colorado for electrical panel upgrades?

There are several excellent incentives available to help offset the cost of panel upgrades and smart energy management installations in Colorado:

  • Federal Tax Credits (Section 25C): Homeowners can claim a 30% tax credit for qualified electrical panel upgrades, up to a maximum credit cap, when completed in conjunction with installing a heat pump or heat pump water heater.
  • Utility Rebates: Major local utilities, including Xcel Energy, offer specific rebates for EV-ready wiring, panel upgrades, and smart load-management devices.
  • State and Local Programs: Various Colorado municipalities offer additional localized rebates and permit fee waivers for home electrification projects.

Because these programs can be stacked, planning your upgrades together can significantly reduce your out-of-pocket expenses. Check out our comprehensive guide on Colorado EV Charger Rebates and Incentives for the latest details on active programs.

Conclusion

Understanding how EV chargers, heat pumps, and batteries change your panel needs is the key to a successful, headache-free home electrification journey. Whether you have an older home in Black Forest that needs a creative load-management solution, or you are looking to install a state-of-the-art SPAN smart panel and Franklin battery storage system in Highlands Ranch, taking a holistic, planned approach will save you time, money, and hassle.

At Courtesy Electric Company, we've spent decades helping Denver and Front Range homeowners navigate their electrical needs with quality, integrity, and dependability. We handle everything from complete system design to professional installation, ensuring your home is safe, efficient, and ready for the future.

Ready to take the next step? Contact us today to request a free estimate on your panel upgrade, smart panel installation, or home backup system. Let's design an electrical system that works for you. Learn more about our complete range of services at Electrical Service.

A Practical Guide to Why Older Homes Need More Frequent Inspections

Why Colorado Homeowners Must Understand How Older Homes Need More Frequent Inspections

A historic brick home in Denver, Colorado under a clear sky

Why Do Older Homes Need More Frequent Inspections?

If you own a home built before 1996, keeping a close eye on your property is vital. Here is a quick breakdown of why older properties require more frequent evaluations:

  • System Lifespan Limits: Critical components like electrical wiring, pipes, and roofs deteriorate over decades of constant use.
  • Outdated Safety Standards: Older homes were built under historical codes that lack modern safety features like GFCI outlets and arc-fault breakers.
  • Modern Power Demands: Original electrical systems were never designed to handle today's heavy loads of multiple computers, TVs, and smart appliances.
  • Undetected Wear and Tear: Soil expansion and extreme weather in Colorado slowly shift foundations, stressing plumbing and electrical systems over time.

Many Colorado Front Range families do not realize how older homes need more frequent inspections to remain safe, functional, and secure. Properties built over thirty years ago often harbor hidden electrical hazards, deteriorating plumbing, and foundation issues. In cities like Denver, CO, extreme temperature swings and expansive soils put constant stress on aging infrastructure. This makes a regular professional home electrical inspection an essential preventative measure, rather than just a one-time purchase hurdle. Outdated wiring simply cannot keep up with modern power demands, leading to overloaded circuits and severe fire hazards behind your walls.

If you are concerned about your home's safety, explore our comprehensive electrical services and schedule an electrical service with us today.

I am David Meyer, Vice President of Courtesy Electric, where we have spent fifty years keeping Colorado families safe and powered. Over my decades in the field, I have seen how older homes need more frequent inspections to prevent catastrophic electrical failures and safely integrate modern upgrades.

Infographic showing the hidden risks of aging home electrical and structural systems infographic

Understanding How Older Homes Need More Frequent Inspections

A home inspector carefully checking an older electrical panel with a thermal camera

Many homeowners view a property inspection as a single hurdle to clear during the buying process. However, for those living in Denver’s historic neighborhoods, Parker, Highlands Ranch, or Black Forest, inspections must be treated as recurring, proactive maintenance.

According to national housing data, approximately 48% of owner-occupied homes in the United States were built before 1980, and roughly 35% date back to before 1970. This aging housing stock is subject to continuous wear and tear. Over five or six decades, materials degrade, foundations settle, and environmental factors take their toll.

When you live in an older property, you are dealing with a complex web of overlapping systems. A slow plumbing leak behind a plaster wall can gradually rot structural framing, which in turn can pinch aging electrical lines. Standard home inspections find issues in about 86% of all homes evaluated. In properties built before 1980, that percentage is significantly higher, and the problems discovered tend to involve critical, high-risk systems.

Building codes are not static; they evolve to protect lives as technology and safety science advance. What was considered cutting-edge construction in 1950 or 1970 is often considered a safety hazard today. To keep your family safe and protect your investment, you need to understand How Often Should You Have Your Electrical System Inspected and when to bring in specialized professionals to assess other structural elements.

How Older Homes Need More Frequent Inspections to Prevent Electrical Fires

The gap between a home’s original design and modern electrical usage is one of the most pressing reasons how older homes need more frequent inspections. In the 1950s, a typical household ran a refrigerator, a few light bulbs, and perhaps a small television. Today, we plug in multiple high-definition screens, high-draw kitchen appliances, powerful HVAC systems, smart home networks, and electric vehicle chargers.

When modern loads are forced through legacy electrical infrastructure, the results can be disastrous. Undersized circuits become chronically overloaded, generating heat behind walls long before a breaker trips. This risk is compounded by the deterioration of the wire insulation itself. Over time, original rubber or cloth coverings on older wiring dry out, crack, and crumble, exposing live conductors.

Understanding How Outdated Wiring Increases Fire Risk is the first step in protecting your property. Older systems lack the safety margins engineered into modern homes. Without regular evaluations, hidden damage can trigger arc faults or short circuits. Proactive homeowners must prioritize learning How to Prevent Electrical Fires in Your Home through routine diagnostic testing, thermal imaging, and timely panel upgrades.

How Older Homes Need More Frequent Inspections to Maintain Structural Integrity

The physical structure of an older home acts as a unified system. When one element shifts, it places strain on everything else. In the Colorado Front Range, our unique geology and climate play a major role in this degradation.

Denver, Highlands Ranch, and surrounding areas are famous for expansive soils, particularly bentonite clay. This clay acts like a sponge, expanding dramatically when wet and shrinking as it dries. This constant movement exerts immense pressure on older foundations, which were often built with fewer steel reinforcements than modern engineering requires. Many older buildings are engineered to tolerate less than a quarter-inch of foundation movement over several years. When movement exceeds these narrow tolerances, the structural frame warps.

You can learn more about How Colorado Front Range Climate Affects Your Electrical System to see how these physical shifts do not just cause sticking doors and cracked drywall—they can also pull apart conduit, shear underground service lines, and compromise the grounding of your entire home. Regular structural and electrical checkups ensure that these slow-moving climate impacts are caught before they turn into emergency structural failures.

For properties over thirty years old, we recommend a comprehensive general maintenance inspection every five years, paired with an annual electrical safety check. These routine evaluations help you stay ahead of the natural failure patterns of aging materials.

Standard home inspections are primarily visual, meaning they can miss hidden, slow-growing issues. To truly safeguard an older home, specialized ancillary testing is highly recommended.

For instance, sewer lines in homes built before 1970 are frequently constructed from clay or cast iron. These materials are highly susceptible to tree root intrusion and ground settling. A specialized sewer scope can save you from a catastrophic backup. Similarly, Colorado's geology means that high radon levels are incredibly common. The EPA estimates that nearly 6 million homes nationwide have radon levels at or above the action limit of 4 pCi/L, and older, less ventilated basements are disproportionately affected.

Proactive testing is the best way to maintain peace of mind. Knowing How an Electrical Inspection Prevents Problems allows you to target your maintenance budget effectively, fixing minor issues before they escalate.

  • Sewer Scope Inspections: Uses a specialized camera to check for cracks, collapses, or root blockages in original clay or cast-iron lines.
  • Radon Testing: Measures soil gas levels in the lowest livable area of your home to protect your family from carcinogens.
  • Thermal Imaging: Detects hidden moisture, missing insulation, and overloaded, overheating electrical circuits behind finished walls.
  • Mold and Moisture Evaluations: Identifies slow plumbing leaks and poor attic ventilation before toxic mold compromises indoor air quality.

Diagram showing a comparison of standard vs specialized inspections

Inspection Type Focus Areas Recommended Frequency for Older Homes
Standard Visual Inspection Overall structural bones, roof, basic plumbing, and visible electrical components. Every 5 years
Electrical Safety Inspection Panel integrity, grounding, circuit loads, and outlets. Annually
Sewer Scope Main sewer line condition, root intrusion, pipe offsets. Every 2 to 3 years
Radon Testing Sub-slab soil gas levels on the lowest level. Every 2 years
Thermal Imaging & Moisture Hidden wall leaks, electrical hot spots, insulation gaps. As needed / during electrical audits

Common Hazards and Red Flags Found in Aging Infrastructure

When evaluating older properties, inspectors frequently run into predictable, era-specific hazards. Many of these issues are hidden behind plaster or drywall, quietly posing safety risks to the home's occupants.

One of the most critical areas of concern is the electrical system. Homes built before 1940 often contain active knob-and-tube wiring. This system uses single insulated conductors run through porcelain tubes and supported by porcelain knobs. While safe when originally installed, knob-and-tube has no ground wire, and its cloth insulation degrades over time. Furthermore, well-meaning homeowners often cover this wiring with modern attic insulation, which traps heat and creates an immediate fire hazard.

Later, in the late 1960s and early 1970s, copper shortages led builders to use aluminum branch circuit wiring. Aluminum expands and contracts more than copper when carrying electrical current, which can loosen connections at outlets and switches, leading to overheating and potential fires.

Keeping an Electrical Safety Checklist for Older Homes handy can help you identify these hazards in your property.

Outdated Electrical and Plumbing Systems

Beyond the wiring itself, the electrical panels in older homes are a major point of concern. Legacy panels manufactured by Federal Pacific Electric (Stab-Lok) or Zinsco are notorious for failing to trip when overloaded. Instead of cutting power during a short circuit, these outdated breakers can melt, arc, and cause devastating house fires. Many insurance carriers now refuse to write or renew policies on homes that still use these legacy panels.

Plumbing systems in older homes present similar age-related risks. Galvanized steel pipes, common in homes built before 1960, corrode from the inside out. This corrosion restricts water flow, causes low pressure, and eventually leads to pinhole leaks hidden inside walls.

It is crucial to learn How to Spot Electrical Problems Before They Become Dangerous, such as flickering lights, warm switch plates, or a persistent musty smell that could indicate a slow plumbing leak near electrical conduits.

Hazardous Materials and Past DIY Repairs

Older homes also act as historical records of past building trends, some of which we now know are highly hazardous. Lead-based paint was standard in residential construction until it was banned in 1978. If left undisturbed, lead paint is relatively safe, but scraping, sanding, or remodeling can release toxic lead dust. Asbestos was also widely used for insulation, plaster, and floor tiles up through the 1980s.

In addition to hazardous materials, older homes often suffer from "layers of past repairs." Over fifty or sixty years, various homeowners and uncertified handymen may have added outlets, removed structural walls, or spliced plumbing lines without permits or proper techniques.

These amateur modifications frequently create hidden hazards. Understanding When to Call an Electrician vs DIY is essential for older home maintenance. While painting or replacing trim is perfectly fine to tackle yourself, modifying structural framing, plumbing, or electrical infrastructure requires licensed professionals to ensure safety and code compliance.

Future-Proofing and Proactive Maintenance for Your Front Range Home

Preserving the historic character of an older Front Range home does not mean you have to live with outdated technology. In fact, modernizing your home’s infrastructure is the best way to protect its structural and architectural heritage. Future-proofing your property involves upgrading to systems that can safely manage modern electrical loads while providing reliable backup options during severe Colorado weather.

One of the most effective ways to modernize an older home is by installing a SPAN smart electrical panel. Traditional panels simply distribute power blindly, but a smart panel gives you real-time monitoring and control over every circuit in your house through a smartphone app. This allows you to track energy usage, detect abnormal electrical behavior before it becomes dangerous, and prioritize critical loads during an outage.

Pairing a smart panel with a Franklin battery storage system or a whole-home standby generator (such as a Generac or Cummins system) ensures your home remains safe and comfortable during winter blizzards or summer grid strain. These modern systems work together to isolate utility failures and restore power to your home within seconds.

By taking a proactive approach, you can learn How to Future-Proof Your Home Electrical System, blending classic historic charm with the safety and efficiency of modern smart home technology.

Frequently Asked Questions About Older Home Inspections

What are the biggest red flags in an older home inspection report?

The most critical red flags in an older home's inspection report are those that compromise safety or require massive structural remediation. These include:

  • Active structural foundation movement: Indicated by wide foundation cracks, severely sloping floors, or doors that cannot close.
  • Hazardous electrical systems: Active knob-and-tube wiring, aluminum branch wiring, or ungrounded outlets near water sources.
  • Legacy electrical panels: Federal Pacific Stab-Lok or Zinsco panels that pose immediate fire risks and prevent you from securing home insurance.
  • Severe water damage or mold: Hidden leaks behind walls or in crawl spaces that decay structural framing and ruin indoor air quality.

How do past unpermitted renovations affect an inspection?

Past unpermitted work is a major administrative and safety headache. When a previous owner performs unpermitted electrical, plumbing, or structural work, it often fails to meet building codes. During an inspection, these mismatched systems are flagged as safety hazards. Furthermore, if the city discovers unpermitted renovations, you may be forced to open up finished walls for inspections, pay retroactive permit fees, or completely rebuild the project to meet current safety standards.

How much of a home's value should be set aside for annual maintenance?

Industry experts and financial advisors generally recommend the "1% to 3% rule." This means you should set aside 1% to 3% of your home's total market value each year for ongoing maintenance and repairs. For an older home, you should aim for the higher end of this range (3%). Having a dedicated maintenance fund allows you to address minor repairs, schedule regular inspections, and replace aging components proactively, saving you from the stress of emergency failures.

Conclusion

Owning a piece of Colorado’s history is incredibly rewarding, but it comes with a responsibility to maintain and protect that legacy. Understanding how older homes need more frequent inspections is the key to keeping your historic property safe, functional, and valuable for decades to come. By pairing regular structural checkups with professional electrical safety audits, you can catch minor wear and tear before it escalates into a costly emergency.

At Courtesy Electric Company, we have been serving Denver, Parker, Highlands Ranch, Black Forest, and the entire Front Range region since 1976. As a trusted local contractor, we specialize in everything from retrofitting older homes with modern wiring to installing smart panels, standby generators, and battery backups.

Let us help you protect your home. We offer free estimates on all electrical installations and upgrades. Schedule an Electrical Service with Courtesy Electric Company today to ensure your older home is ready for the future.

The Ins and Outs of Franklin Battery Storage Cost vs Value

Is Franklin Battery Storage Worth the Cost? A Colorado Homeowner's Honest Look

franklin battery storage home energy system colorado front range

When weighing franklin battery storage cost vs value, here is what Colorado Front Range homeowners need to know upfront:

Quick Answer:

  • A single FranklinWH aPower system uses LFP chemistry, delivers 13.6–15 kWh of usable storage, and provides whole-home backup capability
  • Installed costs vary based on system size, labor, permitting, and whether you are pairing with solar
  • Long-term value comes from energy bill savings, outage protection, and available incentives that can meaningfully reduce your net investment
  • Homes in time-of-use rate territories or areas with unreliable grid access tend to see the strongest financial return
  • Stacking multiple units lowers the cost per kWh and improves whole-home resilience

Utility rates across Colorado keep climbing, and grid outages on the Front Range are becoming harder to ignore. More homeowners are asking a practical question: does a home battery system actually pay off, or is it just an expensive insurance policy? The answer depends heavily on your local utility structure, how you use energy at home, and how well the system you choose holds up over time. Franklin battery storage has emerged as a serious contender in that conversation — built on LFP chemistry, designed to scale, and engineered to handle real-world loads like central HVAC and well pumps. But understanding the full picture means looking past the equipment specs and into the total installed investment, available incentives, and the realistic savings you can expect in a Colorado climate.

I'm David Meyer, Vice President of Courtesy Electric — a Colorado electrical contractor with roots going back to 1976 — and evaluating franklin battery storage cost vs value is something I do regularly for homeowners across the Denver metro and Front Range. In the sections ahead, I'll walk you through every layer of that equation so you can make a confident, informed decision.

Infographic showing Franklin battery storage cost vs value breakdown for Colorado homeowners infographic

Evaluating Franklin Battery Storage Cost vs Value for Colorado Homeowners

When evaluating any clean energy upgrade, the core question is whether the upfront capital investment translates into tangible, long-term security and financial return. For homeowners in Denver, Parker, Highlands Ranch, and Black Forest, Colorado, the local climate and utility landscape play a massive role in this decision. Between heavy spring snowstorms that weigh down power lines and intense summer heatwaves that strain the local grid, power reliability is no longer something we can take for granted.

But beyond basic emergency preparedness, there is a clear financial mechanism at play. To determine if the investment makes sense for your home, you must look at how stored energy offsets your monthly utility bills. By storing excess power when rates are low (or when your solar panels are producing at their peak) and discharging that power during peak-rate hours, you can significantly lower your monthly electric bills. In fact, when looking closely at whether is home battery storage worth it in colorado, the combination of daily bill management and seamless emergency backup is what tips the scale from a luxury purchase to a practical home asset.

Diagram showing how solar energy, a home battery, and the utility grid interact to power a home

Understanding the Upfront Investment and Long-Term Value

The total investment for a home battery system is determined by several interconnected components. It is helpful to think of the system as two primary parts: the physical storage units (the batteries themselves) and the intelligent management hardware that controls them.

For a standard FranklinWH installation, the project scope includes:

  • The aPower Battery Unit: This is the physical energy storage device. It utilizes Lithium Iron Phosphate (LFP) chemistry, which is widely recognized as the safest and most durable chemistry available for residential applications.
  • The aGate Smart Controller: This is the "brain" of the system. It manages the connection between your home, your solar panels, the battery, and the utility grid. It also handles grid isolation during an outage, ensuring your home remains powered safely without sending electricity back into the grid.
  • Labor, Engineering, and Permitting: Installing a high-capacity battery system requires specialized electrical work, structural or wall-mount preparation, local building permits, and utility interconnection agreements.

When analyzing the franklin battery storage cost vs value equation, scaling is a critical factor. Installing a single battery unit requires a baseline investment in the smart gateway, electrical subpanels, and permitting. However, if you choose to stack multiple battery units, the incremental cost of the additional storage capacity is significantly lower because the foundational electrical infrastructure is already in place. This means a multi-battery stack offers a much better relative value per kilowatt-hour of storage than a single-unit installation. To explore how these components fit together in detail, you can consult our home battery storage complete guide.

Maximizing Your Return with Local Utility Incentives

One of the most effective ways to accelerate your return on investment is by taking advantage of federal and local financial incentives. Even in 2026, residential energy storage remains highly supported by public policy, making these systems much more accessible.

First and foremost is the federal residential clean energy credit. This incentive allows homeowners to claim a 30% tax credit on the total cost of the system, including equipment, labor, and necessary electrical upgrades. Because the credit applies to standalone battery storage systems with a capacity of 3 kWh or greater, you do not even need to have solar panels installed to qualify. You can read more about how to navigate these tax advantages in our guide on federal tax credits for battery storage and span panels.

Additionally, local Colorado utilities offer programs that further improve the financial equation. For example, Xcel Energy's Renewable Battery Connect program provides upfront incentives or ongoing annual credits for homeowners who allow their batteries to occasionally support the grid during periods of extreme electricity demand. When you stack these local utility rebates with the 30% federal tax credit, the net investment drops substantially, allowing you to recoup your initial costs much faster through monthly bill savings.

Key Factors That Drive the Value of Your Home Energy Storage

To truly appreciate the value side of the equation, we have to look under the hood. Not all home batteries are engineered the same way, and the physical design of the system directly impacts how much work it can perform for your household.

The FranklinWH system stands out due to its heavy-duty performance characteristics. Each unit delivers a high continuous power output and an exceptional peak surge capacity. In practical terms, this means the system can handle the high starting currents (often measured as Locked Rotor Amperage, or LRA) required by large household appliances. While some standard home batteries struggle to start up a 3-ton central air conditioner or a deep well pump during a blackout, the FranklinWH system is designed specifically to handle these demanding startup surges.

A clean, professionally installed home battery system mounted on a garage wall

Furthermore, the system features a dedicated "black start" capability. If an extended winter storm drains your battery completely overnight, the system reserves a small portion of its internal energy to reboot itself and your solar inverters as soon as the sun rises the next morning, preventing you from being stranded with a dead system. To see how these technical advantages translate into daily home comfort, check out our article where the franklin battery storage benefits explained in greater detail.

How Smart Circuits Optimize Franklin Battery Storage Cost vs Value

A common challenge with home backup power is that standard batteries can drain quickly if you try to power your entire house without restrictions. This is where the aGate's smart circuit management provides immense value.

The smart gateway allows you to designate specific electrical circuits as "smart circuits." During a power outage, the system automatically monitors your battery level and can dynamically turn off non-essential loads — such as pool pumps, clothes dryers, or guest bedroom air conditioning — to preserve power for your refrigerator, medical equipment, and heating system.

This level of control can be enhanced even further when paired with an intelligent electrical panel, such as a SPAN smart panel. By combining smart battery storage with advanced energy management, you can customize your backup priorities on the fly using a smartphone app. This prevents you from having to buy multiple extra batteries just to back up your whole home, optimizing your upfront investment while maximizing your runtime. To understand the relationship between load management and utility savings, read about how energy management reduces your electric bill.

Long-Term Durability and Warranty Protections

A battery is only as valuable as its lifespan. If a system degrades significantly after just a few years, its long-term financial return vanishes. This is why the underlying battery chemistry is so important.

FranklinWH uses Lithium Iron Phosphate (LFP) cells, which offer several distinct advantages over traditional Nickel Manganese Cobalt (NMC) chemistries:

  • Thermal Stability: LFP chemistry is highly resistant to thermal runaway, making it incredibly safe for indoor or garage installations.
  • Deep Discharge Cycles: You can repeatedly discharge the battery to 100% of its usable capacity without causing the rapid degradation common in older battery types.
  • Extended Cycle Life: LFP batteries typically support thousands of full charge and discharge cycles before showing any noticeable drop in capacity.

This durability is backed by an exceptional manufacturer's warranty. The FranklinWH system comes with a 12-to-15-year warranty (depending on the specific model configuration) that guarantees a high percentage of original capacity retention, alongside a generous energy throughput limit. Because these systems are designed to operate reliably for 15 to 20 years with minimal maintenance, they represent a highly stable, long-term asset for your home. For tips on keeping your system running at peak performance, you can review our battery storage maintenance guide granby co.

Integrating Battery Storage with Other Home Power Solutions

For many Front Range homeowners, energy independence is not an all-or-nothing choice between solar batteries and traditional backup generators. In fact, the strongest backup systems often combine multiple technologies to create a resilient, multi-layered home power grid.

Feature FranklinWH Battery Storage Standby Generator (Generac/Cummins)
Primary Fuel Source Solar Power / Grid Electricity Natural Gas / Liquid Propane
Transfer Time Instantaneous (Seamless backup) 10–20 Seconds
Maintenance Needs Extremely Low (No moving parts) Annual engine servicing & oil changes
Daily Financial Value High (TOU arbitrage & self-consumption) Low (Only operates during blackouts)
Outage Duration Dependent on battery capacity & solar Indefinite (As long as fuel is supplied)

As shown in the table above, both systems have unique strengths. While a battery provides silent, instantaneous backup and daily financial utility, a standby generator offers unlimited runtime during extended, multi-day grid failures. For a deep dive into comparing these two options, see our guide on battery storage vs generator which is better for backup.

Balancing Franklin Battery Storage Cost vs Value with Standby Power

If you live in a rural or heavily forested area like Black Forest, or in parts of the Front Range prone to severe winter weather, you might experience outages that last for several days. In these scenarios, relying solely on a battery can be risky if consecutive cloudy days limit your solar panels' ability to recharge the system.

The FranklinWH platform solves this problem through its built-in generator integration. The aGate smart controller can connect directly to a standby generator, managing both power sources simultaneously. When the grid goes down, the battery provides immediate, seamless power so your lights never flicker. If the outage continues and the battery drops to a pre-set threshold, the system automatically signals the generator to start up, powering your home while recharging the battery. This hybrid approach minimizes generator fuel consumption, reduces engine wear, and guarantees that your home has continuous power regardless of the weather. To compare the economics of these systems, read our standby generator vs battery backup cost comparison.

Seamless Installation and System Configuration

Integrating advanced energy storage into your home requires careful planning and professional execution. Because the FranklinWH system utilizes an AC-coupled architecture, it is incredibly flexible. It can be paired with a brand-new solar installation, retrofitted onto an existing solar panel system, or even installed as a standalone backup system without solar panels.

However, the physical installation involves more than just mounting the battery to a wall. Depending on the age of your home's electrical system, you may need an electrical panel upgrade to accommodate the new power flows. Additionally, local building departments in Denver, Parker, and Highlands Ranch have strict permitting and safety codes regarding battery placement, rapid shutdown capabilities, and structural mounting. Working with an experienced, licensed electrical contractor ensures that your system is sized correctly, permitted properly, and installed safely. For a step-by-step look at what to expect during the physical setup, consult our battery storage installation guide centennial co.

Frequently Asked Questions About Home Battery Storage

How does a home battery backup system work during a grid outage?

When a grid outage occurs, the smart gateway instantly detects the loss of utility power and physically isolates your home’s electrical system from the grid. This process happens in a fraction of a second, meaning your household appliances continue running without interruption. Once isolated, the battery system acts as a microgrid, supplying stored power to your home and allowing your solar panels to continue generating electricity safely. To learn more about this process, see our guide on how does a home battery backup system work.

What utility rate structures offer the fastest payback period?

The fastest payback periods occur under Time-of-Use (TOU) rate structures and avoided-cost net billing systems. Under TOU rates, your utility charges significantly more for electricity during peak evening hours. By charging your battery during the day when solar power is abundant (or when grid rates are lowest) and discharging it to power your home during expensive evening hours, you avoid paying high peak rates. Similarly, in areas where utilities do not offer full-retail net metering, storing your excess solar power for personal use is far more valuable than exporting it back to the grid for a minimal credit.

Can I add a battery to my existing solar panel system?

Yes. Because the FranklinWH system is AC-coupled, it is highly compatible with existing solar installations. It does not require you to replace your current solar inverter, making it an excellent option for retrofitting. The aGate controller simply sits between your existing electrical panel, your solar inverter, and the grid, managing the flow of power seamlessly without affecting your existing solar warranty.

Conclusion

Investing in home energy storage is about more than just keeping the lights on; it is about taking control of your home’s energy future. When you weigh the franklin battery storage cost vs value, the combination of robust LFP chemistry, intelligent smart-circuit management, and seamless generator integration makes it an incredibly versatile solution for Colorado's unique climate and utility structures.

At Courtesy Electric Company, we have been serving the Denver metro area and the Colorado Front Range for decades. Whether you are looking to install a standalone battery backup, pair storage with a new solar array, or upgrade your home with a SPAN smart panel and a standby generator, our team of experienced professionals is here to design and install a system tailored to your specific needs.

If you are ready to protect your home from rising utility rates and unexpected grid outages, contact us today to schedule a consultation. We provide professional, end-to-end service and offer free estimates on all of our installations. Learn more about how we can help secure your home’s power by visiting Courtesy Electric Company's electrical services.

Everything You Need to Know About Whole Home Generator Investment Value

Is a Whole Home Generator Worth the Investment for Colorado Homeowners?

whole home generator worth the investment

Is a whole home generator worth the investment? For most Colorado Front Range homeowners, the answer depends on how often you lose power, what's at stake when you do, and how much you value keeping your home running without interruption. Here's a quick look at who benefits most:

A whole home standby generator is likely worth it if you:

  • Experience frequent or extended power outages (especially during Colorado winter storms)
  • Rely on medical equipment that cannot lose power
  • Work from home and cannot afford downtime
  • Have a sump pump, well pump, or other critical home systems
  • Want automatic, hands-free protection without manual setup during a storm

It may be harder to justify if you:

  • Lose power only once or twice a year for a few hours
  • Have no critical systems or equipment at risk
  • Are comfortable with a portable generator as a lower-cost alternative

Power outages in the U.S. are getting worse — the average American customer lost 11 hours of power in 2024, the highest on record over the past decade. In storm-heavy states, that number climbs far higher. Colorado is no stranger to grid disruptions, from heavy snowstorms and high winds to summer thunderstorms that can knock out power for hours or days at a stretch. When the grid goes down, the question isn't just about the lights — it's about your furnace, your refrigerator, your sump pump, and everything else your home depends on to stay safe and functional.

I'm David Meyer, Vice President of Courtesy Electric, a Colorado electrical contractor with nearly 50 years of experience helping Front Range homeowners navigate backup power decisions — and the question of is a whole home generator worth the investment is one I hear constantly, especially as outages become more frequent and unpredictable. In this guide, I'll walk you through everything you need to make a confident, informed decision.

infographic showing who benefits from whole home generator investment and key decision factors infographic

What Is a Standby Generator and How Does It Work?

To truly evaluate if this system is right for your property, it helps to understand exactly what a whole-home standby generator does and how it differs from other backup options. Unlike temporary, portable units that you drag out of the garage during an emergency, a standby generator is a permanently installed outdoor appliance. It sits on a concrete or composite pad adjacent to your home, looking very similar to a standard central air conditioning condenser.

The magic of a standby generator lies in its integration with your home’s existing infrastructure. The unit is connected directly to your electrical panel through an automatic transfer switch (ATS) and is plumbed into your local utility fuel line—typically natural gas or liquid propane.

Here is a step-by-step breakdown of how the entire system functions automatically:

step-by-step process of how an automatic standby generator detects an outage and restores power

  1. Utility Grid Monitoring: The automatic transfer switch constantly monitors the incoming electrical current from your local Colorado utility grid.
  2. Outage Detection: The moment the utility power drops or fluctuates dangerously, the ATS senses the interruption.
  3. Engine Startup: Within seconds, the ATS signals the generator’s engine to start up, using your home's natural gas or liquid propane supply.
  4. Seamless Power Restoration: Once the generator reaches the correct operating speed, the ATS safely disconnects your home from the utility grid and connects it to the generator. This prevents "backfeeding," a dangerous hazard where power from your home travels back down the utility lines and threatens the safety of electrical line workers.
  5. Automatic Shutdown: When the ATS detects that stable utility power has returned, it seamlessly transfers your home's electrical load back to the grid, shuts down the generator engine, and returns to monitoring mode.

This entire process occurs in about 10 to 30 seconds. Whether you are sleeping, working in your home office, or vacationing far away from the Front Range, your home remains powered and protected. To learn more about the engineering behind these systems, read our comprehensive article on How Does a Standby Generator Work?.

Is a Whole Home Generator Worth the Investment for Colorado Homeowners?

standby generator installed in the snow during a Colorado winter storm

When evaluating whether is a whole home generator worth the investment, geography plays a massive role. Living along the Colorado Front Range—from Denver to Parker, Highlands Ranch, and the heavily wooded, elevated terrain of Black Forest—comes with distinct meteorological challenges. Our weather is notoriously unpredictable.

Severe Colorado Weather and Grid Reliability

Colorado winter storms and spring blizzards frequently dump heavy, wet snow that snaps tree branches and downs power lines. High wind events can lead to precautionary utility shutdowns or physical damage to the grid that takes days to repair. In the summer, severe thunderstorms bring lightning and microbursts that knock out local substations.

If your power goes out during a freezing January storm, your home's temperature will plunge rapidly. Without a functioning furnace, you face the very real risk of frozen, burst water pipes. The resulting water damage and mold remediation can easily cost tens of thousands of dollars, making a standby generator a highly effective form of preventive insurance.

Food Preservation and Sump Pump Protection

The average household spends hundreds of dollars on groceries each month. A standard refrigerator can only keep food safe for about four hours without power, and a full freezer might last up to 48 hours if left unopened. An extended power outage can easily lead to complete food spoilage, forcing you to discard expensive groceries and refrigerated medications.

Furthermore, many homes along the Front Range rely on active sump pumps to keep basements dry during heavy rains or rapid snowmelt. If the power goes out during a torrential downpour, a non-functional sump pump can lead to immediate basement flooding. Keeping your sump pump running continuously is a key financial benefit of a whole-home system.

Medical Equipment and Remote Work Support

For households with family members who rely on electricity-dependent medical equipment—such as oxygen concentrators, CPAP machines, or home dialysis systems—a power outage is not merely an inconvenience; it is a life-threatening emergency. Having an automatic, highly reliable standby system provides invaluable peace of mind.

Additionally, with so many professionals working remotely in communities like Highlands Ranch and Parker, a reliable internet connection and functional home office are essential for maintaining income. A whole-home backup system ensures you never have to drop off an important business call or miss critical deadlines due to a localized grid failure. For a deeper dive into how these systems protect local properties, check out our guide on Whole Home Generator Benefits for Colorado Homeowners.

Standby Generator vs. Portable Generator: Key Differences

Many homeowners wonder if they can achieve the same level of security with a portable generator. While portable units are far less expensive upfront, they require a significant amount of manual labor, active management, and compromise.

The Manual Hassle of Portable Units

Imagine a severe blizzard hitting Black Forest at 2:00 AM. The power goes out, and your home begins to cool. If you rely on a portable generator, you must:

  • Bundle up and head outside into sub-zero temperatures and blowing snow.
  • Drag a heavy, cold engine out of your garage or shed.
  • Position it at least 20 feet away from your home to prevent deadly carbon monoxide poisoning.
  • Manually pull-start the engine or hope the electric start battery hasn't drained in the cold.
  • Run heavy-duty extension cords through a cracked window or door to power a few selected appliances, or manually operate a manual transfer switch or interlock kit.
  • Regularly venture back out into the storm to refuel the hot engine with highly flammable gasoline.

In contrast, a standby generator requires zero physical effort. It turns on automatically, runs on your existing utility natural gas or propane line, and keeps your entire electrical panel—including hardwired appliances like your furnace, well pump, and water heater—fully operational.

Safety Hazards of Portable Generators

Portable generators carry inherent safety risks. Operating one too close to windows, doors, or vents can allow carbon monoxide to seep into your living spaces. Additionally, storing large quantities of gasoline on your property poses a fire hazard and requires the use of fuel stabilizers to keep the fuel from degrading over time. Standby units operate on clean-burning, highly stable fuel sources and feature built-in safety shutoffs.

Feature Standby Generator Portable Generator
Startup 100% Automatic (within seconds) Manual setup, pull-start, or key start
Fuel Source Continuous Natural Gas or Liquid Propane Gasoline, Diesel, or Propane (requires refueling)
Power Output High (can power whole house, including AC/furnace) Low to Medium (powers selected essential circuits)
Safety Permanently wired, minimal carbon monoxide risk High carbon monoxide risk if placed improperly
Maintenance Automatic self-tests, annual professional service Manual oil changes, fuel stabilization, battery care

To compare your options and see which path fits your specific lifestyle, read our analysis on Choosing the Right Backup Power for Colorado.

Sizing and Fuel Options: Is a Whole Home Generator Worth the Investment?

Choosing the right generator requires a precise electrical load calculation. We do not size generators based solely on the square footage of your home; instead, we analyze the starting and running wattage requirements of the specific appliances you want to run simultaneously.

  • Essential Coverage: Sized to run critical loads such as lights, refrigeration, internet routers, furnace blowers, and sump pumps.
  • Whole-House Coverage: Sized to run everything in your home at once, including energy-intensive loads like central air conditioning, electric double ovens, well pumps, and EV chargers.

Your fuel choice is equally critical. If your home has access to a municipal natural gas line, a natural gas generator provides an virtually infinite fuel supply that will run uninterrupted for weeks. If you live in a more rural area without natural gas access, a liquid propane (LP) system connected to a large dedicated on-site tank is the gold standard, offering excellent fuel stability and high energy output.

Battery Backup Alternatives: Is a Whole Home Generator Worth the Investment?

In recent years, battery storage systems—such as Franklin battery storage—have emerged as a popular alternative to traditional fossil-fuel generators. When integrated with residential solar panels, battery backups offer a clean, silent, and highly efficient way to navigate power outages.

diagram comparing the power delivery duration of standby generators versus battery backup systems

However, when determining if a standby generator or a battery is better, the decision often comes down to the duration of the outages you expect to face.

  • Battery Storage: Excellent for short-term outages (a few hours to a day) and daily energy management, such as offsetting peak utility rates. However, if a heavy winter storm blankets your solar panels in snow for three days, your batteries will not be able to recharge once drained.
  • Standby Generator: Designed for long-term, multi-day outages. As long as the natural gas flows or your propane tank is full, a generator can run continuously to keep your home warm and safe.

Many forward-thinking homeowners in the Denver area choose a hybrid approach, combining solar-plus-battery systems with a smart electrical panel (like SPAN) and a standby generator for the ultimate, multi-layered energy security plan. For a detailed comparison, read our guide: Is a Standby Generator or Battery Backup Better for Power Outages?.

Long-Term Financial Impact: Home Value and Insurance

While the convenience of uninterrupted power is clear, a whole-home standby generator is also a significant financial asset that can positively impact your property’s overall value.

Property Value and Buyer Appeal

A professionally installed standby generator is a permanent fixture that remains with the home when it is sold. In competitive real estate markets across the Colorado Front Range—especially in areas prone to weather-related outages like Black Forest and Parker—buyers place a high premium on built-in disaster preparedness.

Studies show that a standby generator can increase a home's resale value by up to 3% to 5%, allowing homeowners to recoup a substantial portion of their original investment (often yielding up to a 150% return on the investment depending on the local market demand). It signals to prospective buyers that the home has been meticulously maintained and is fully equipped to handle Colorado's harsh winter seasons.

Insurance Premium Discounts

Because a standby generator actively prevents catastrophic property damage—such as frozen, burst water pipes and the resulting water and mold damage—many major insurance companies recognize them as risk-reduction devices. According to Consumer Reports, some insurance providers offer a discount ranging from 4% to 10% on the property portion of a homeowners insurance policy for homes equipped with a professionally installed, automatic standby generator. Over the lifetime of the unit, these premium savings can help offset ongoing operational costs.

To explore how the long-term financial dynamics of generators stack up against modern battery systems, read our Standby Generator vs. Battery Backup Cost Comparison.

Frequently Asked Questions About Standby Generators

How long does a whole home standby generator last?

With proper care and routine maintenance, a high-quality standby generator has an asset lifespan of 20 to 30 years. In terms of active runtime, these heavy-duty engines are built to deliver between 3,000 to 5,000 hours of operation. Since the average homeowner only uses their generator for a few dozen hours each year during brief emergency outages and weekly self-test cycles, the unit is highly likely to last for as long as you own your home.

Can I install a standby generator myself?

No. Installing a standby generator is absolutely not a DIY project. It is a highly complex process that requires advanced knowledge of high-voltage electrical systems, gas line plumbing, and local building codes.

To complete a safe, legal installation, you must:

  1. Obtain the proper electrical and plumbing building permits from your local Front Range municipality.
  2. Coordinate with your local gas utility to ensure your existing gas meter can handle the increased fuel demand.
  3. Install an automatic transfer switch directly into your main electrical panel.
  4. Pour a level concrete pad and secure the heavy unit.
  5. Ensure compliance with strict local HOA guidelines and municipal setback rules (often requiring the unit to be placed a specific distance from windows, doors, and property lines).

Improper installation can lead to life-threatening hazards, including carbon monoxide poisoning, gas leaks, electrical fires, and dangerous utility grid backfeeding. It will also instantly void your manufacturer's warranty.

What ongoing maintenance does a standby generator require?

Like a car, a standby generator relies on an internal combustion engine that requires regular upkeep to ensure it starts instantly when the grid fails.

An effective maintenance schedule includes:

  • Automatic Self-Test Cycles: Most modern units are programmed to run a brief, low-speed "exercise" cycle once a week or every two weeks. This keeps the engine components lubricated, monitors battery health, and runs self-diagnostics without powering your home.
  • Annual Service Visits: A certified technician should perform an annual tune-up, which includes changing the engine oil and oil filter, replacing the air filter, inspecting the spark plugs, checking the battery charge, and testing the transfer switch operation.
  • Post-Outage Care: After an extended period of continuous operation (usually every 100 to 200 run hours), you should check the oil levels and replace the oil and filters as recommended by the manufacturer.

Conclusion

Deciding whether is a whole home generator worth the investment comes down to your personal tolerance for risk, your local grid reliability, and how much you value seamless comfort and safety during Colorado's wildest weather. While a standby generator is a significant property upgrade, it provides unparalleled, hands-free protection that pays you back in peace of mind long before you ever decide to sell your home.

At Courtesy Electric Company, we have spent nearly five decades providing top-tier residential electrical services across Denver, Parker, Highlands Ranch, Black Forest, and the entire Colorado Front Range. As certified installers of leading standby generators and advanced battery storage systems, we specialize in designing custom, end-to-end backup power solutions tailored to your home's unique energy demands.

Ready to secure your home's energy independence before the next big storm hits? Contact us today to schedule a free estimate on your backup power installation. Explore our complete range of services by visiting Courtesy Electric Company's electrical services.

An Essential Guide to How Electrification Is Changing Home Electrical Needs

What is Home Electrification and Why is it Growing?

modern electrified home exterior with solar panels and EV charger in driveway

How electrification is changing home electrical needs is one of the most important shifts Colorado homeowners are navigating right now. As more households replace gas appliances with electric alternatives — from heat pumps and induction cooktops to EV chargers and electric water heaters — the demand placed on home electrical systems is growing faster than most panels were ever designed to handle.

Here is a quick look at the core ways electrification is reshaping what your home's electrical system needs to do:

  • Higher electrical load: Each new electric appliance adds amperage demand that older panels may not support
  • Panel capacity limits: Many homes — especially those built before 1980 — have 100-amp panels that struggle to keep up with modern electrification loads
  • Dedicated circuits required: EV chargers, heat pumps, and electric dryers each need their own dedicated circuit
  • Peak demand spikes: Running multiple high-draw appliances at the same time can push a panel close to or beyond its limits
  • Potential need for panel upgrades: Adding electrification loads without assessing capacity first can create safety risks and code violations
  • Smart technology as a solution: Load management devices and smart panels can help existing systems handle more without a full service upgrade

The good news is that understanding your current electrical capacity — and planning upgrades strategically — can make the transition to an all-electric home smoother and more affordable than most homeowners expect.

The scale of this challenge is significant. Research shows that 48 million homes in the U.S. would need a panel upgrade just to add an EV charger, and over 60 million homes have panels that are not up to current electrical code. On the Colorado Front Range, where EV adoption and energy-efficient home upgrades are accelerating, these numbers hit close to home.

I'm David Meyer, Vice President of Courtesy Electric, a Colorado electrical contractor with roots going back to 1976. Over the decades, I've watched how electrification is changing home electrical needs — from the field to the panel box — and this guide reflects what I've seen work for homeowners across Denver and the Front Range.

Infographic showing how electrification changes home electrical needs: higher loads, dedicated circuits, panel limits, smart

Home electrification is the process of transitioning a household’s energy consumption away from fossil fuels — such as natural gas, propane, or fuel oil — and replacing those systems with highly efficient electric alternatives. Instead of burning gas for heat, hot water, and cooking, an electrified home relies entirely on the electrical grid and, in many cases, on-site renewable energy like rooftop solar.

This movement is gaining rapid momentum across Colorado for several compelling reasons:

  • Unmatched Energy Efficiency: Modern electric appliances are marvels of engineering. For instance, electric heat pumps are up to three times more efficient than traditional combustion heating systems because they transfer heat rather than generate it. Additionally, electric clothes dryers use roughly 20% less energy than standard gas models, while heat pump dryers can save up to 60% more energy.
  • Substantial Cost Savings: Transitioning away from fossil fuels is a smart financial move over the long term. Retrofitting an existing residential building with electric systems can save homeowners up to $10,000 over a 20-year period, while all-electric new construction projects can see savings of approximately $15,000 over that same timeframe.
  • Dramatic Air Quality and Public Health Improvements: Burning fossil fuels inside our living spaces compromises the air we breathe. Gas stoves, for example, emit harmful pollutants like nitrogen dioxide and carbon monoxide. Studies show that wide-scale residential electrification across the United States could prevent 3,400 premature deaths, 1,300 hospital admissions, and 220,000 asthma attacks.
  • A Greener Electrical Grid: As utilities transition to renewable energy sources, the electricity powering our homes becomes cleaner every year. In 2023, roughly 21% of total U.S. electricity generation came from renewable sources, and that percentage continues to rise.
  • Policy and Municipal Support: Across the country, local jurisdictions are actively promoting or requiring building electrification. Here in Colorado, municipalities are introducing progressive energy codes and local utility programs to encourage homeowners to make the switch.

To successfully navigate this transition, it helps to take a structured approach. Learning how to future-proof your home electrical system ensures that your home is ready to handle these modern upgrades safely. Additionally, many homeowners find that pairing these efficiency upgrades with local energy storage is highly beneficial; evaluating whether is home battery storage worth it in Colorado can help you decide if a home battery is the right addition to your electrification plan.

How Electrification Is Changing Home Electrical Needs and Panel Capacity

At the center of every home's electrical system is the main service panel, often referred to as the breaker box. This panel is responsible for safely distributing electricity from the utility grid to the various circuits throughout your home. However, the rapid shift toward electrification is fundamentally changing the demands placed on this critical piece of infrastructure.

A residential electrical panel with multiple breakers and clean wiring

To understand how these changes impact your home, it helps to understand a few key concepts:

  • Electrical Load: The total amount of electrical power consumed by all the devices, lights, and appliances running in your home at any given time.
  • Panel Capacity: The maximum amount of electrical current (measured in amperes, or "amps") that your electrical panel is rated to safely handle.
  • Main Breaker: The master switch located at the top of your panel that limits the total incoming electrical current to protect the system from overloading.
  • Amperage Rating: The specific capacity of your home’s electrical service, typically ranging from 60 or 100 amps in older homes to 200 amps or more in modern builds.
  • Continuous Load: A load where the maximum current is expected to continue for three hours or more, such as an electric vehicle charger.
  • Peak Demand: The brief periods during the day when your household's electricity usage is at its absolute highest — usually in the evening when family members are cooking, running laundry, and charging vehicles simultaneously.

If you are wondering if your current system is up to the task, evaluating whether does your electrical panel support an EV charger is an excellent starting point. For a broader look at how to manage these demands, our home battery storage complete guide explains how storing power can help buffer peak demand and protect your home from grid outages.

Understanding How Electrification Is Changing Home Electrical Needs for EV Charging

Adding a Level 2 electric vehicle (EV) charger is often a homeowner’s first major step into electrification, and it is also one of the most demanding. Unlike standard household appliances that cycle on and off, an EV charger operates as a continuous load.

Under the National Electrical Code (NEC), continuous loads must be calculated at 125% of their rated capacity to prevent overheating. For example, a standard 40-amp Level 2 charger actually requires 50 amps of dedicated panel capacity.

Installing a high-draw circuit like a NEMA 14-50 outlet on an older 100-amp panel without careful planning can easily push your system past its safe operating limits during peak demand hours.

Sizing Your Service: How Electrification Is Changing Home Electrical Needs for HVAC

Space heating and water heating represent the largest energy demands in the average residential home. Transitioning these systems from natural gas to electric heat pumps has a massive impact on your service panel capacity.

While modern heat pump space heaters and heat pump water heaters are incredibly efficient, they still require dedicated 240-volt circuits. A whole-home heat pump system can add 30 to 60 amps of electrical demand to your load calculation.

If your home currently relies on a 100-amp service, adding an electric heat pump alongside your existing appliances will almost always require upgrading your electrical service or implementing smart load management.

Calculating Your Home's Electrical Load Under the NEC

Before adding any new electric appliances, a professional load calculation must be performed in accordance with National Electrical Code (NEC) Article 220. This calculation determines whether your existing service panel has the physical and electrical capacity to handle the new loads safely.

The NEC allows for two primary calculation methods:

  1. The Standard Method: This traditional approach uses standardized calculations based on your home's square footage (calculated at a set volt-amperes, or VA, per square foot) and adds the full nameplate ratings of all fixed appliances, heating, and cooling systems. It applies conservative demand factors to estimate peak usage.
  2. The Optional Method: This modern approach is highly favored by residential electricians for existing homes. It looks at the actual maximum demand of the home over the past 12 months (using utility records) or applies a more realistic diversity factor to the home's total connected loads. Because it accounts for the fact that you rarely run every appliance in your home at the exact same moment, the Optional Method often yields a lower, more accurate load requirement.

The 2026 NEC Update: Reflecting Modern Efficiency

A major update in the 2026 NEC directly helps homeowners looking to electrify. Recognizing the widespread adoption of highly efficient LED lighting, the NEC officially reduced the general lighting load calculation for dwelling units from 3 VA to 2 VA per square foot for service and feeder sizing.

For a 2,000-square-foot home, this simple code change immediately frees up 2,000 VA of calculated capacity — equivalent to over 16 amps of breathing room at 120 volts. This update makes it significantly easier for homes with 100-amp or 150-amp panels to qualify for new electrification projects without needing an immediate service upgrade.

Calculation Element NEC Standard Method NEC Optional Method (Article 220 Part IV)
General Lighting & Receptacles 2 VA per sq. ft. (2026 Code Update) Included in the first 10 kVA calculation
Small Appliance & Laundry 1,500 VA per dedicated circuit Included in the first 10 kVA calculation
First 10,000 VA (10 kVA) of Load Calculated at 100% demand factor Calculated at 100% demand factor
Remaining Load over 10,000 VA Calculated at 35% demand factor Calculated at a highly favorable 40% demand factor
Heating vs. Cooling Load Sized for the larger of the two systems Sized for the larger of the two systems
Suitability Best for new construction design Ideal for retrofits and existing home electrification

Smart Panels and Load Management: Alternatives to Panel Upgrades

Historically, if a load calculation showed that your planned EV charger or heat pump would overload your panel, your only option was to perform a traditional utility service upgrade. This process involves replacing your electrical panel and potentially coordinating with your local utility company to run new wires underground or replace neighborhood transformers — a process that can be time-consuming.

Fortunately, modern technology offers an elegant alternative: Smart Panels and Dynamic Load Management.

Instead of defaulting to a costly service upgrade, homeowners can use smart load centers and circuit-sharing devices to optimize their existing panel capacity:

  • Smart Panels (like SPAN): These advanced digital panels replace traditional breaker boxes and allow you to monitor and control every circuit in your home via a smartphone app. If your home approaches its capacity limit, the smart panel can automatically and temporarily pause power to non-essential loads (like an EV charger or hot tub) to ensure your stove, lights, and medical equipment keep running smoothly.
  • Smart Energy Management: By utilizing dynamic load shedding, these systems prevent your home from ever exceeding its main breaker capacity, allowing you to fully electrify a home on a 100-amp or 150-amp panel.
  • Circuit-Sharing Devices: These smart switches allow two high-draw appliances (such as an electric clothes dryer and an EV charger) to share a single circuit, automatically routing power to the charger only when the dryer is not in use.

To compare your options, take a look at our breakdown of smart energy management vs traditional panel installations. You can also explore the wide-ranging energy management system benefits for homeowners, learn how energy management reduces your electric bill, and discover how simple it is to track and control energy use room by room using modern smart home technology.

Incentives, Rebates, and Preparing Your Home for the Future

Making your home electric-ready is a smart long-term investment, and there are more financial incentives available today than ever before to help offset the costs.

Under the federal Inflation Reduction Act (IRA), homeowners can take advantage of significant tax credits and rebates:

  • Energy Efficient Home Improvement Credit (Section 25C): Provides a federal tax credit covering 30% of the cost of qualifying electrical panel upgrades up to $600, provided the upgrade is installed in conjunction with an eligible heat pump or heat pump water heater.
  • Clean Energy Tax Credits (Section 25D): Offers a 30% tax credit for residential solar and battery storage installations, helping you build a self-sufficient home microgrid.
  • State and Utility Rebates: Colorado homeowners have access to excellent localized programs. Many local utilities offer direct rebates for installing heat pumps, smart thermostats, and Level 2 EV chargers.

To maximize your savings, check out our comprehensive guide to Colorado energy rebates for electrical upgrades. Additionally, you can learn how to combine these local programs with federal incentives by reading about federal tax credits for battery storage and Span panels.

Steps to Prepare Your Home for Electrification

If you are planning to transition to electric systems over time, you can prepare your home in phases to avoid emergency upgrade costs down the road:

  1. Schedule a Home Energy Audit: Identify areas where weatherization, insulation, and sealing can reduce your overall heating and cooling loads, which in turn reduces the size of the electrical equipment you will need.
  2. Assess Your Existing Panel: Locate your main breaker box, identify your main breaker's amperage rating, and take note of any empty expansion slots.
  3. Pre-Wire for Future Loads: If you are having electrical work done for a remodel or minor repair, have your electrician run the wiring and conduit for an EV charger or heat pump at the same time to save on labor costs later.

Frequently Asked Questions about Home Electrification

Can I electrify my home without upgrading my electrical panel?

Yes, in many cases you can fully electrify your home without upgrading your main electrical panel. By utilizing smart load management systems, circuit-sharing devices, and highly efficient appliances, you can maximize the capacity of a standard 100-amp or 150-amp panel. Making "power-smart" appliance choices and utilizing the NEC Optional Method for load calculations often reveals that a panel upgrade is unnecessary.

What is the difference between the NEC standard and optional calculation methods?

The Standard Method uses a conservative, rigid formula based on square footage and full appliance nameplate ratings to calculate electrical load. The Optional Method (Article 220 Part IV) applies a more realistic diversity factor to your home's connected loads or utilizes 12 months of actual utility data. Because it accounts for real-world demand patterns, the Optional Method typically yields a much lower calculated load, making it easier to add new electric appliances to existing panels.

How do smart panels help manage increased electrical loads?

Smart panels, such as SPAN panels, replace traditional breaker boxes with digital, software-controlled systems. They continuously monitor your home's total electrical draw in real time. If your household's demand approaches the panel’s safety limit, the smart panel will temporarily pause or throttle power to non-essential, high-draw circuits (like your EV charger or hot tub) to ensure your primary appliances continue running safely without tripping the main breaker.

Conclusion

Understanding how electrification is changing home electrical needs is the key to creating a home that is safer, cleaner, and prepared for the future. Whether you want to install a Level 2 EV charger, transition to an ultra-efficient heat pump, or gain total control over your energy bills with a smart panel, taking a proactive and planned approach to your electrical system is the best way to save time and money.

At Courtesy Electric Company, we have been helping homeowners across Denver and the Colorado Front Range navigate these transitions with quality, integrity, and dependability since 1976. From Parker and Highlands Ranch to the Black Forest, our team specializes in end-to-end electrical solutions, including SPAN smart panels, Franklin battery storage, and standby generator systems.

We are here to help you design an electrical system that fits your lifestyle and your budget. Schedule your electrical service with Courtesy Electric Company today to request a free estimate on your next upgrade.

Signs Your Home Needs an Electrical Inspection

Why Knowing the Signs Your Home Is Due for an Electrical Inspection Could Save Your Life

signs your home is due for an electrical inspection

The signs your home is due for an electrical inspection are easy to overlook — a light flickers here, a breaker trips there — until a small problem quietly grows into a serious hazard. Electrical failures cause roughly 47,700 home fires in the U.S. every year, resulting in 418 deaths, 1,570 injuries, and $1.4 billion in property damage. Many of those fires start long before any visible warning appears.

Here are the most common signs your home needs an electrical inspection:

  • Breakers that trip frequently or repeatedly reset on the same circuit
  • Lights that flicker or dim when appliances turn on
  • Outlets or switch plates that feel warm to the touch
  • Burning smells or scorch marks near outlets or the panel
  • Buzzing, humming, or crackling sounds from walls or outlets
  • Mild electrical shocks when touching switches or plugging in devices
  • Two-prong (ungrounded) outlets throughout the home
  • A home that is 25 years old or older and has never been inspected
  • Recent renovations, storm damage, or the addition of high-load appliances like an EV charger

For most homes, an inspection every 3 to 5 years is the baseline. Homes over 25 years old should be inspected every 2 to 3 years, and homes over 40 years old may need annual checks — especially if the wiring has never been updated.

Behind the walls of many Colorado Front Range homes, aging wiring, undersized panels, and missing safety devices are working against systems that were never designed to handle today's electrical loads. The problem is not just age — it is the growing gap between what older systems were built for and what modern households actually demand.

I'm David Meyer, Vice President of Courtesy Electric, a Colorado electrical contractor with roots going back to 1976, and I've seen how easy it is to miss the early signs your home is due for an electrical inspection — and how costly that delay can become. In the sections below, I'll walk you through every warning sign worth knowing.

Timeline of home electrical system aging and when inspections are needed infographic

Critical Signs Your Home Is Due for an Electrical Inspection

Warm discolored electrical outlet showing signs of heat damage

When it comes to your home's electrical system, silence is golden. Most of the time, electricity flows quietly and invisibly behind your drywall. When your system begins to struggle, however, it will almost always drop subtle clues. Learning How to Spot Electrical Problems Before They Become Dangerous is one of the most proactive steps you can take as a homeowner in Denver, Parker, or Highlands Ranch.

Ignoring these indicators doesn't make them go away; instead, it allows minor connection issues to degrade into major safety hazards. Below, we break down the most critical warning signs that demand a closer look from a professional.

Frequent Breaker Trips and Overloaded Panels

A circuit breaker is designed to be a safety valve. Its primary job is to cut off the flow of electricity when a circuit draws more current than it can safely handle, protecting your home from severe overloads. If you find yourself frequently walking to your breaker panel in the garage or basement to flip a switch back on, your system is trying to tell you something.

Repeated trips typically point to one of three issues:

  1. Circuit Overload: You have too many high-draw modern appliances (like air fryers, space heaters, or vacuum cleaners) running on a single circuit.
  2. Short Circuits: A hot wire is touching a neutral wire somewhere in your walls or inside an appliance, creating a dangerous spike in current.
  3. Ground Faults: A hot wire has made contact with a ground wire or a grounded portion of the junction box.

Resetting a breaker over and over without addressing the root cause is incredibly dangerous. It weakens the breaker mechanism itself and subjects the wiring inside your walls to repeated thermal stress. To keep your household safe, review the Ultimate Electrical Fire Safety Checklist Home and have a professional evaluate whether your panel needs to be upgraded or if new, dedicated circuits need to be run.

Flickering Lights and Signs Your Home Is Due for an Electrical Inspection

Do your dining room lights dim every time your refrigerator cycles on, or do the bathroom lights flicker when you turn on a hair dryer? While many homeowners brush this off as a harmless quirk of an older home, it is actually a classic sign of a significant voltage drop.

When a high-draw appliance starts up, it requires a brief surge of electrical current. If your home's wiring is undersized, outdated, or shares too many loads, that surge steals power from your lighting circuits. Even worse, flickering can indicate loose connections at your outlets, switches, or inside the main panel. Loose connections create resistance, which generates immense heat and can lead to electrical arcing. Understanding these Electrical Safety Tips Every Homeowner Should Know will help you recognize that a flickering light bulb is rarely just a bad bulb—it is often a symptom of an overburdened electrical system.

Warm Outlets, Buzzing Sounds, and Signs Your Home Is Due for an Electrical Inspection

Under normal operating conditions, your outlets, switches, and electrical panel should remain completely cool to the touch and operate in total silence. If you plug in a device and notice the outlet faceplate feels warm, or if you hear a faint buzzing, sizzling, or crackling sound, you are dealing with an electrical emergency.

These physical symptoms are usually caused by:

  • Electrical Arcing: Electricity jumping across gaps in loose or damaged wiring. Arcing can reach temperatures exceeding 10,000 degrees Fahrenheit, easily melting wire insulation and igniting nearby wood framing or drywall paper.
  • Backstabbed Receptacles: A common but unreliable wiring method where wires are pushed into the back of an outlet rather than secured around terminal screws. Over time, these push-in connections loosen and create high-resistance hot spots.
  • Corroded or Loose Terminals: Common in older homes, especially those exposed to moisture or shifting temperatures.

If you smell a strange, chemical, or "fishy" odor near your outlets, this is the smell of melting plastic and wire insulation. You must act immediately. Turn off the power at the main breaker and read up on How to Prevent Electrical Fires in Your Home while you wait for a licensed professional to inspect the damage.

How Often Should You Schedule a Professional Electrical Assessment?

Just like your car requires routine oil changes to prevent engine failure, your home's electrical system requires periodic maintenance to ensure it remains safe and efficient. Many homeowners assume that if the lights turn on, everything is fine. However, wires degrade, connections loosen due to thermal expansion, and safety codes evolve to address newly discovered hazards.

Determining How Often Should You Have Your Electrical System Inspected depends largely on the age of your property, its renovation history, and how heavily you utilize your electrical system.

Standard Inspection Timelines vs. Older Properties

While a standard, modern home should be professionally evaluated every 3 to 5 years, older properties require much tighter schedules. As insulation materials dry out and crack, the risk of short circuits and fires increases exponentially.

Home Age Recommended Inspection Frequency Primary Areas of Concern
Under 25 Years Every 3 to 5 Years Overloaded circuits, loose connections from home settling, checking GFCI/AFCI functionality.
25 to 40 Years Every 2 to 3 Years Degrading wire insulation, outdated panels, lack of sufficient receptacle outlets leading to extension cord overuse.
Over 40 Years Annually Outdated wiring types (knob-and-tube or aluminum), obsolete breaker panels, complete lack of grounded circuits.

If you live in an older home, it is vital to consult an Electrical Safety Checklist for Older Homes. Properties built in the Denver area or the broader Front Range during the mid-20th century often contain unique wiring challenges.

For example, homes built between 1965 and 1973 were frequently wired with aluminum rather than copper due to high copper prices. Aluminum wiring is 55 times more likely to reach fire hazard conditions at wire connections compared to copper. This is because aluminum expands and contracts significantly more when heated, a phenomenon known as "cold creep" that quickly loosens terminal connections. An annual inspection ensures these connections are checked, pigtailed with copper, or slated for a full home rewiring before they fail.

Immediate Triggers and Risks of Outdated Wiring

While routine inspections keep your home safe over the long term, certain events or upgrades should trigger an immediate, unscheduled call to a licensed electrician. Failing to inspect your system after major changes or natural disasters can expose your family to sudden failures, appliance damage, or catastrophic fires. Understanding Spring Electrical Safety and Storm Preparation is particularly important for Colorado residents, where rapid weather transitions are common.

Post-Storm Hazards and Adding High-Load Appliances

The Colorado Front Range is famous for its dramatic weather, from winter blizzards to intense spring thunderstorms. Lightning strikes—even indirect ones occurring half a mile away—can send thousands of volts of surge power traveling through utility lines directly into your home. This massive electrical surge can destroy sensitive electronics, compromise your main panel, and damage safety devices like Ground Fault Circuit Interrupters (GFCIs) and Arc Fault Circuit Interrupters (AFCIs).

Similarly, physical storm damage like falling branches or localized flooding can compromise outdoor wiring, underground feeds, or basement electrical systems. If your area has experienced severe weather, check out the Spring Electrical Safety Checklist Colorado Guide to identify hidden vulnerabilities.

Another major trigger for an immediate inspection is adding high-load appliances to your home. Modern upgrades like:

  • Level 2 Electric Vehicle (EV) chargers
  • Standby generators (such as Generac or Cummins units)
  • Central air conditioning systems
  • Franklin battery storage systems
  • Hot tubs or swim spas

These additions can easily overwhelm an older 100-amp electrical service. Before installing any high-draw equipment, an electrician must perform a detailed load calculation to ensure your panel has the physical space and electrical capacity to handle the new demand without overheating.

Outdated Wiring and Missing Safety Protections

Living in a home with outdated wiring or missing safety devices is a quiet but serious gamble. Modern building codes require two primary layers of advanced safety protection:

  1. GFCI (Ground Fault Circuit Interrupter) Outlets: These monitor the balance of current between the hot and neutral wires. If they detect an imbalance (which indicates electricity is escaping, potentially through a person), they cut power in milliseconds to prevent severe shocks. They are mandatory in wet areas like kitchens, bathrooms, basements, and outdoors.
  2. AFCI (Arc Fault Circuit Interrupter) Breakers: These detect the specific electrical signature of sparking or arcing behind your walls and shut down the circuit before a fire can ignite.

Many older homes completely lack these protections, relying instead on ungrounded two-prong outlets. Some homeowners try to bypass this by using three-prong adapters, but these do not provide a path to ground and actually increase shock risks.

Additionally, outdated wiring can severely affect your homeowners insurance. Many insurance carriers in Colorado will charge higher premiums, refuse to renew policies, or deny coverage entirely if a home contains active knob-and-tube wiring, aluminum branch circuits, or obsolete electrical panels (such as Federal Pacific or Zinsco brands, which have notoriously high failure rates). Reviewing Electrical Fire Prevention Tips for Homeowners will help you understand how bringing your home up to modern standards protects both your family and your financial investments.

What to Expect During a Professional Electrical Inspection

A professional electrical inspection is not a quick glance at your outlets. It is a highly structured, technical diagnostic process designed to uncover hidden defects that standard home inspectors routinely miss. While a general home inspector might test a few outlets and make sure your lights turn on, a licensed electrician dives deep into code compliance, load balance, and material integrity.

When choosing When to Call an Electrician vs DIY, safety should always come first. Opening a live electrical panel or handling testing equipment without proper training carries lethal shock risks.

Here is what a comprehensive, professional electrical inspection typically includes:

Process diagram of a comprehensive home electrical inspection

  1. Main Service Panel Evaluation: The electrician will remove the panel cover to check for proper wire sizing, correct breaker ratings, signs of corrosion, overheating, or double-tapping (where two wires are forced into a single breaker terminal). They will also verify adequate clearance around the panel.
  2. Grounding and Bonding Assessment: Verifying that your electrical system is safely connected to the earth via grounding rods and that your metal plumbing pipes are properly bonded.
  3. Device and Receptacle Testing: Testing outlets throughout the home for correct polarity, proper voltage levels (should register between 110-120 volts), and structural integrity.
  4. Safety Protection Verification: Actively testing all GFCI and AFCI devices to ensure they trip and cut power instantly when a fault is simulated.
  5. Wiring Inspection: Checking visible wiring in crawlspaces, attics, or unfinished basements for brittle insulation, improper splices outside of junction boxes, or outdated materials like cloth-wrapped wire.
  6. Safety Device Check: Verifying the presence, location, and expiration dates of smoke and carbon monoxide detectors.

At the end of the inspection, you will receive a detailed report outlining any code violations, safety hazards, and recommendations for upgrades, allowing you to prioritize repairs based on urgency.

Frequently Asked Questions About Home Electrical Safety

How does a dedicated electrical inspection differ from a standard home inspection?

A standard home inspection is a general, non-invasive overview of a property's condition, usually performed during a real estate transaction. The inspector will check if a representative number of outlets work, look for physical damage to the panel exterior, and test basic light switches. They do not perform detailed load calculations, trace circuits, or open junction boxes.

A dedicated electrical inspection is performed by a licensed electrician who specializes entirely in electrical infrastructure. They will remove the panel dead-front cover, measure voltage drops, inspect wire connections, check for proper wire gauges matching breaker sizes, and evaluate the entire system against current National Electrical Code (NEC) safety standards.

Can minor electrical issues affect my homeowners insurance policy?

Yes, absolutely. Insurance companies are in the business of assessing risk, and faulty electrical systems are a leading cause of property damage. If your home has minor but unresolved issues—like flickering lights, warm outlets, or a panel that has been flagged as obsolete—your insurance carrier may raise your premiums.

If your home contains uncorrected major hazards like active knob-and-tube wiring, aluminum branch wiring, or ungrounded systems, many carriers will refuse to write a policy altogether. If an electrical fire occurs and an investigation reveals the fire was caused by pre-existing, neglected wiring issues that you were aware of, your claim could potentially be denied.

How do I differentiate between a minor issue and a serious electrical hazard?

While no electrical issue should be completely ignored, some require immediate emergency intervention.

  • Minor / Non-Urgent Issues: A single outlet that doesn't work, a light bulb that burns out slightly too quickly, or a loose outlet cover plate. These should be scheduled for repair during normal business hours.
  • Serious / Immediate Hazards: A burning smell (often smelling like hot plastic or fish), outlets or switches that are hot to the touch, visible sparks when plugging in devices, buzzing or sizzling sounds from your walls, or receiving a mild shock when touching an appliance.

If you experience any of these immediate hazards, do not wait. Turn off the corresponding breaker or shut down the main power panel entirely, and contact an emergency electrician immediately.

Conclusion

Your home's electrical system is its quiet engine, powering everything from your morning coffee maker to your home office and backup systems. Recognizing the signs your home is due for an electrical inspection is the key to preventing minor wiring quirks from turning into dangerous, costly emergencies. Whether you are dealing with frequent breaker trips, flickering lights, or simply live in an older home that has not been evaluated in years, being proactive is always the safest choice.

At Courtesy Electric Company, we have been serving homeowners across Denver and the Colorado Front Range—including Parker, Highlands Ranch, and Black Forest—since 1976. We specialize in keeping your home safe, modern, and resilient. From updating outdated electrical panels to installing cutting-edge SPAN smart panels, Franklin battery storage, and reliable Generac or Cummins standby generators, our experienced team is here to help.
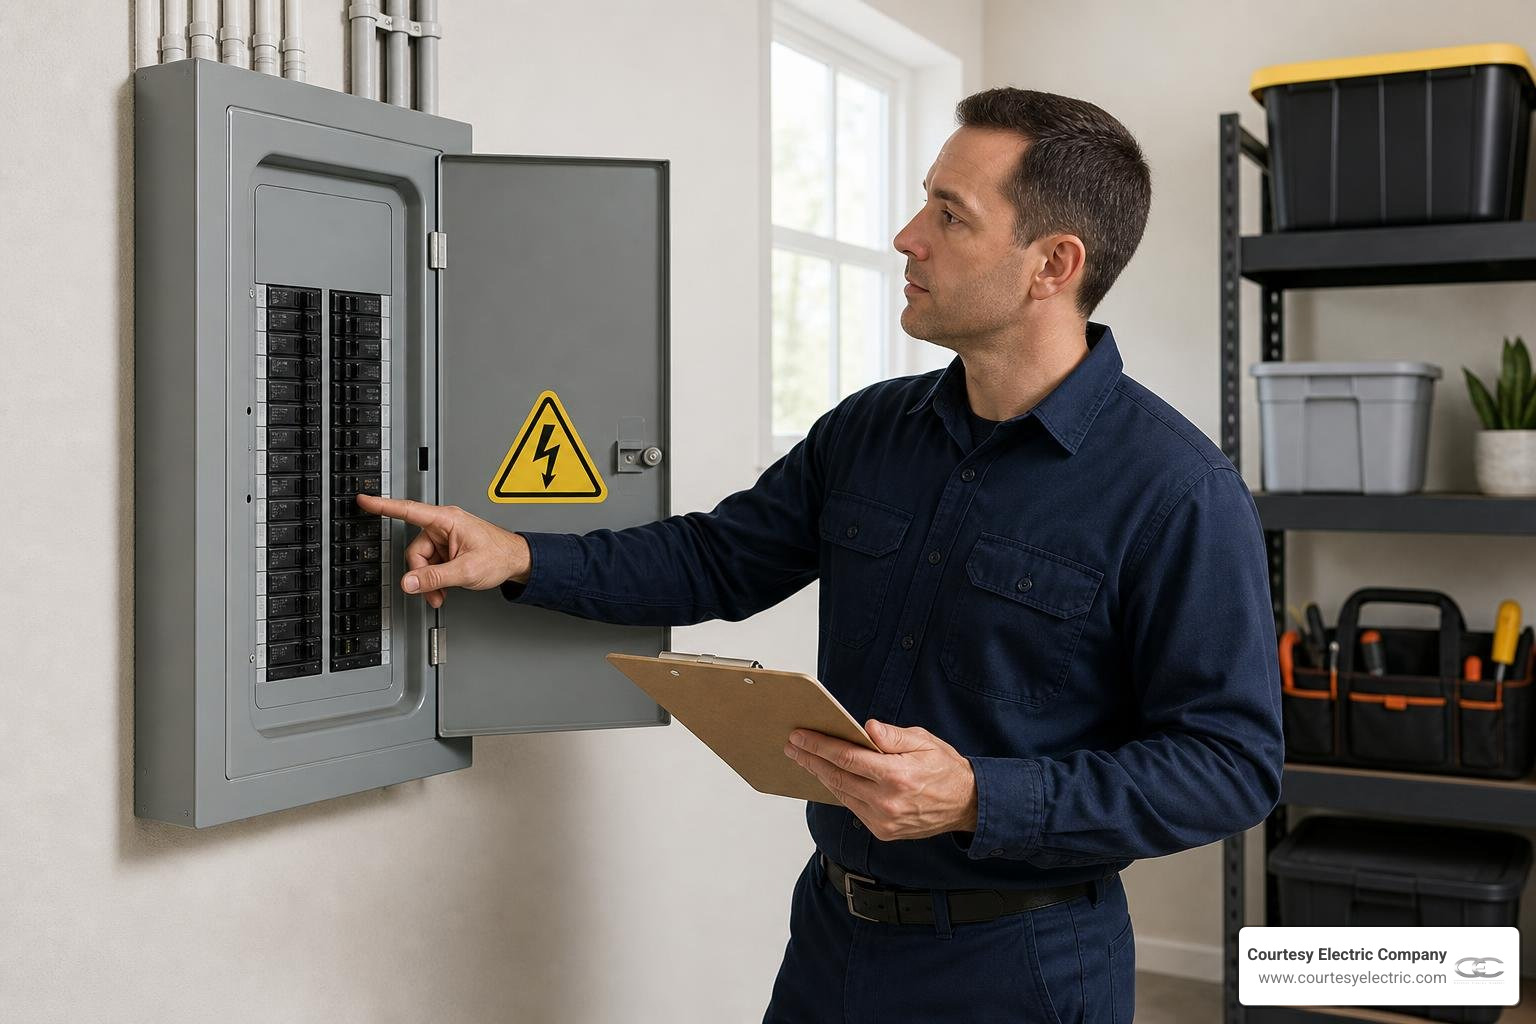
Don't wait for a warning sign to turn into a hazard. Contact us today for a free estimate on your next electrical installation or to schedule a comprehensive safety inspection. More info about Denver residential electrical services is just a click away—let's keep your home running safely and efficiently.

When Should You Replace Your Generator? Key Signs

Is It Time? How to Know When Should You Replace Your Generator

home standby generator operating during a storm in Colorado

Knowing when should you replace your generator could be the difference between staying safe and comfortable during a Colorado Front Range power outage — and being left in the dark when it matters most.

Here are the clearest signs it's time to replace your generator:

  • Age over 10-15 years — Even with low running hours, internal components lose reliability over time
  • Repair costs exceed 50% of replacement cost — At this point, replacement is almost always the smarter financial choice
  • Frequent or recurring breakdowns — More than two service calls in a single year is a strong warning sign
  • Parts are no longer available — Discontinued models become increasingly difficult and expensive to maintain
  • Your power needs have grown — Added EV chargers, home offices, HVAC upgrades, or new appliances can outgrow an older unit
  • Visible corrosion, rust, or water damage — Physical deterioration often runs deeper than it looks
  • Unreliable starting or inconsistent power output — A generator that won't start dependably is no longer doing its job
  • Incompatibility with modern electrical loads — Older units can struggle with today's electronics and energy-efficient devices

Colorado winters don't give you a second chance. If your generator is showing any of these signs, it's worth a professional look before the next outage hits.

I'm David Meyer, Vice President of Courtesy Electric — a Colorado electrical contractor with roots going back to 1976 — and over the years I've helped countless Front Range homeowners think through exactly when should you replace your generator versus when a repair still makes sense. In the sections ahead, I'll walk you through the key factors that drive that decision clearly and practically.

Infographic showing generator replacement decision factors: age, repair costs, parts availability, power needs, and physical

When Should You Replace Your Generator?

aging generator with visible wear and rust

Determining the "end of serviceable life" for a backup power system requires looking past the outer metal enclosure. While a standby generator might look perfectly fine sitting on its concrete pad, the internal components are constantly subjected to extreme temperature swings, moisture, and mechanical wear.

At Courtesy Electric, we define the end of a generator's serviceable life using three core criteria:

  1. The Manufacturer Support Threshold: When the Original Equipment Manufacturer (OEM) officially stops producing replacement parts or supporting the model.
  2. The 50% Financial Rule: When a single repair bill or the cumulative repair costs over a 12-month period exceed half the cost of purchasing a brand-new, modern system.
  3. The Reliability Factor: When the system can no longer be trusted to start automatically and run continuously during an emergency.

If your generator fails on any of these fronts, continuing to pour money into repairs is simply delaying the inevitable. To help you spot these issues early, we have compiled a guide on Signs Your Generator Needs Professional Attention to keep you ahead of potential failures.

Understanding When Should You Replace Your Generator Based on Age

One of the most common misconceptions we encounter in the Denver metro area and across the Front Range is that a generator with low running hours is guaranteed to be reliable. Homeowners will often say, "It's twelve years old, but it has only run for 50 hours!"

While it is true that standby generators have an average operational life expectancy of 10,000 to 30,000 running hours (which theoretically translates to 25 to 40 years of light emergency use), the calendar age of the unit is often a far more accurate indicator of reliability.

Over a 10-to-15-year period, critical non-metal components degrade regardless of whether the engine is running:

  • Rubber Hoses and Belts: Dry rot, crack, and weaken under Colorado's dry, high-altitude air.
  • Electrical Wiring Insulation: Becomes brittle and susceptible to cracking, which can cause short circuits.
  • Gaskets and Seals: Shrink and dry out, leading to slow oil, coolant, or fuel leaks.
  • Control Boards: Sensitive electronic circuitry is subject to thermal expansion and contraction, eventually causing solder joints to fail.

Just like a classic car that has sat in a garage for a decade, a standby generator that has reached the 10-to-15-year benchmark requires increasingly frequent attention. For a deeper dive into how calendar age and operational hours balance out, read our Standby Generator Lifespan Guide 2026.

How Evolving Household Power Needs Dictate When Should You Replace Your Generator

Your home's electrical profile is not static. Since your original backup power system was sized and installed, your household's energy demands have likely changed significantly.

If you have completed any of the following upgrades in your Parker, Highlands Ranch, or Denver home, your current generator may now be severely undersized:

  • Electric Vehicle (EV) Chargers: Adding a Level 2 EV charger introduces a massive, continuous electrical load.
  • Home Additions or Renovations: Adding square footage, finishing a basement, or building a detached home office.
  • High-Draw Appliances: Installing a hot tub, upgrading to a larger central air conditioning system, or switching to an electric heat pump.
  • Smart Home Technology: Evolving your home with advanced automation systems that require stable, continuous power.

When a generator is forced to operate under a load that exceeds its rated capacity, it will either stall, overheat, or shut down automatically to protect its internal circuitry. Operating an undersized generator also leads to "wet stacking" (in diesel units) or excessive carbon buildup, which rapidly shortens the engine's lifespan.

If your lifestyle has evolved, it might be time to evaluate whether a new standby generator or an integrated home battery system is the right fit. You can learn more about how these modern options stack up in our guide on Generator or Battery for Power Outages Is a Generator or Battery Better for Power Outages.

Key Indicators of Generator Decline and Failure

When a generator begins to fail, it rarely does so in complete silence. It will typically leave a trail of warning signs that indicate its internal systems are struggling.

  • Unreliable Starting: If your unit struggles to turn over during its weekly self-test cycle, or if it requires multiple manual attempts to start, the starter motor, fuel delivery system, or compression levels are failing.
  • Power Fluctuations: If your home's lights flicker like a disco, or if your appliances turn off and on while running on generator power, the voltage regulator is failing to supply a clean, steady stream of electricity.
  • Visible Corrosion and Leaks: Puddles of oil, coolant, or fuel beneath the enclosure indicate failing seals. Meanwhile, rust on the frame or internal compartments can compromise structural integrity and electrical grounding.
  • Excessive Noise and Vibration: A generator that sounds like a heavy metal band auditioning in your backyard is likely suffering from worn engine bearings, misaligned rotors, or broken engine mounts.

In places like Black Forest and the higher-elevation areas of the Front Range, these physical symptoms are often accelerated by our unique climate. To understand how our local environment plays a role, take a look at How Colorado Weather Affects Generator Lifespan.

Frequent Breakdowns and Sourcing Obsolete Parts

If you find yourself calling a technician out to your property more than twice a year for unrelated mechanical or electrical failures, your generator has entered a cycle of decline.

One of the most frustrating aspects of maintaining an older generator (especially units built over 15 years ago) is the sheer difficulty of sourcing replacement parts. Manufacturers naturally phase out support for legacy models to focus on newer, cleaner, and more efficient technology.

When a critical component like a control board, alternator, or major engine part fails on a discontinued model, you are left with very few options. Technicians are forced to hunt for expensive, refurbished parts online, leading to extended downtime. Waiting weeks for a hard-to-find part to arrive during the peak of winter or summer storm season is a risk most Colorado homeowners simply cannot afford.

Incompatibility with Modern Electrical Demands

The nature of the electrical loads in our homes has fundamentally changed over the last few decades. Up until the mid-1990s, household electrical demands were primarily "linear loads"—things like incandescent light bulbs, basic heating elements, and simple electric motors.

Today, our homes are filled with "sensitive electronics" and "reactive loads," including:

  • Computers, servers, and home office networks
  • LED lighting systems
  • Smart televisions and home theater equipment
  • High-efficiency HVAC systems with variable-speed inverter compressors

These modern devices introduce harmonics and complex reactive power demands back into your electrical system. Generators manufactured prior to the mid-90s—and even many lower-end portable units—were not engineered to handle these modern loads. They lack the precise voltage and frequency regulation required to protect sensitive microprocessors. Running modern electronics on an outdated generator can cause the generator's engine to overheat, create voltage instability, and potentially fry your home's most expensive devices.

The Role of Maintenance in Extending Equipment Life

There is no getting around it: regular maintenance is the single most important factor in determining how long your generator will last. A standby generator is an engine-driven power plant that sits idle for the vast majority of its life, yet it is expected to start instantly and run at full capacity within seconds of a utility outage.

To ensure it can perform this feat, a rigorous maintenance routine is essential. This includes:

  • Weekly or Bi-weekly Self-Test Cycles: Allowing the engine to run for 10-12 minutes to circulate oil, charge the battery, and clear out moisture.
  • Biannual Professional Inspections: Checking fuel lines, replacing oil and air filters, testing coolant levels, and verifying battery health.
  • Enclosure Maintenance: Keeping the air vents clear of snow, dry leaves, pine needles, and dust.

We have detailed the exact steps to maximize your system's longevity in our guides on How Proper Maintenance Extends Generator Life and How Often Should You Service Your Standby Generator.

When Maintenance is No Longer Enough

While routine care can easily add 5 to 10 years of reliable operation to your backup power system, there comes a point where maintenance can no longer compensate for fundamental mechanical wear.

If the piston rings inside the engine have worn thin, or if the alternator windings have begun to lose their insulation resistance, no amount of fresh oil, new filters, or spark plug replacements will restore the unit's dependability.

Signs that your generator has transitioned from needing simple maintenance to requiring a complete replacement include:

  • Persistent "low oil pressure" or "high temperature" faults that occur even after sensors and fluids are replaced.
  • Blue smoke in the exhaust, indicating the engine is burning oil.
  • Black smoke or heavy soot buildup, indicating incomplete combustion and severe engine wear.

For homeowners looking to perform basic checks themselves before calling in the pros, our Generator Maintenance Tips for Homeowners is an excellent resource. Additionally, if you are preparing your home for seasonal weather shifts, refer to our checklist on Generator Maintenance Before Colorado Storm Season.

Benefits of Upgrading to a Modern Standby Generator

If you are holding onto an aging generator out of habit, you might be surprised by how far standby power technology has advanced over the last decade. Upgrading to a modern system brings immediate improvements in safety, convenience, and performance.

Feature / Capability Older Legacy Generators (10+ Years Old) Modern Standby Generator Systems
Operational Noise Levels Can be incredibly loud, easily disrupting neighbors Engineered to be as quiet as a standard central A/C unit
Fuel Efficiency High fuel consumption; prone to wasting fuel under light loads Advanced fuel management and variable-speed operation
Power Quality Higher Total Harmonic Distortion (THD); risky for electronics Clean, stable power (under 5% THD) safe for sensitive devices
Monitoring & Diagnostics Requires checking physical gauges on the unit Mobile app integration with real-time status and remote alerts
Load Management Static sizing; can easily overload if too many appliances kick on Smart load shedding to automatically balance household power

Modern systems also feature advanced emissions controls, meaning they burn much cleaner and produce far less carbon monoxide than older models. When you are ready to explore your options, we compare the leading manufacturers in our guide: Which Home Generator Brand Is Better for Colorado.

Frequently Asked Questions About Generator Replacement

How many years does a standby generator typically last?

With proper maintenance, high-quality standby generators typically last between 20 and 30 years, or roughly 3,000 to 5,000 hours of run time. However, most professional installers and manufacturers recommend evaluating the system for replacement between the 10-to-15-year mark. Even if the engine has low hours, the electrical and rubber components lose reliability over time, which can compromise automatic startup during an outage.

Can I upgrade my existing generator to a larger size?

Yes, you can absolutely upgrade to a larger capacity unit. When doing so, our team will evaluate your existing automatic transfer switch (ATS) and electrical subpanels to ensure they are compatible with the higher power output. In many cases, we can repurpose some of the original wiring and concrete pad infrastructure, which helps streamline the installation process.

What should I expect during a professional generator assessment?

During an in-person assessment, a certified technician will:

  • Perform an electrical load analysis of your home to determine your exact power requirements.
  • Inspect the physical condition of your current generator, transfer switch, and gas line connections.
  • Verify that the unit's placement complies with current local building codes, clearance requirements, and HOA guidelines.
  • Discuss your backup power goals (e.g., powering the entire home vs. critical loads only) and provide a clear, tailored recommendation.

Conclusion

At the end of the day, a home standby generator is an investment in safety and peace of mind. If your current system is leaving you anxious about whether it will perform when the power grid fails, it has lost its primary value.

At Courtesy Electric Company, we have been serving homeowners throughout Denver, Parker, Highlands Ranch, Black Forest, and the wider Colorado Front Range since 1976. As local experts in backup power, smart home technology, and complete electrical infrastructure, we specialize in helping you find the perfect power solution for your home. Whether you are looking to upgrade to a modern, high-efficiency generator from top brands like Generac or Cummins, or you want to explore advanced options like SPAN smart panels and Franklin battery storage, our team is here to help.

Don't wait for the next major Colorado storm to find out if your generator is up to the task. Contact us today to schedule your professional, in-person evaluation. Visit our Courtesy Electric Company Electrical Services page to get started with a free installation estimate.

Cheat Sheet to Battery Storage Tax Credits and Incentives

Your Cheat Sheet to Battery Storage Tax Credits and Incentives Available Right Now

home battery storage system with solar panels on a modern Colorado home

The battery storage tax credits and incentives available to homeowners have changed significantly heading into 2026 — and knowing where you stand can mean thousands of dollars in savings. Here's a quick snapshot of what's currently on the table:

Federal Credits (2026)

  • Section 25D (Residential Clean Energy Credit): Expired December 31, 2025. If you installed a qualifying battery system in 2025, you can still claim the 30% credit when you file your 2025 tax return in 2026.
  • Section 48E (Commercial Investment Tax Credit): Still active. Homeowners using a lease or power purchase agreement (PPA) can access this credit indirectly through their third-party system owner — available through 2032.

Key Federal Eligibility Rules

  • Minimum battery capacity: 3 kWh (residential), 5 kWh (commercial/48E)
  • Credit is non-refundable but unused amounts carry forward
  • File IRS Form 5695 to claim the Section 25D credit

State and Utility Incentives (Still Active in 2026)

  • Colorado: 10% state tax credit plus utility rebates through Xcel Energy
  • California: SGIP rebates up to $1,000/kWh for qualifying households
  • Connecticut: Up to $16,000 per residential installation
  • New York: NYSERDA rebates for grid-connected systems
  • Vermont: Green Mountain Power rebates for qualifying customers

The landscape shifted fast. The Inflation Reduction Act of 2022 opened the door wide for battery storage incentives — and now, just a few years later, the rules have already changed for residential buyers making a direct purchase. That said, meaningful incentives still exist at the federal, state, and utility level, and stacking them correctly can still make a real difference in your overall investment.
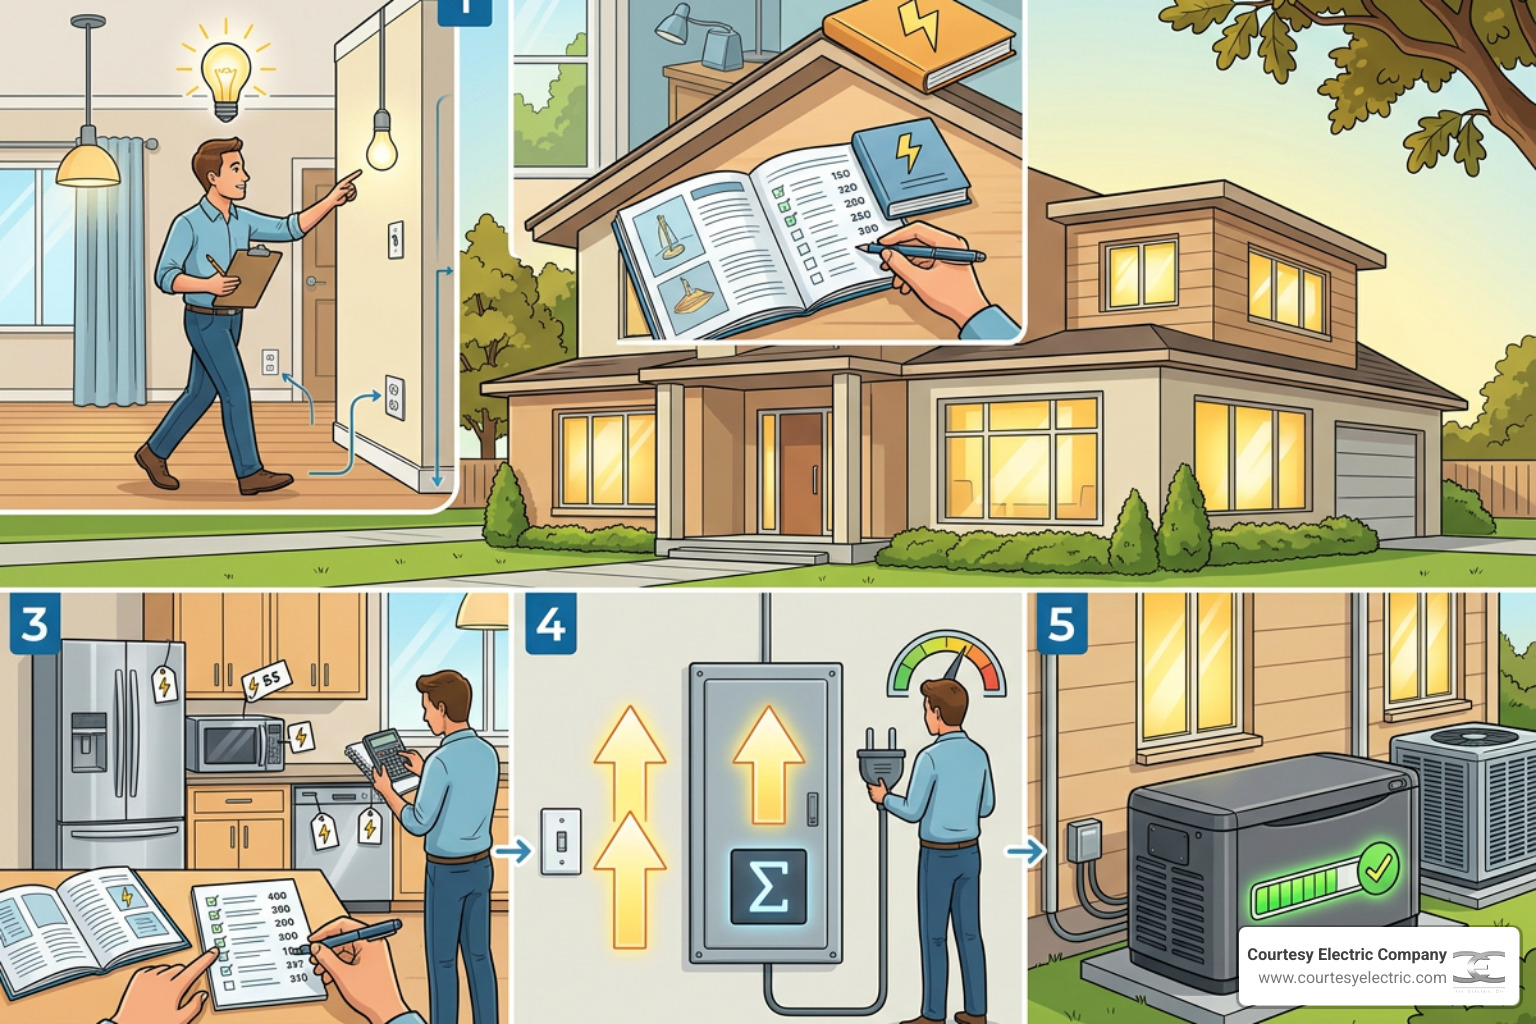
I'm David Meyer, Vice President of Courtesy Electric and a hands-on specialist in battery storage systems and advanced electrical infrastructure across the Colorado Front Range — including navigating the battery storage tax credits and incentives available to our customers. Whether you're planning a new installation or trying to claim a credit from a 2025 install, the sections below walk you through everything you need to know.

Overview of battery storage tax credits and incentives available in 2026 for homeowners infographic

Understanding the Federal Battery Storage Tax Credits and Incentives Available in 2026

When navigating the federal tax landscape for home energy, it helps to think of the government as a very particular accountant. They want to reward you for making green choices, but they have written a massive rulebook on exactly how you can claim those rewards. For years, the primary pathway for residential energy storage was Section 25D of the Internal Revenue Code.

However, as we move through 2026, the federal approach to residential energy storage has split into two very distinct pathways. Depending on how you acquire your system, you will find yourself looking at either the legacy Section 25D rules (for retroactively claiming recent installations) or the commercial Section 48E rules (for third-party owned systems).

Understanding these pathways is essential to maximizing your savings. To learn more about how these tax structures align with modern electrical upgrades, check out our guide on Federal Tax Credits for Battery Storage and Span Panels.

The Expiration of Section 25D for Homeowners

Let’s address the elephant in the room: the direct-purchase federal tax credit under Section 25D, known as the Residential Clean Energy Credit, officially terminated for new systems placed in service after December 31, 2025. This means if you purchase a battery storage system outright in 2026, you can no longer claim the 30% federal tax credit under this specific section.

For homeowners who managed to purchase, install, and fully commission their battery storage systems before the December 31, 2025 deadline, there is good news. You can still claim the 30% credit on your federal tax return during the 2026 tax filing season.

Because this credit is non-refundable, it can only reduce your active tax liability to zero. However, if your credit is larger than the taxes you owe for the year, the IRS allows you to carry the remaining balance forward to future tax years.

The Third-Party Ownership Pathway Under Section 48E

Just because Section 25D has expired for direct cash purchases does not mean federal incentives are completely out of reach. In 2026, the primary pathway to securing federal battery storage incentives is through third-party ownership (TPO) models, such as solar-plus-storage leases or Power Purchase Agreements (PPAs).

Under a TPO arrangement, a solar or energy developer owns the battery storage system installed at your home. Because the system is owned by a business, it qualifies for the Section 48E Commercial Investment Tax Credit (ITC), which remains fully active through 2032.

The developer claims the 30% federal credit (plus any applicable bonus adders) and passes those financial savings directly to you in the form of lower monthly lease payments or reduced electricity rates. To understand how these systems operate once they are up and running, you can read about How Does a Home Battery Backup System Work.

Eligibility Requirements and How the 30% Credit is Calculated

To qualify for any federal battery incentive, your storage system must meet strict technical standards. The IRS does not hand out credits for small, portable backup batteries you might take on a camping trip. The equipment must be permanently installed and integrated into your home's electrical infrastructure.

A professional electrician installing a home battery storage system next to a smart electrical panel

The primary technical threshold comes down to capacity:

  • Residential Systems (Legacy Section 25D / TPO): The battery storage system must have a capacity of at least 3 kilowatt-hours (kWh) to qualify.
  • Commercial Systems (Section 48E): For commercial applications or standalone utility-scale projects, the minimum capacity threshold is 5 kWh.

To visualize how these two pathways compare, review the breakdown below:

Feature Legacy Section 25D (Direct Purchase) Section 48E (Third-Party Lease/PPA)
System Owner Homeowner Third-Party Developer
Installation Deadline Must be installed by Dec 31, 2025 Active through 2032
Minimum Capacity 3 kWh 5 kWh
Credit Rate 30% 30% base (can increase with adders)
Filing Form IRS Form 5695 Filed by commercial owner

What Costs are Included in the 30% Calculation?

When calculating the total basis for your 30% tax credit, the eligible expenses go far beyond the physical battery unit itself. The federal government allows you to include a wide range of associated installation costs, including:

  • The cost of the battery storage equipment and housing.
  • Onsite labor costs for preparation, assembly, and physical installation.
  • Connecting piping, wiring, and system integration components.
  • Permitting and utility interconnection fees.

Additionally, if your home's main electrical panel requires an upgrade to safely handle the new battery system, those costs can often be included in the credit basis. This is especially true when installing smart energy management systems that help balance your home's electrical loads. For a deeper look at how these advanced panels compare to older infrastructure, see our article on Smart Energy Management vs Traditional Panel.

Key Limitations of the Federal Battery Storage Tax Credits and Incentives Available

While the federal credit is incredibly valuable, it does come with a few notable strings attached:

  • Non-Refundability: The credit can reduce your tax liability to zero, but the IRS will not send you a refund check for any excess credit amount. Fortunately, you can carry the unused portion forward to the next year.
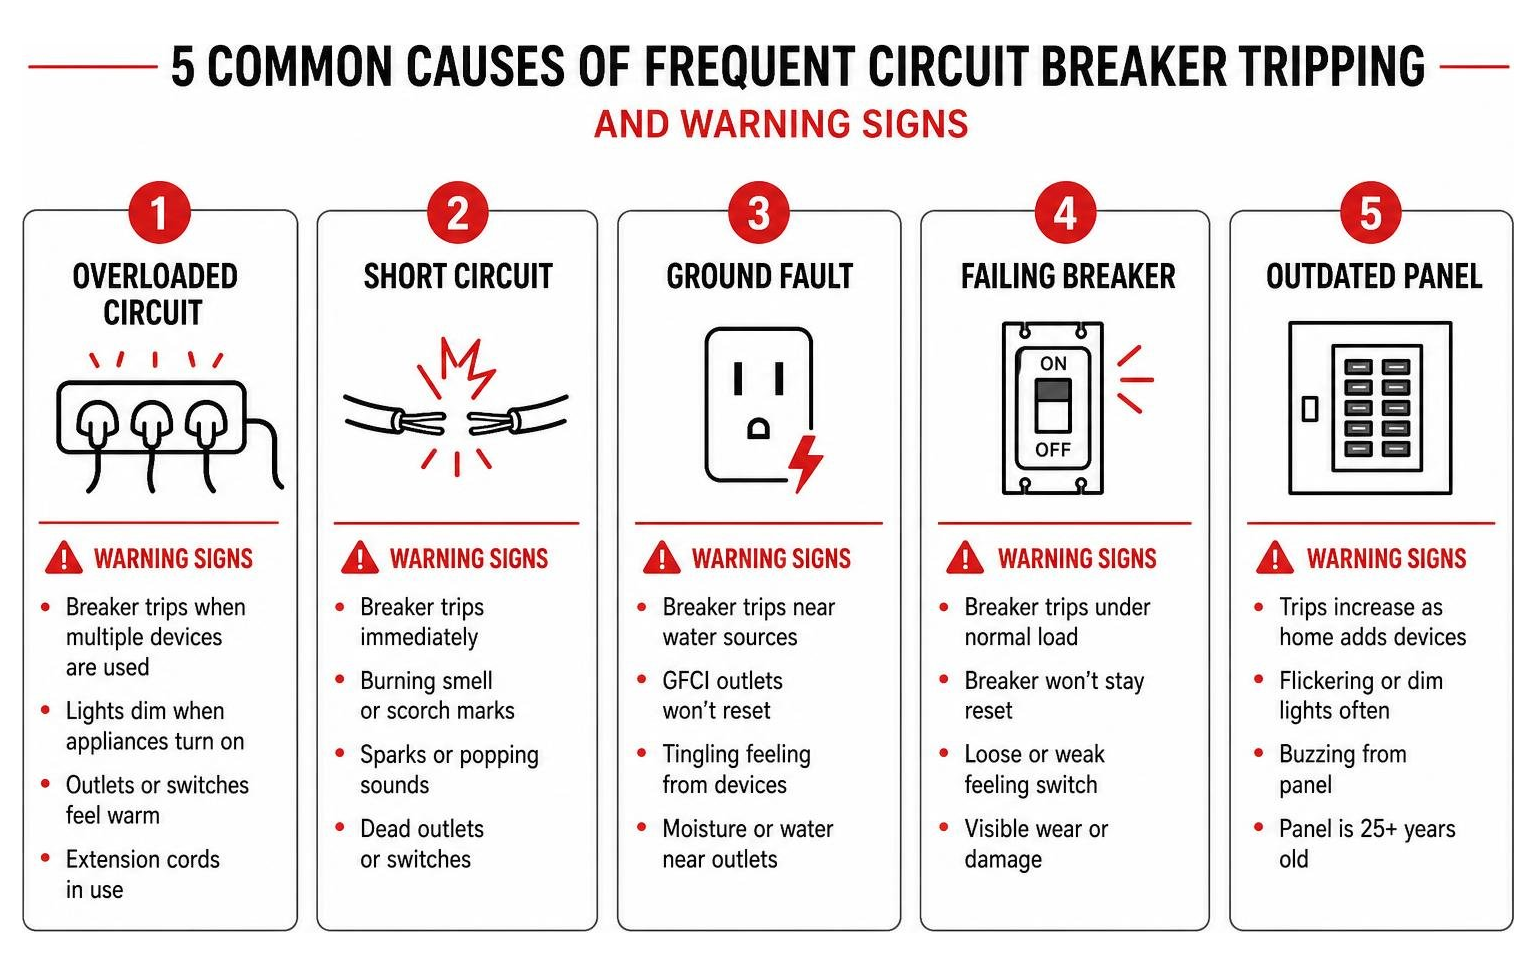
  • Utility Subsidies and Rebates: If your local utility company provides an upfront rebate or discount on your battery storage system, you must subtract that incentive from your total project cost before calculating your 30% federal tax credit. For example, if your system installation costs a certain amount and your utility gives you an upfront rebate, your federal credit is calculated using the remaining balance.

State-Level Rebates and Local Utility Incentives

As federal direct-purchase tax credits transition, state-level programs and local utility rebates have stepped up to play an even larger role in making home energy storage affordable. Depending on where you live, these local incentives can dramatically lower your upfront expenses.

Many states have established aggressive clean energy goals, leading to localized rebate structures that work alongside federal incentives. To explore the broader picture of how local upgrades are incentivized, read our guide on Colorado Energy Rebates for Electrical Upgrades.

Colorado Battery Storage Incentives and Wildfire Mitigation

Here in Colorado, the state has taken a proactive approach to grid resilience, particularly in areas prone to extreme weather and wildfires. Colorado offers a 10% state tax credit for qualified residential battery storage systems.

Furthermore, local utilities like Xcel Energy offer robust rebate programs. For homeowners living in designated high wildfire risk areas — or those who rely on electricity for critical medical equipment — Xcel Energy provides enhanced rebates of up to $10,000 to offset the cost of backup power installations. For standard residential customers, rebates of up to $5,000 are available for qualifying battery systems.

These programs are designed to integrate seamlessly with smart home technology, allowing you to manage your energy consumption dynamically. To learn more about your local options, check out our guide on Energy Management Options for Colorado Homes.

California SGIP and Other State Programs

While our team focuses on serving Colorado, looking at other state programs helps illustrate the national push toward battery storage:

  • California's Self-Generation Incentive Program (SGIP): This program has set aside over $500 million for energy storage technology. Under the Equity Resiliency category, rebates can reach up to $1,000/kWh, which can cover up to 100% of the equipment costs for medically vulnerable or high-risk households.
  • Connecticut & New York: Connecticut offers up to $16,000 per residential installation through its Energy Storage Solutions program, while New York provides direct NYSERDA rebates for grid-connected systems up to 25 kWh.

Supply Chain Rules: FEOC and Domestic Content Requirements

In 2026, qualifying for energy tax credits is no longer just about what you install — it is also about where the components were made. The federal government has introduced strict supply chain rules designed to boost domestic manufacturing and reduce reliance on overseas production.

These regulations can impact both third-party developers claiming Section 48E credits and manufacturers trying to keep their equipment compliant.

The Foreign Entity of Concern (FEOC) rules are designed to restrict tax credit eligibility for clean energy projects that source critical minerals or components from countries like China, Russia, Iran, or North Korea.

For battery storage projects beginning construction in 2026, the regulations dictate that at least 55% of the manufactured component costs must come from non-FEOC sources. This threshold is scheduled to step up annually, reaching 75% by 2030. If a system fails to meet these strict supply chain metrics, it could lose its eligibility for federal tax incentives entirely.

How Domestic Content Affects Commercial Battery Storage Tax Credits and Incentives Available

For developers utilizing the Section 48E commercial credit pathway, meeting "Domestic Content" requirements can unlock valuable bonus adders. If a project uses a certified percentage of steel, iron, and manufactured products produced in the United States, the base 30% credit can be increased by an additional 2 to 10 percentage points.

This domestic manufacturing push is driving major battery brands to establish production lines right here in the U.S., ensuring their systems remain highly competitive. To see how optimizing your system's hardware and software can lead to long-term financial benefits, read about How Energy Management Reduces Your Electric Bill.

Frequently Asked Questions About Battery Storage Incentives

Can I claim the federal tax credit for a battery installed in 2025 on my 2026 tax return?

Yes. If your qualifying battery storage system was fully installed and placed in service between January 1, 2025, and December 31, 2025, you are eligible to claim the 30% Section 25D credit. You will file IRS Form 5695 (Residential Energy Credits) alongside your federal tax return during the 2026 tax filing season. If the credit exceeds your total tax liability for the year, the remaining balance can be carried forward to offset your taxes in 2027 and beyond.

Does adding a battery backup system require separate electrical permits?

Yes, in almost all Colorado jurisdictions, installing a battery storage system requires separate building and electrical permits. Local authorities enforce strict safety standards, including compliance with NFPA 855 fire codes, which regulate the placement and spacing of residential energy storage systems.

These permitting requirements ensure your system is installed safely in designated areas (like garages or utility rooms) and is properly isolated from living spaces. If you are trying to decide between a battery and a traditional generator for emergency backup, you can compare the two options in our analysis of Battery Storage vs Generator Which is Better for Backup.

How do battery storage credits interact with solar or geothermal incentives?

Battery storage incentives are designed to stack harmoniously with other clean energy tax credits. If you install a solar PV array or a geothermal heat pump alongside your battery system, you can claim the respective credits for each technology.

Under the rules active for 2025 installations, you can calculate the 30% credit for your solar panels and the 30% credit for your battery storage system on the same IRS Form 5695. This stacking capability allows you to maximize your overall return on investment when executing a complete home energy upgrade.

Conclusion

The world of battery storage tax credits and incentives available in 2026 may be more complex than in years past, but the financial and practical benefits of energy independence remain incredibly strong. By combining state-level tax credits, utility rebates from providers like Xcel Energy, and creative third-party ownership pathways, Front Range homeowners can still secure a highly resilient backup system.

At Courtesy Electric Company, we have spent decades helping homeowners across Denver, Parker, Highlands Ranch, and Black Forest navigate complex electrical upgrades. From advanced Franklin battery storage systems to seamless SPAN smart panel retrofits, our team provides the design, permitting, and installation expertise needed to ensure your project is fully compliant and optimized for maximum savings.

Ready to protect your home from grid outages and take control of your energy future? Contact us today to schedule your free estimate and find the best electrical service and backup power solutions for your home.

A–Z Guide to Whole Home Generator Protection

Why Power Outages Put Your Family at Risk — and What Actually Stops Them

whole home generator protecting family during neighborhood power outage

Understanding how a whole home generator protects your family starts with one uncomfortable truth: power outages in Colorado are not rare, one-off events. They are increasingly common, and they arrive without warning.

According to U.S. Energy Information Administration data, the average utility customer went without power for 330 minutes in 2024 — a 20% jump over the previous five-year average. Nearly half of all large-scale outages are triggered by severe weather, and the Colorado Front Range sees its share: blizzards, high-wind events, summer lightning storms, and heat waves that push the grid to its limits.

When the lights go out, the risks stack up fast:

  • Refrigerated food becomes unsafe after just 4 hours if the fridge door is opened
  • Sump pump failure during a storm can flood a basement and cause an estimated $26,500 in damage
  • Frozen or burst pipes from a loss of heat can run around $12,500 to repair
  • Mold remediation — often a follow-on from water damage — can reach $30,000
  • Medical devices like CPAP machines and oxygen concentrators stop working entirely
  • Security systems, outdoor lighting, and alarm panels go dark

A whole home standby generator addresses every one of these risks automatically — no manual startup, no extension cords, no scrambling in the dark. Here is a quick summary of how it works:

Protection Area What a Whole Home Generator Does
Food safety Keeps refrigerators and freezers running continuously
Water damage Powers sump pumps to prevent basement flooding
Pipe protection Maintains heating so pipes cannot freeze or burst
Medical devices Keeps oxygen concentrators, CPAP machines, and other equipment on
Home security Sustains alarm systems, cameras, and outdoor lighting
Family comfort Runs HVAC, lighting, and essential appliances without interruption
Automatic response Detects an outage and restores power within seconds — even if no one is home

I'm David Meyer, Vice President of Courtesy Electric, a Colorado electrical contractor with roots going back to 1976, and backup power systems are one of the areas I'm most focused on — because I've seen what a single extended outage can cost a family in both safety and dollars. In the sections below, I'll walk you through exactly how a whole home generator protects your family at every level, and what to look for when choosing the right system for your home.

infographic showing automatic grid-to-standby power transition steps for whole home generator protection infographic

How a Whole Home Generator Protects Your Family

modern standby generator installed outside a residential home

A whole home standby generator is a permanently installed backup power system designed to keep your entire house running when the local electrical grid goes down. Unlike portable units, which require manual setup and refueling during a storm, a standby generator integrates directly with your home's electrical panel and its existing fuel lines.

When utility power fails, the system automatically shifts your home's electrical load to the generator. This seamless transition is handled by a specialized component called an automatic transfer switch (ATS). The generator runs on either natural gas or liquid propane, meaning you do not have to venture outside in dangerous weather to pour gasoline into a hot engine.

To understand how these systems maintain 24/7 energy security, you can read our detailed guide on How Does a Standby Generator Work.

To help you weigh your options, we have broken down the primary differences between standby and portable systems:

Feature Whole Home Standby Generator Portable Gasoline Generator
Activation Automatic (within 10 seconds) Manual (must be rolled out and started)
Fuel Source Natural Gas or Liquid Propane (continuous) Gasoline (requires manual refueling every few hours)
Power Capacity High (can run central AC, heating, and appliances) Limited (runs only a few select appliances via extension cords)
Weather Resistance Permanent, weatherproof outdoor enclosure Must be protected from rain/snow; cannot run indoors
Safety Risks Extremely low; meets strict electrical codes High risk of carbon monoxide poisoning if placed incorrectly
Home Value Increases property appeal and long-term equity No impact on property value

Standby vs. Portable Generators: Key Differences

While portable generators are common, they present significant safety and operational challenges during a true emergency. First, portable units require manual setup. When a blizzard hits or a severe thunderstorm knocks out the power at 2:00 AM, you have to drag the generator out of the garage, run heavy extension cords through cracked windows, and pull-start the engine in the freezing cold or pouring rain.

Second, fuel storage is a major concern. Portable generators run on gasoline, which degrades in as little as 90 days. Storing multiple gallons of highly flammable fuel in a garage or shed is a safety hazard in itself. Furthermore, during a widespread grid failure, local gas stations may also lose power, leaving you unable to buy more fuel when your supply runs out.

The most critical difference, however, is safety. Portable generators produce high levels of carbon monoxide (CO). If they are operated too close to windows, doors, or inside garages, they can cause fatal CO poisoning. Standby generators, by contrast, are permanently installed outdoors at a safe distance from your home's living areas, routing exhaust away from your family. They also eliminate the danger of "backfeeding" (accidentally sending power back into utility lines), which can injure or kill utility workers trying to restore power.

Automatic Outage Detection and Seamless Power Transition

A standby generator acts as a constant, silent sentinel for your home. It continuously monitors the incoming voltage from the utility grid. The moment that voltage drops or fails entirely, the automatic transfer switch immediately isolates your home's electrical system from the utility grid.

Within 10 seconds, the generator’s engine starts, reaches its operating speed, and begins producing clean, stable electricity. The transfer switch then directs this power into your home’s main breaker panel.

This entire process is completely hands-free. Whether you are sleeping, working remotely, or away on vacation, your home remains powered. When utility power is safely restored, the system reverses the process: it reconnects your home to the grid and shuts down the generator engine, returning to its monitoring state.

Safeguarding Your Home’s Essential Systems and Appliances

When the grid fails, a whole home generator does more than just keep your lights on. It actively safeguards the infrastructure of your home and the health of your family. By maintaining a continuous flow of electricity, you can protect sensitive electronic components, keep your home climate-controlled, and prevent expensive property damage.

To learn more about the regional advantages of these systems, explore our article on Whole Home Generator Benefits for Colorado Homeowners.

Keeping Medical Devices and Security Systems Active

For households with vulnerable family members, a power outage is not just an inconvenience—it is a medical emergency. Equipment such as oxygen concentrators, CPAP machines, home dialysis units, and electric wheelchairs require uninterrupted power. A standby generator ensures that these life-saving devices remain operational without a single second of dangerous downtime.

Beyond medical needs, backup power keeps your home security systems fully functional. During a blackout, neighborhood streetlights go dark, making homes targets for vandalism or burglary. A standby generator keeps your security cameras, motion sensors, alarm systems, and outdoor floodlights active, ensuring your property remains secure when the rest of the block is in darkness.

How a Whole Home Generator Protects Your Family from Food Spoilage and Water Damage

One of the most immediate financial losses during an outage is food spoilage. According to FoodSafety.gov, refrigerated food is only safe for up to 4 hours after a power failure, and only if the doors remain closed. A full freezer can keep food safe for up to 48 hours (or 24 hours if it is only half full). If the temperature inside your refrigerator rises above 40°F for more than two hours, the food is no longer safe to eat and must be thrown out. For a growing family, losing a fully stocked refrigerator and freezer can easily cost hundreds of dollars.

Water damage is another major concern. During heavy rains, a power outage will disable your sump pump. Without power, water can quickly back up into your basement. For a 2,500-square-foot home, a sump pump failure resulting in just two inches of flooding has an estimated restoration cost of $26,500. This standing water also creates the perfect environment for mold growth, which can cost anywhere from $500 to $30,000 to remediate. A standby generator keeps your sump pump running, keeping your basement dry and protecting your home's structural integrity.

Weathering Colorado’s Extreme Seasons Safely

The Colorado Front Range is known for its dramatic weather shifts. From sudden blizzards that dump feet of heavy, wet snow to summer thunderstorms packed with lightning, hail, and high winds, our local electrical grid is constantly under stress.

To prepare your property for these seasonal challenges, check out our Storm Preparedness Tips for Colorado Homeowners. You can also learn about how seasonal weather impacts your home's electrical system in our guide on How Blizzards Hail and Lightning Stress Your Wiring.

How a Whole Home Generator Protects Your Family During Extreme Weather

During a severe winter storm, losing power means losing your primary heat source. Even if you have a natural gas furnace, it still requires electricity to run the blower fan, thermostat, and electronic ignition. Without backup power, indoor temperatures can plummet to dangerous levels in a matter of hours, putting infants, young children, and elderly family members at risk of hypothermia.

Conversely, summer heat waves bring their own risks. High temperatures put immense strain on the electrical grid, often resulting in rolling blackouts. For those with respiratory conditions or heat sensitivity, losing air conditioning during a 95°F summer afternoon is highly dangerous. A standby generator has the capacity to run your central air conditioning or heating system, keeping your home a safe, temperature-controlled sanctuary regardless of the weather outside.

Preventing Frozen Pipes and Winter Hazards

When your home loses heat during a winter freeze, the water inside your plumbing lines can quickly drop below freezing. As water freezes, it expands, causing copper or PEX pipes to burst.

diagram showing cause-and-effect chain of a winter power outage leading to frozen and burst pipes

A single burst pipe can cause catastrophic water damage behind your walls and beneath your floors, costing an average of $12,500 to repair. By keeping your heating system powered, a whole home generator maintains a safe indoor temperature, preventing your pipes from freezing and saving you from devastating winter repair bills.

Choosing the Right Backup Power Strategy for Your Household

Every household has unique energy needs, which is why choosing the right backup power strategy requires a professional, customized approach. To understand the differences between fuel-powered systems and battery storage, read our Standby Generator vs Battery Backup Cost Comparison. For general guidance on selecting a system, you can also read about Choosing the Right Backup Power for Colorado.

Sizing Your System: Whole-Home vs. Partial-Home Coverage

When planning your backup power system, you must decide between whole-home coverage and partial-home (essential circuits) coverage:

  • Whole-Home Coverage: This setup powers every single circuit in your house. You can run high-draw appliances like your electric range, clothes dryer, central AC, and water heater simultaneously. This is ideal for larger families, all-electric homes, or those who want zero disruption to their daily routines.
  • Partial-Home Coverage: This configuration targets only your most critical circuits, such as your refrigerator, heating system, sump pump, home security, internet router, and a few lights. This is a highly practical option for families who want to focus strictly on safety and basic comfort.

Calculating your home’s electrical load is a precise science. Our certified electricians look at both the "running watts" (what an appliance needs to operate) and the "surge watts" (the extra power required when a motor, like an AC compressor, first starts up). We also use smart load management modules that can temporarily shed non-essential loads, allowing a mid-sized generator to provide highly effective coverage for your home.

Professional Installation and Maintenance for Guaranteed Reliability

Installing a standby generator is not a DIY project. It involves high-voltage electrical wiring, connecting to your home's main utility lines, and plumbing into your municipal natural gas or liquid propane supply. Professional installation ensures that the work complies with local building codes, National Electrical Code (NEC) regulations, and manufacturer warranty requirements.

For a step-by-step look at what to expect on your installation day, read our guide on Generator Installation What to Expect.

Once installed, regular maintenance is essential to ensure your system is ready to perform when the grid fails. Standby generators perform automated self-test cycles (often weekly or bi-weekly) to keep their internal parts lubricated and confirm the battery is fully charged.

Just like a car, they also require regular oil changes, filter replacements, and spark plug checks. To keep your system in peak condition, refer to our guide on How Often Should You Service Your Standby Generator.

Frequently Asked Questions

How long can a standby generator run continuously during an outage?

A high-quality standby generator can run continuously for up to 500 hours (roughly 21 days), provided it has a continuous fuel supply like natural gas. However, during an extended outage, you should shut the generator down briefly every 24 hours to check the oil level and add oil if necessary. Air-cooled engines also require a full oil and filter change after every 100 hours of continuous runtime to prevent engine wear.

What is the difference between a standby generator and a whole house generator?

"Standby" refers to the permanent, automatic installation type of the generator, while "whole house" refers to its power capacity. A standby generator can be configured as a partial-home system (powering only essential circuits) or as a true whole-house system (powering every circuit on your main electrical panel). The difference comes down to the generator's kilowatt (kW) output and how it is wired into your home.

Does a whole house generator require a transfer switch?

Yes, every permanently installed standby generator must have an automatic transfer switch (ATS) to comply with National Electrical Code Article 702. The transfer switch is a critical safety device that prevents "backfeeding," which is the dangerous flow of electricity from your generator back into the utility lines. It also protects your generator from being damaged when utility power is restored.

Conclusion

At Courtesy Electric Company, we have been providing trusted residential electrical services across Denver and the Colorado Front Range since 1976. Our team specializes in end-to-end power backup solutions, from professional load calculations and system design to seamless generator installations and long-term energy management.

Whether you live in Denver, Parker, Highlands Ranch, or Black Forest, we are here to help you protect your home, your property, and your family from the unexpected. Schedule professional electrical services today to get a free estimate on your backup power installation.

A Practical Guide to Future-Proofing Your Electrical for Smart Home Technology

Why Smart Homes Demand More From Your Electrical System

future proofing your electrical for smart home technology

Future-proofing your electrical for smart home technology is one of the most important — and most overlooked — investments a Colorado homeowner can make right now. The average smart home in 2026 runs 25 to 40 connected devices. That means smart thermostats, security cameras, automated lighting, EV chargers, and whole-home battery systems are all drawing power simultaneously from an electrical infrastructure that, in many cases, was never designed to handle it.

Here is a quick overview of what future-proofing your electrical system for smart home technology actually involves:

Key Steps to Future-Proof Your Home's Electrical System:

  1. Upgrade your electrical panel — A 200-amp panel is the minimum for a modern smart home; high-load homes may need 320 to 400 amps or a smart panel for dynamic load management.
  2. Add dedicated circuits — Smart hubs, network equipment, security systems, and EV chargers each need their own circuit to prevent overloads and system reboots.
  3. Install structured low-voltage wiring — Run Cat6A Ethernet, conduit pathways, and speaker wire during construction or renovation to avoid costly wall-opening retrofits later.
  4. Protect power quality — Install a whole-home surge protector at the panel plus UPS backup for sensitive devices like network equipment and smart hubs.
  5. Prepare for high-load technology — Reserve panel space and conduit pathways for solar, battery storage, and EV charging before you need them.
  6. Meet NEC 2026 code requirements — Ensure AFCI protection, GFCI coverage, tamper-resistant outlets, and weatherproof covers are in place throughout the home.

The stakes are real. Over 60 million homes in the United States have an electrical panel that does not meet current code, and as many as 48 million would need a panel upgrade just to add an EV charger. For homeowners on the Colorado Front Range, where brutal winter storms can knock out power and demand for EV charging is growing fast, an outdated electrical system is not just an inconvenience — it is a liability.

The good news is that most of this infrastructure can be planned and installed in a logical sequence, and doing it proactively is far less expensive than retrofitting after the fact. Pre-wiring during new construction or a major renovation costs a fraction of what it takes to open finished walls later.

I'm David Meyer, Vice President of Courtesy Electric — a Colorado electrical contractor with roots going back to 1976. I've worked across the full spectrum of residential electrical projects, from panel upgrades and smart panel installations to battery storage and low-voltage smart home systems, and future-proofing your electrical for smart home technology is one of the areas where early planning makes the single biggest difference in long-term cost and reliability. Let's walk through exactly what that planning looks like.

Infographic showing the key components of a future-proof smart home electrical system including panel, circuits, wiring, and

Why Future Proofing Your Electrical for Smart Home Technology Starts at the Panel

modern smart electrical panel installation

Every smart device, automated switch, and high-load appliance relies on a single source of power: your main service panel. If your home has a 100-amp or 150-amp panel, it was designed for an era when the most demanding appliances were an electric stove and a clothes dryer. Today, adding smart home automation alongside modern electrification upgrades will quickly push these older systems past their limits.

For a modern smart home, a 200-amp service panel is the absolute practical minimum. When we perform load calculations for custom homes or major renovations in Denver and Highlands Ranch, we look at both current demands and future additions. If you plan to add a Level 2 electric vehicle charger, a heat pump, or solar and battery storage, a standard 200-amp panel can fill up surprisingly fast. In larger custom homes, upgrading to a 320-amp or 400-amp service is often the best way to ensure you never have to worry about tripping the main breaker when multiple high-draw systems run at the same time.

Before diving into a major smart home installation, it is vital to assess whether your existing system can handle the load. You can learn more about how to evaluate your current setup in our guide on whether Does Your Electrical Panel Support an EV Charger.

If you are stuck with a standard panel and want to avoid a massive utility service upgrade, or if you simply want unparalleled control over your home's power, modern technology offers an incredible alternative. By comparing a Smart Energy Management vs Traditional Panel, you will see how modern solid-state smart panels, such as the SPAN smart panel, completely redefine home energy management.

Upgrading to Smart Panels for Active Load Management

A traditional electrical panel is a passive safety device; it sits in your garage or basement and trips a breaker when too much current flows. A smart panel, on the other hand, is an active computer that manages your home’s electrical ecosystem.

With a smart panel installation, you gain real-time energy tracking down to the individual circuit level. This allows you to see exactly which appliances are consuming the most power at any given moment. Furthermore, you gain the ability to control every circuit remotely through an app. If you are away from your home in Parker and realize you left a high-draw appliance running, you can shut down that specific breaker with a single tap.

Smart panels also enable dynamic load management. If you are charging your EV, running the air conditioning, and using a smart oven simultaneously, the smart panel can temporarily throttle or pause the EV charger to prevent overloading your electrical service. This active management can save you from having to pay for an expensive utility service upgrade. To understand how these systems protect your home and optimize your daily power use, explore the Energy Management System Benefits for Homeowners.

Preparing for High-Load Electrification in Denver Homes

Future-proofing your home in the Denver metro area and the Colorado Front Range means preparing for a rapid shift toward residential electrification. According to recent surveys, 86% of homeowners view improving their property's energy efficiency as the most desirable home improvement project, and 68% are actively seeking to minimize the amount of energy they use. Additionally, 40% of homeowners identify smart home technology as an easy and affordable way to reduce energy bills.

To achieve these goals, your electrical infrastructure must be ready to integrate several high-load technologies:

  • Level 2 EV Chargers: These chargers require dedicated 240-volt circuits (typically 40 to 60 amps). Running these circuits during a renovation is much simpler than trying to fish heavy-gauge wire through finished walls later.
  • Battery Storage Systems: Installing a Franklin battery storage system allows you to store excess energy generated during the day or keep your home running during an outage. Your panel must have the physical space and bus duct capacity to accommodate the necessary transfer switches and subpanels.
  • Solar Integration: Modern solar panels have higher energy conversion rates than ever before. Preparing your panel with dedicated breaker spaces and pre-running conduit to the roof ensures a seamless solar installation when you are ready.
  • Generator Backup: In areas like Black Forest, where winter storms can leave neighborhoods without power, integrating a Generac or Cummins standby generator into your smart electrical system ensures your critical smart devices and security systems stay online.

Designing Structured Low-Voltage Wiring and Dedicated Circuits

While wireless protocols like Wi-Fi 7, Zigbee, and Matter have made smart home devices incredibly convenient, a wireless-only smart home is inherently unstable. As you add more smart switches, streaming cameras, voice assistants, and sensors, your wireless spectrum becomes crowded, leading to dropped connections, latency, and device dropouts.

A truly future-proof smart home relies on a hybrid approach: wireless for mobile devices and portable sensors, and dedicated, hardwired physical infrastructure for everything else. This structured approach ensures that high-bandwidth devices do not compete for wireless airwaves. For a deeper look at managing these individual spaces, check out our guide on How to Track and Control Energy Use Room-by-Room.

The Backbone of Future Proofing Your Electrical for Smart Home Technology

The absolute best investment you can make during a renovation or new construction build is structured low-voltage wiring. This invisible backbone consists of high-grade data cables routed from a central location to strategic points throughout your home.

For any project in 2026, we highly recommend installing Cat6A Ethernet cabling. While older Cat6 cable supports gigabit speeds up to 55 meters, Cat6A extends 10-Gigabit capability across a full 100-meter run and features superior shielding to prevent electromagnetic interference from nearby electrical lines. For massive custom homes or connections between a main house and a detached garage or guest house, running OM4 multi-mode fiber optic cable provides the ultimate bandwidth safeguard for future 40 Gbps and 100 Gbps network links.

To make this infrastructure highly adaptable, you should install a structured media enclosure (often a 28-inch or 42-inch panel) in a centrally located, climate-controlled space like a basement or utility closet. From this central enclosure, run 1-inch ENT (electrical nonmetallic tubing, commonly called "smurf tube") conduit pathways to key locations, such as your living room entertainment center, home office, and the attic. If network standards change in ten or fifteen years, pulling new cables through these empty conduits is a simple five-minute task rather than a destructive drywall demolition project.

Essential Low-Voltage Cable Types for a Future-Proof Home:

  • Cat6A UTP/FTP: Run to all TV locations, desk walls, ceiling-mounted Wi-Fi access points, and PoE (Power over Ethernet) security camera locations.
  • 16/4 Speaker Wire: Route in pairs from your central equipment rack to in-ceiling or in-wall speaker locations for multi-zone distributed audio.
  • 18/2 Stranded Wire: Ideal for low-voltage power runs, such as smart keypads, security sensors, and automated window shades.
  • RG6 Quad-Shield Coaxial: Run at least one to two lines to your main TV locations and the attic for over-the-air antennas or cable/satellite feeds.

Dedicated Power Infrastructure for Automation Hubs

Beyond data lines, your smart home infrastructure requires dedicated high-voltage electrical planning. Smart home hubs, network switch racks, and security system recorders are sensitive computers that run 24/7. Placing these devices on shared general-use circuits — where a vacuum cleaner or a hair dryer might trip a breaker — is a recipe for system corruption and annoying reboots.

We recommend dedicating a 15-amp or 20-amp circuit exclusively to your network equipment closet or structured media center. This circuit should power your router, PoE network switches, smart hubs, and security storage drives.

Additionally, pay close attention to your light switch boxes. Traditional electrical wiring often used "switch loops" that did not bring a neutral wire into the switch box. However, almost all modern smart switches and dimmers require a neutral wire to power their internal wireless radios and smart processors. During any rewiring project, ensure your electrician runs a neutral wire to every single switch box in the house. This simple step unlocks endless possibilities for advanced Lighting Control systems that improve convenience and aesthetic appeal.

Finally, consider pre-wiring window headers with low-voltage power lines routed back to a central multi-channel power supply. This allows you to install sleek, motorized smart shades that never require battery changes or manual recharging.

Essential Power Quality and Safety Measures for Sensitive Electronics

Smart home devices are essentially miniature computers installed inside your walls, outlets, and light switches. Unlike a standard light bulb or outlet, these microprocessors are highly sensitive to minor fluctuations in power quality. A sudden utility spike, an electrical storm on the Front Range, or even the internal cycling of a large air conditioner compressor can damage or destroy thousands of dollars of connected smart equipment.

To protect your investments, a layered approach to power quality and surge protection is essential.

Protection Level Device Type Primary Function Best For
Primary (Whole-Home) Type 1 or Type 2 Surge Protective Device (SPD) Shunts high-voltage external surges (like lightning or utility spikes) safely to the ground at the main panel. Protecting all circuits, appliances, smart switches, and smart panels.
Secondary (Point-of-Use) High-quality surge strips or receptacles Absorbs residual voltage spikes that pass through the main panel protector. Home theater systems, smart TVs, and kitchen appliances.
Uninterruptible Power (UPS) Pure Sine Wave UPS Battery Backup Provides temporary battery power and conditions voltage to eliminate sags, swells, and noise. Network routers, PoE switches, smart hubs, and security NVRs.

A whole-home surge protector is your first line of defense. Installed directly onto your main electrical panel, this device monitors incoming voltage and instantly shunts excess energy safely to the ground. However, this system only works perfectly if your home has a robust grounding system. We verify that ground impedance is below 25 ohms (and ideally below 5 ohms) during our smart home installations to ensure surge protectors can do their job effectively.

For your most critical smart components, pair whole-home protection with a pure sine wave Uninterruptible Power Supply (UPS). Unlike cheap battery backups that produce a simulated, blocky square wave, a pure sine wave UPS delivers clean, continuous electrical power that mimics utility power perfectly. This prevents your smart hubs and network switches from rebooting during brief voltage sags, keeping your automated security systems online and functioning. Proper power management and smart scheduling also help lower your overall energy footprint; read more about How to Reduce Your Summer Electric Bill with Smart Technology.

Meeting NEC 2026 Code Requirements for Smart Installations

Future-proofing your electrical system is not just about convenience; it is about safety and legal compliance. The National Electrical Code (NEC) 2026 establishes strict safety standards that apply directly to smart home installations:

  • Arc-Fault Circuit Interrupter (AFCI) Protection: NEC Section 210.12 requires AFCI protection for almost all living areas, including kitchens, family rooms, bedrooms, and laundry rooms. Smart switches and dimmers must be compatible with AFCI breakers to prevent nuisance tripping while still protecting your home from dangerous electrical arcing.
  • Ground-Fault Circuit Interrupter (GFCI) Protection: GFCI requirements have expanded to cover all outdoor outlets, garages, crawl spaces, and damp areas, including 250-volt circuits. If you are installing an outdoor smart camera or a smart plug near a sink, it must be GFCI-protected.
  • Tamper-Resistant Receptacles: All standard indoor receptacles must feature internal shutters to prevent children from inserting foreign objects. When upgrading to smart outlets, ensure they are certified tamper-resistant.
  • Weatherproof Covers: Any outdoor smart plugs or bridge devices must use "extra-duty" weatherproof covers (often called "while-in-use" covers) to keep moisture out of the outlet even when a device is plugged in.

Frequently Asked Questions about Future-Proofing Home Electrical Systems

Planning a smart home upgrade often brings up several technical questions for homeowners. Here are some of the most common queries we receive at Courtesy Electric.

What is the minimum panel size required for a modern smart home?

A 200-amp electrical panel is the absolute minimum standard for a modern smart home. If you live in an older home with a 100-amp or 150-amp panel, you will likely run out of physical breaker spaces and electrical capacity as you add smart switches, security systems, and high-load appliances.

For homes that feature complete electrification — including a Level 2 EV charger, an electric heat pump, solar panels, and battery storage — a 320-amp or 400-amp service is highly recommended. Alternatively, installing a SPAN smart panel allows you to actively manage loads on a 200-amp service, avoiding a costly utility service upgrade while still supporting all your modern technology.

Why is structured wiring still necessary if I have high-speed Wi-Fi?

While modern Wi-Fi 6 and Wi-Fi 7 offer incredible speeds, wireless networks are prone to interference, signal degradation through walls, and congestion as more devices connect. A physical Cat6A Ethernet cable provides a dedicated, interference-free highway that delivers consistent 10 Gbps speeds with virtually zero latency.

Using structured wiring for stationary devices like smart TVs, gaming consoles, desktop computers, and security cameras keeps these high-bandwidth demands off your Wi-Fi network. This frees up wireless bandwidth for devices that actually need it, like your smartphone, tablet, and smart home sensors. Furthermore, ceiling-mounted Wi-Fi access points perform best when they use a wired Ethernet backhaul to connect to your router.

How does future proofing your electrical for smart home technology improve home value?

Investing in a modern, organized electrical infrastructure is highly attractive to future buyers. Data shows that 78% of homebuyers are willing to pay a premium for a home with integrated smart features.

A home that is pre-wired with Cat6A Ethernet, features a clean structured media closet, has a modern 200-amp or smart panel, and is pre-configured for solar and EV charging stands out dramatically in the Denver real estate market. It reassures buyers that they can easily move in, connect their devices, and expand their technology without having to pay for invasive, expensive electrical retrofits down the road.

Conclusion

Building a smart home is an exciting journey, but the gadgets and apps you see on the surface are only as reliable as the electrical foundation beneath them. By upgrading your panel, planning dedicated circuits, installing structured low-voltage wiring, and protecting your system from power surges, you create an adaptable, safe, and resilient home that is ready for whatever technology the future brings.

At Courtesy Electric Company, we have been helping homeowners across Denver, Parker, Highlands Ranch, and the Colorado Front Range build reliable, state-of-the-art electrical systems since 1976. Whether you need a simple panel upgrade, a SPAN smart panel installation, a standby generator, or a complete low-voltage structured wiring design, our experienced team is here to guide you every step of the way.

We pride ourselves on quality, integrity, and dependable craftsmanship, and we are happy to offer free estimates on all our electrical installations to help you plan your project with confidence. Schedule professional electrical services today and let us build the perfect foundation for your smart home.